Run MXNet Java Examples Using the IntelliJ IDE (macOS)
This tutorial guides you through setting up a simple Java project in IntelliJ IDE on macOS and demonstrates usage of the MXNet Java APIs.
Prerequisites:
To use this tutorial you need the following pre-requisites:
- Java 8 JDK
- Maven
- OpenCV
- IntelliJ IDEA (One can download the community edition from here)
MacOS Prerequisites
Run the following commands to install the prerequisites on MacOS.
/usr/bin/ruby -e "$(curl -fsSL https://raw.githubusercontent.com/Homebrew/install/master/install)"
brew update
brew tap caskroom/versions
brew cask install java8
brew install maven
brew install opencv
Ubuntu Prerequisites
Run the following commands to install the prerequisites on Ubuntu.
sudo apt-get install openjdk-8-java maven
Set Up Your Project
Step 1. Install and setup IntelliJ IDEA
Step 2. Create a new Project:
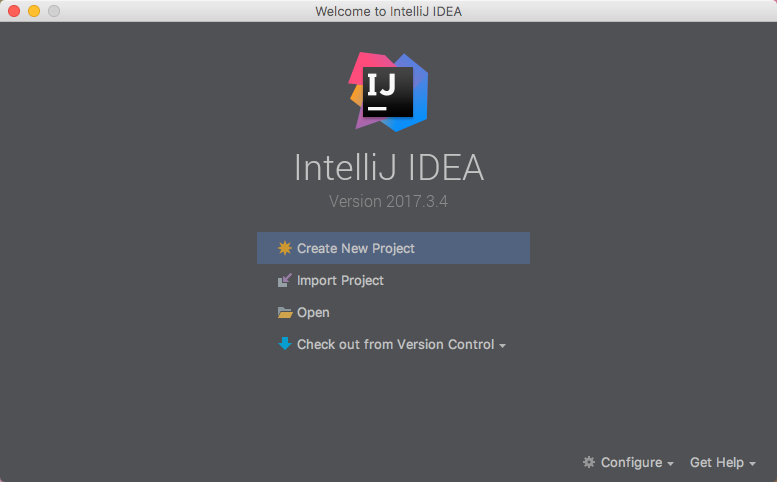
From the IntelliJ welcome screen, select “Create New Project”.
Choose the Maven project type.
Select the checkbox for Create from archetype, then choose org.apache.maven.archetypes:maven-archetype-quickstart from the list below. More on this can be found on a Maven tutorial : Maven in 5 Minutes.
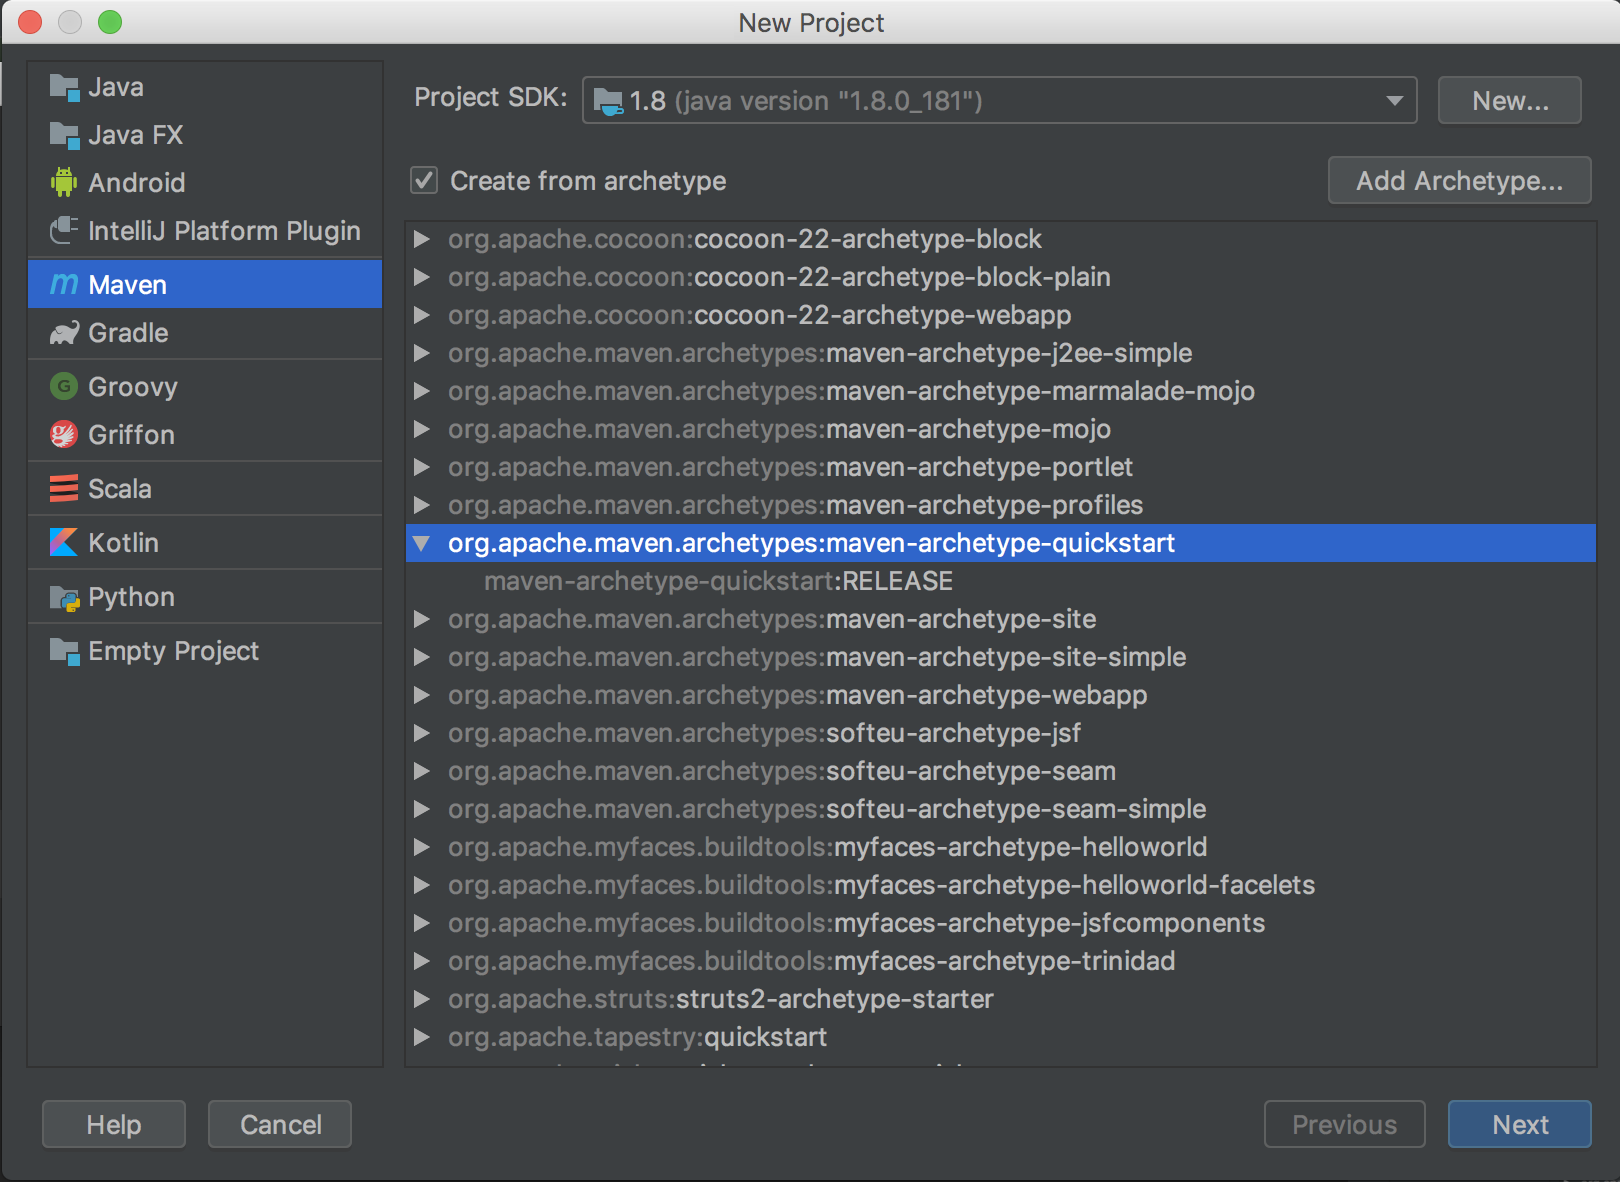
click Next.
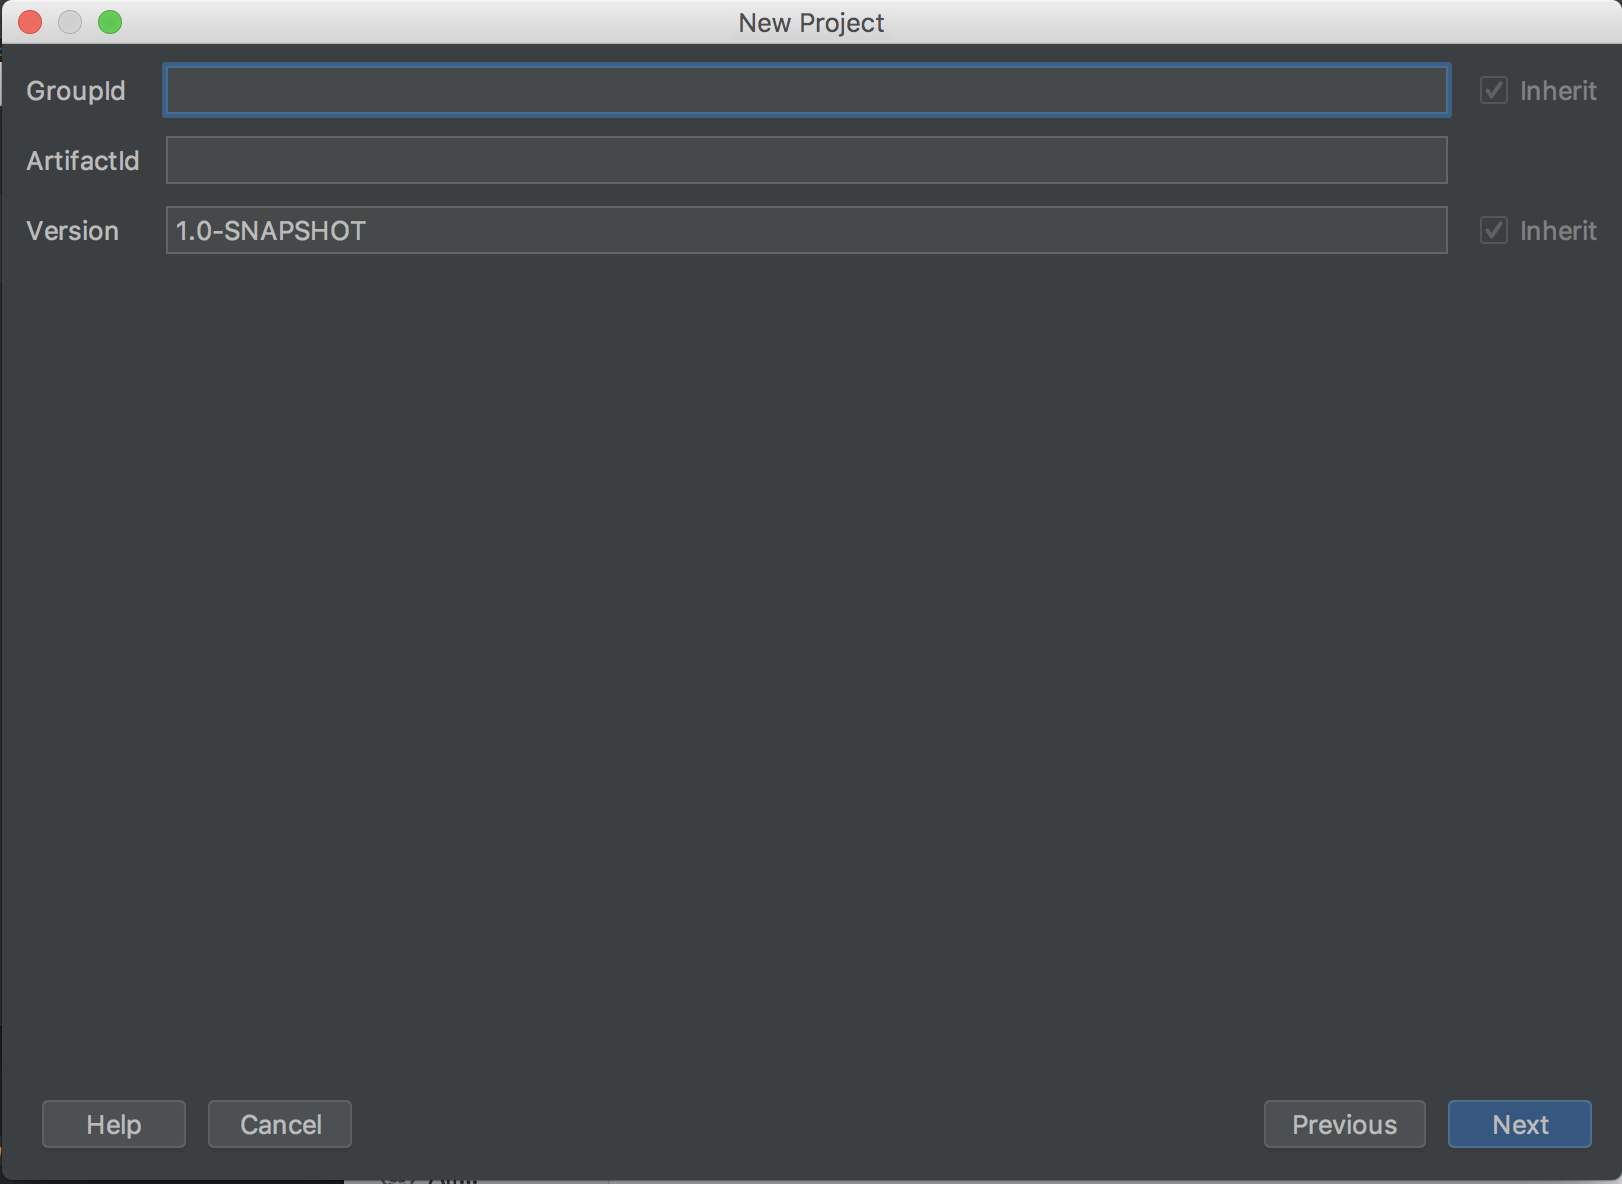
Set the project's metadata. For this tutorial, use the following:
GroupId
mxnet
ArtifactId
javaMXNet
Version
1.0-SNAPSHOT
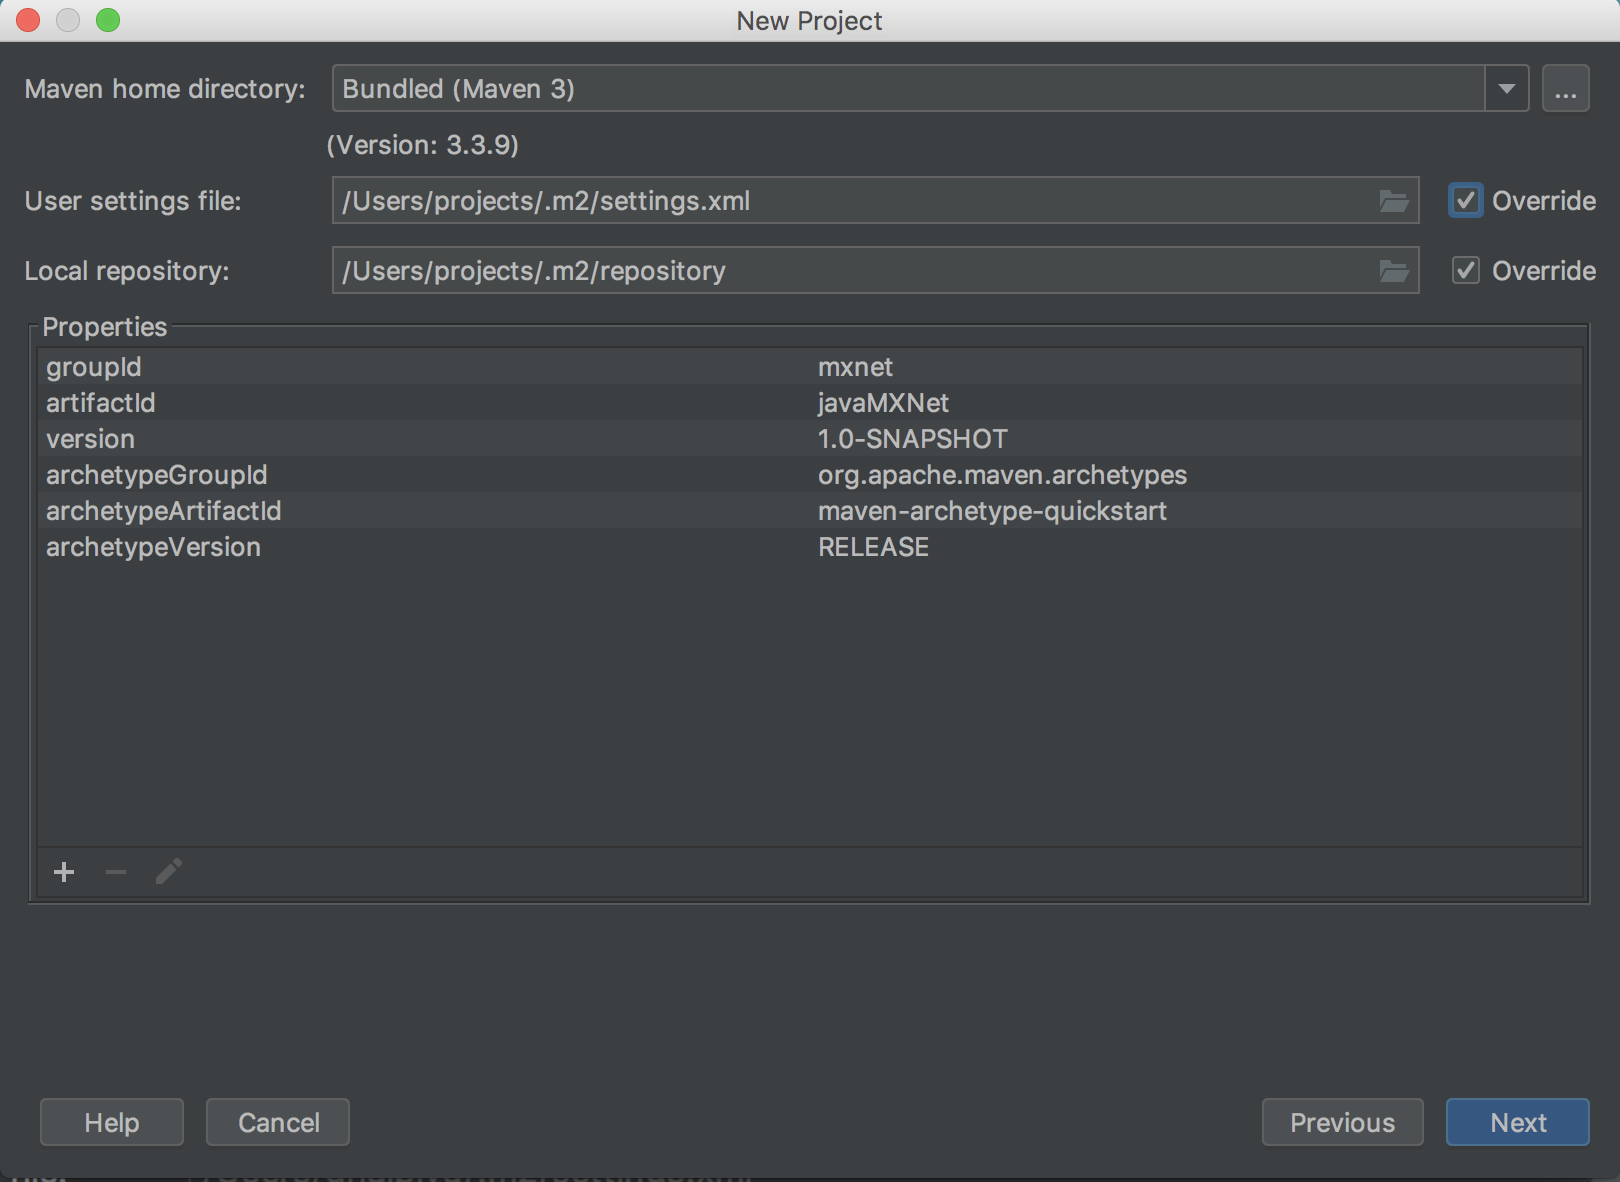
Review the project's properties. The settings can be left as their default.
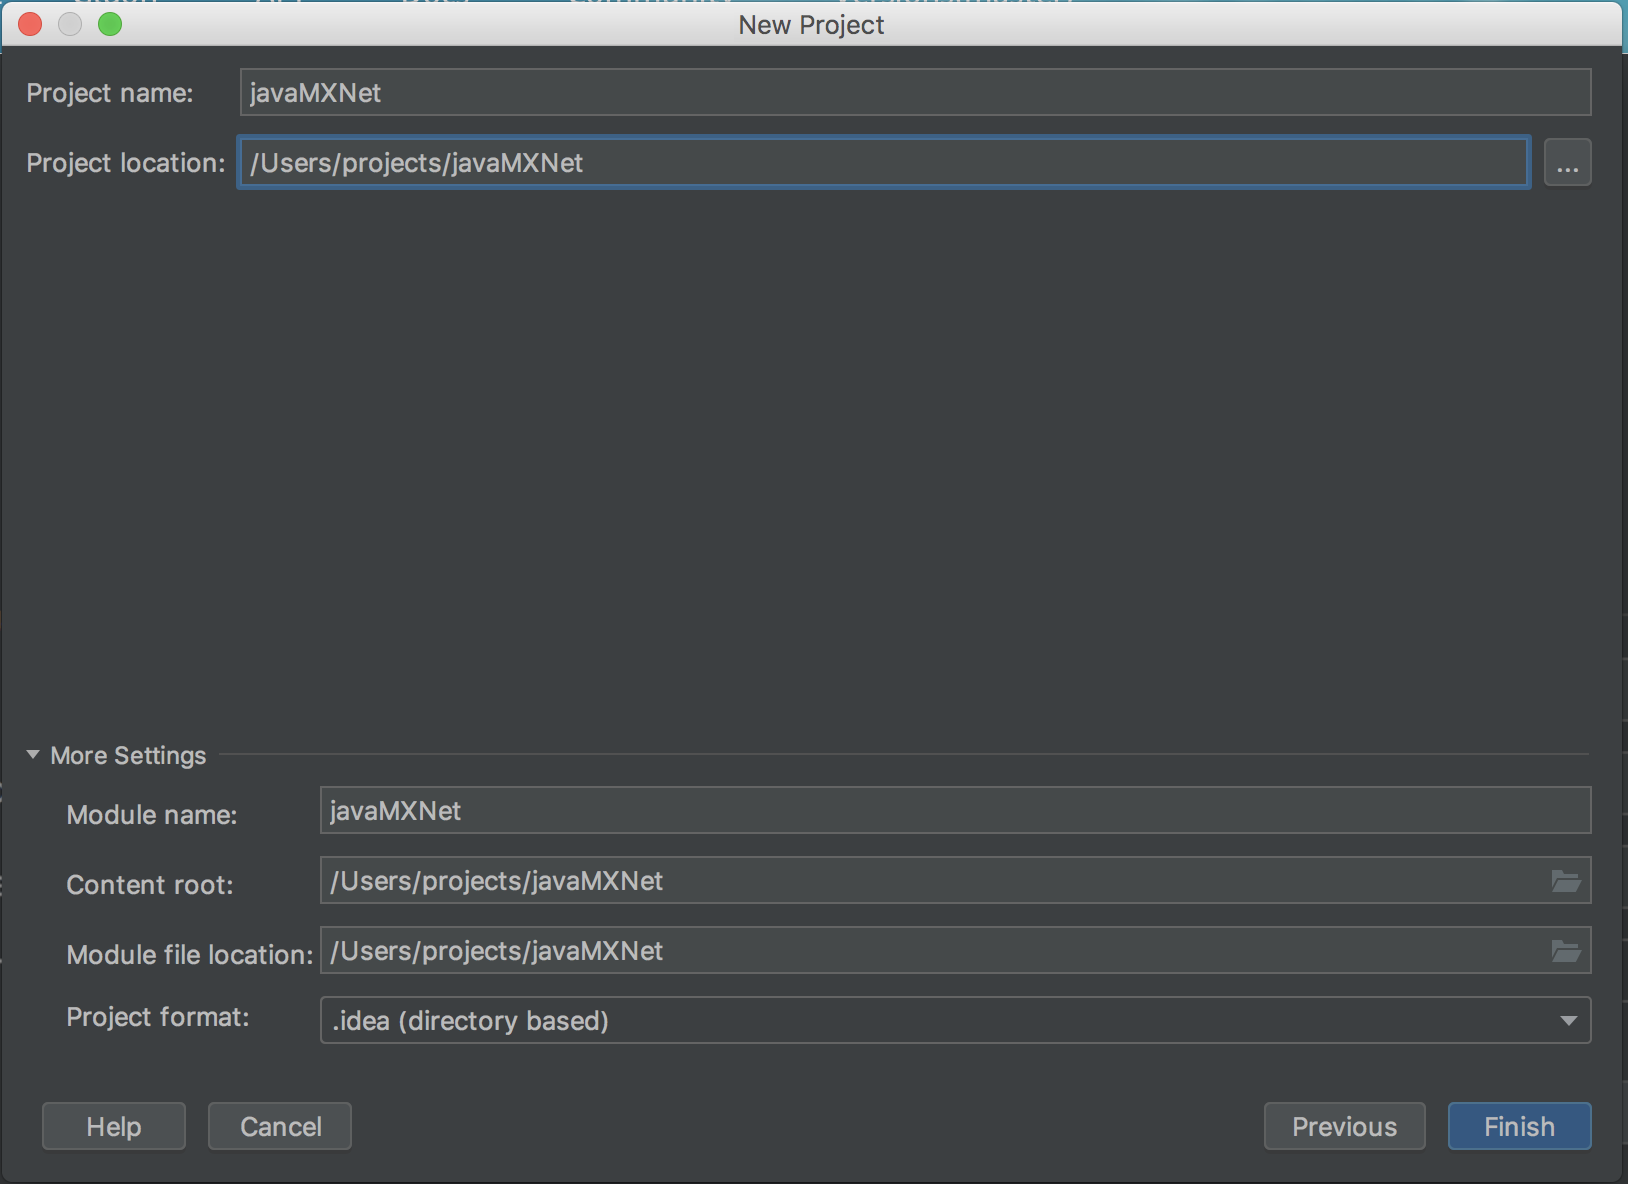
Set the project's location. The rest of the settings can be left as their default.
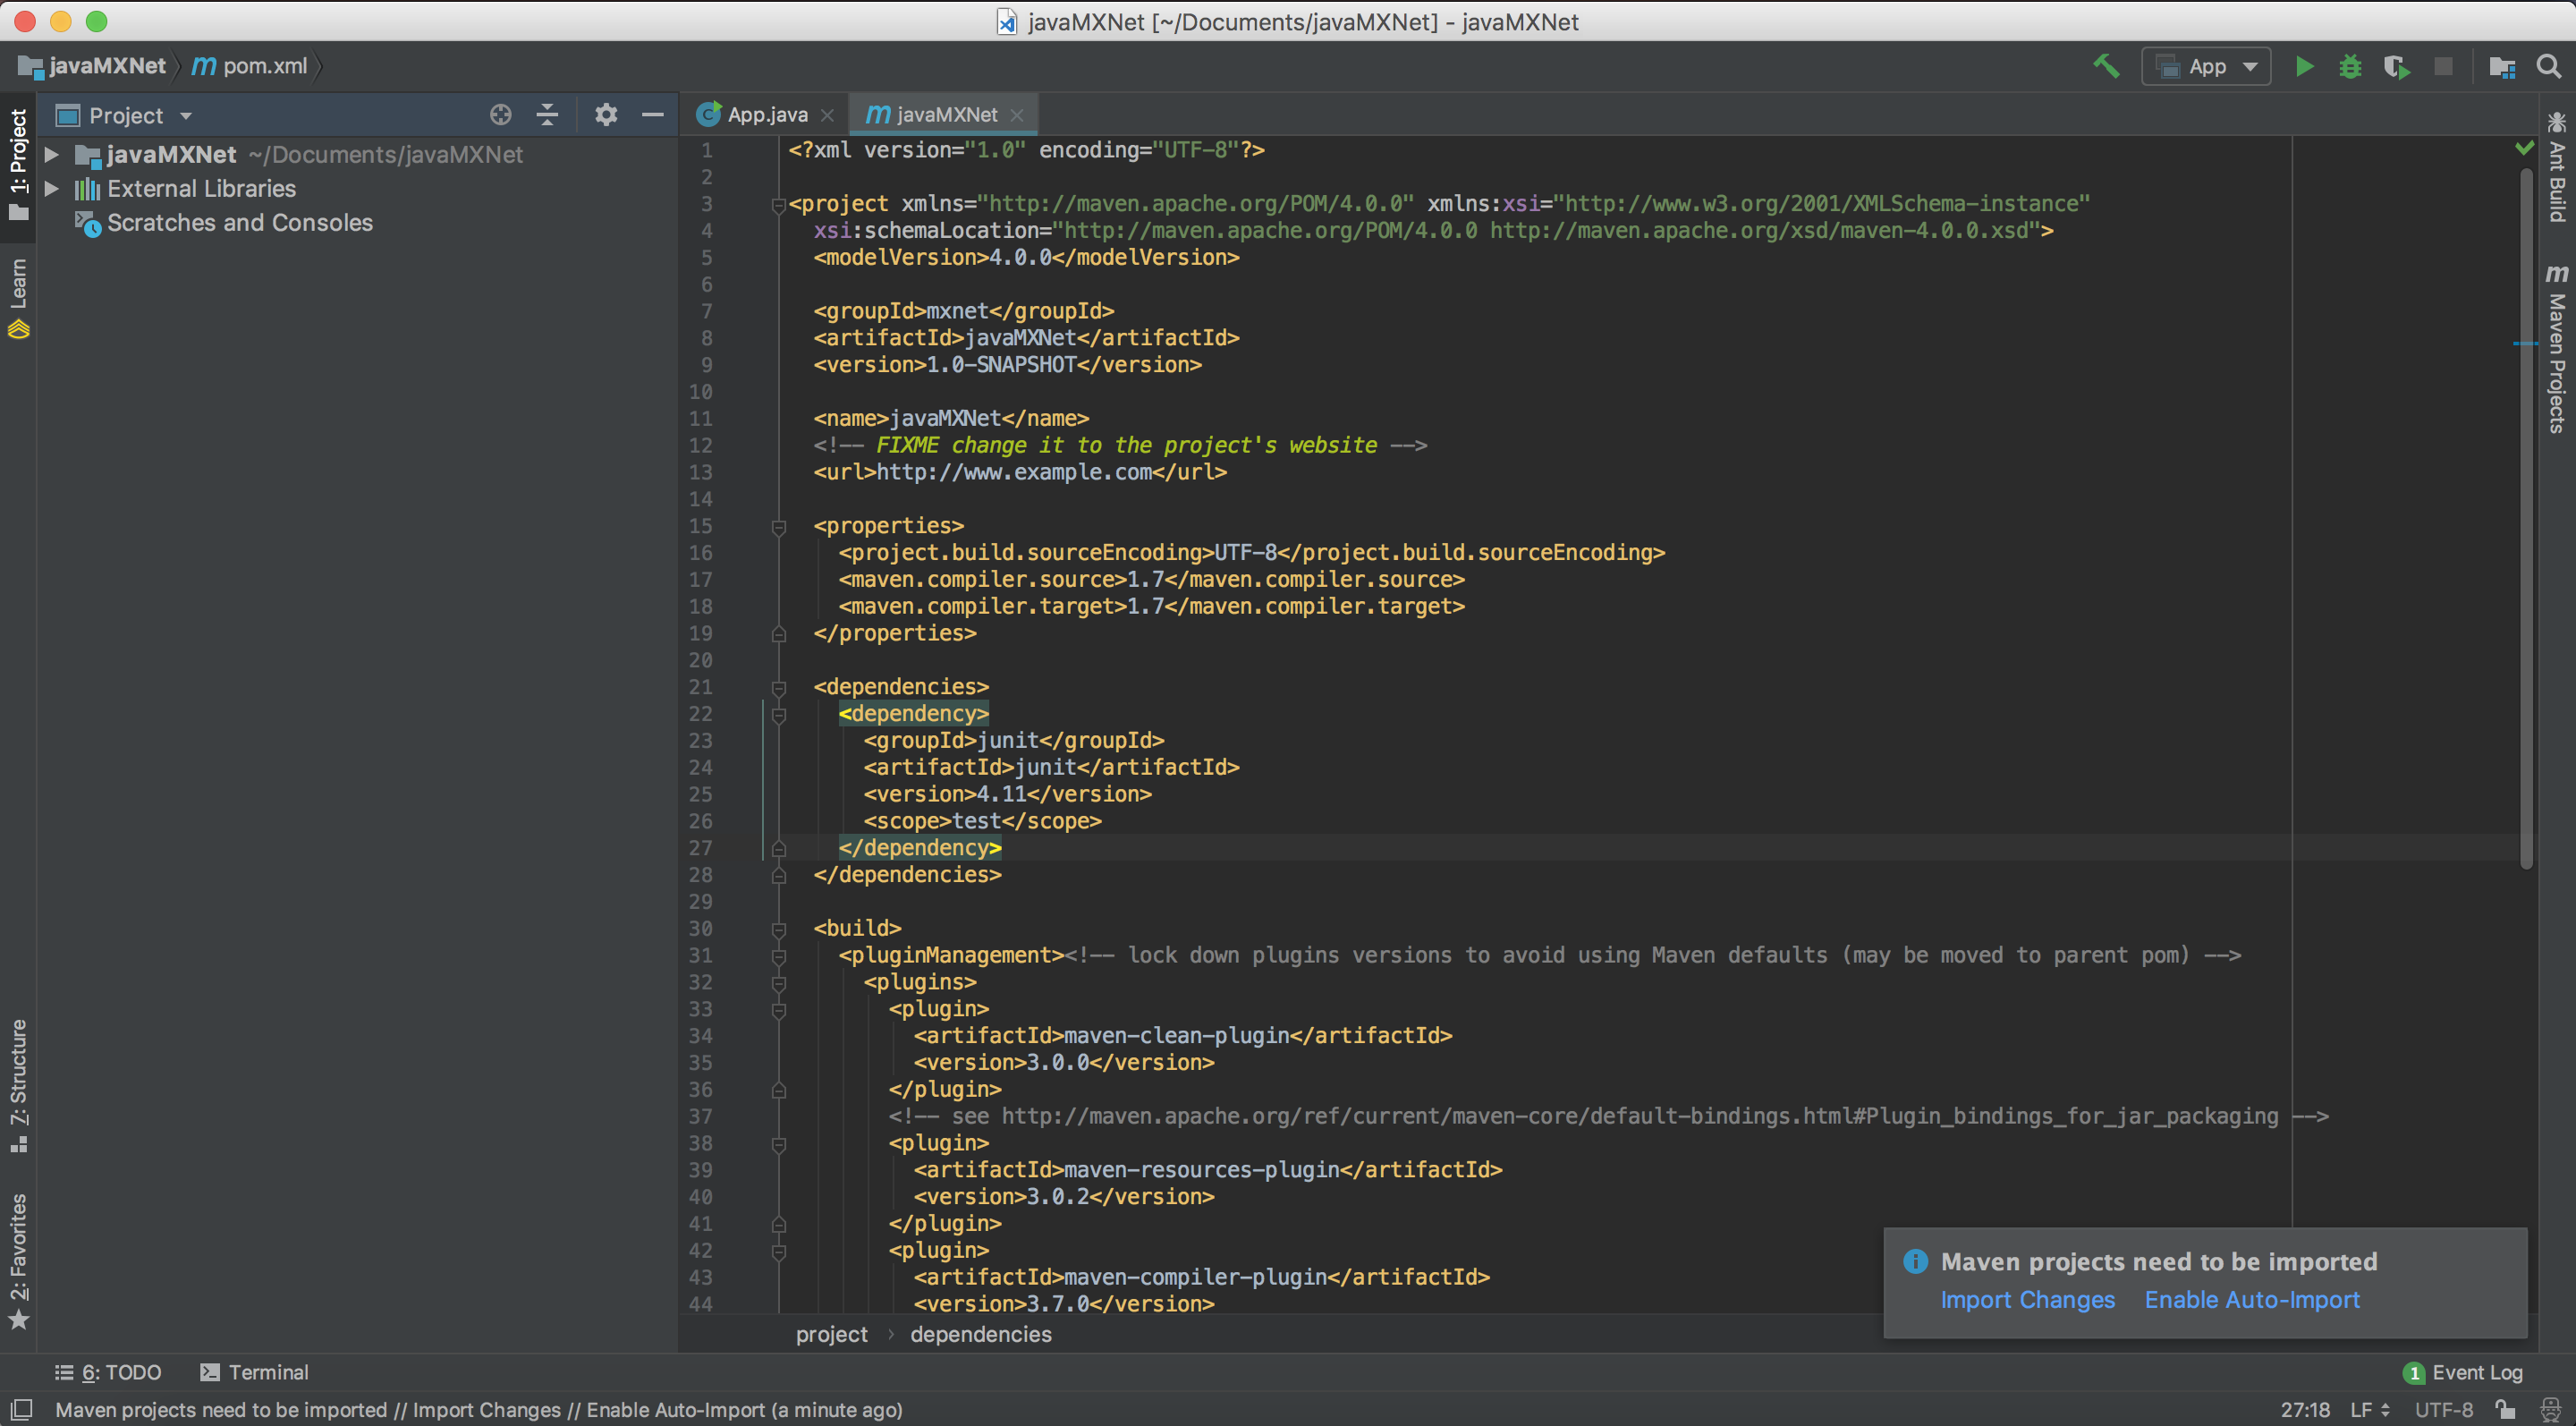
After clicking Finish, you will be presented with the project‘s first view. The project’s pom.xml will be open for editing.
Step 3. The Java packages are currently available on Maven. Add the following under the dependencies tag :
<dependency>
  <groupId>org.apache.mxnet</groupId>
  <artifactId>mxnet-full_2.11-osx-x86_64-cpu</artifactId>
  <version>1.4.0</version>
</dependency>
The official Java Packages have been released as part of MXNet 1.4 and are available on the MXNet Maven package repository.
Note :
- Change the osx-x86_64 to linux-x86_64 if your platform is linux.
- Change cpu into gpu if you have a gpu backed machine and want to use gpu.
Step 4. Import dependencies with Maven:
- Note the prompt in the lower right corner that states “Maven projects need to be imported”. If this is not visible, click on the little greed balloon that appears in the lower right corner.
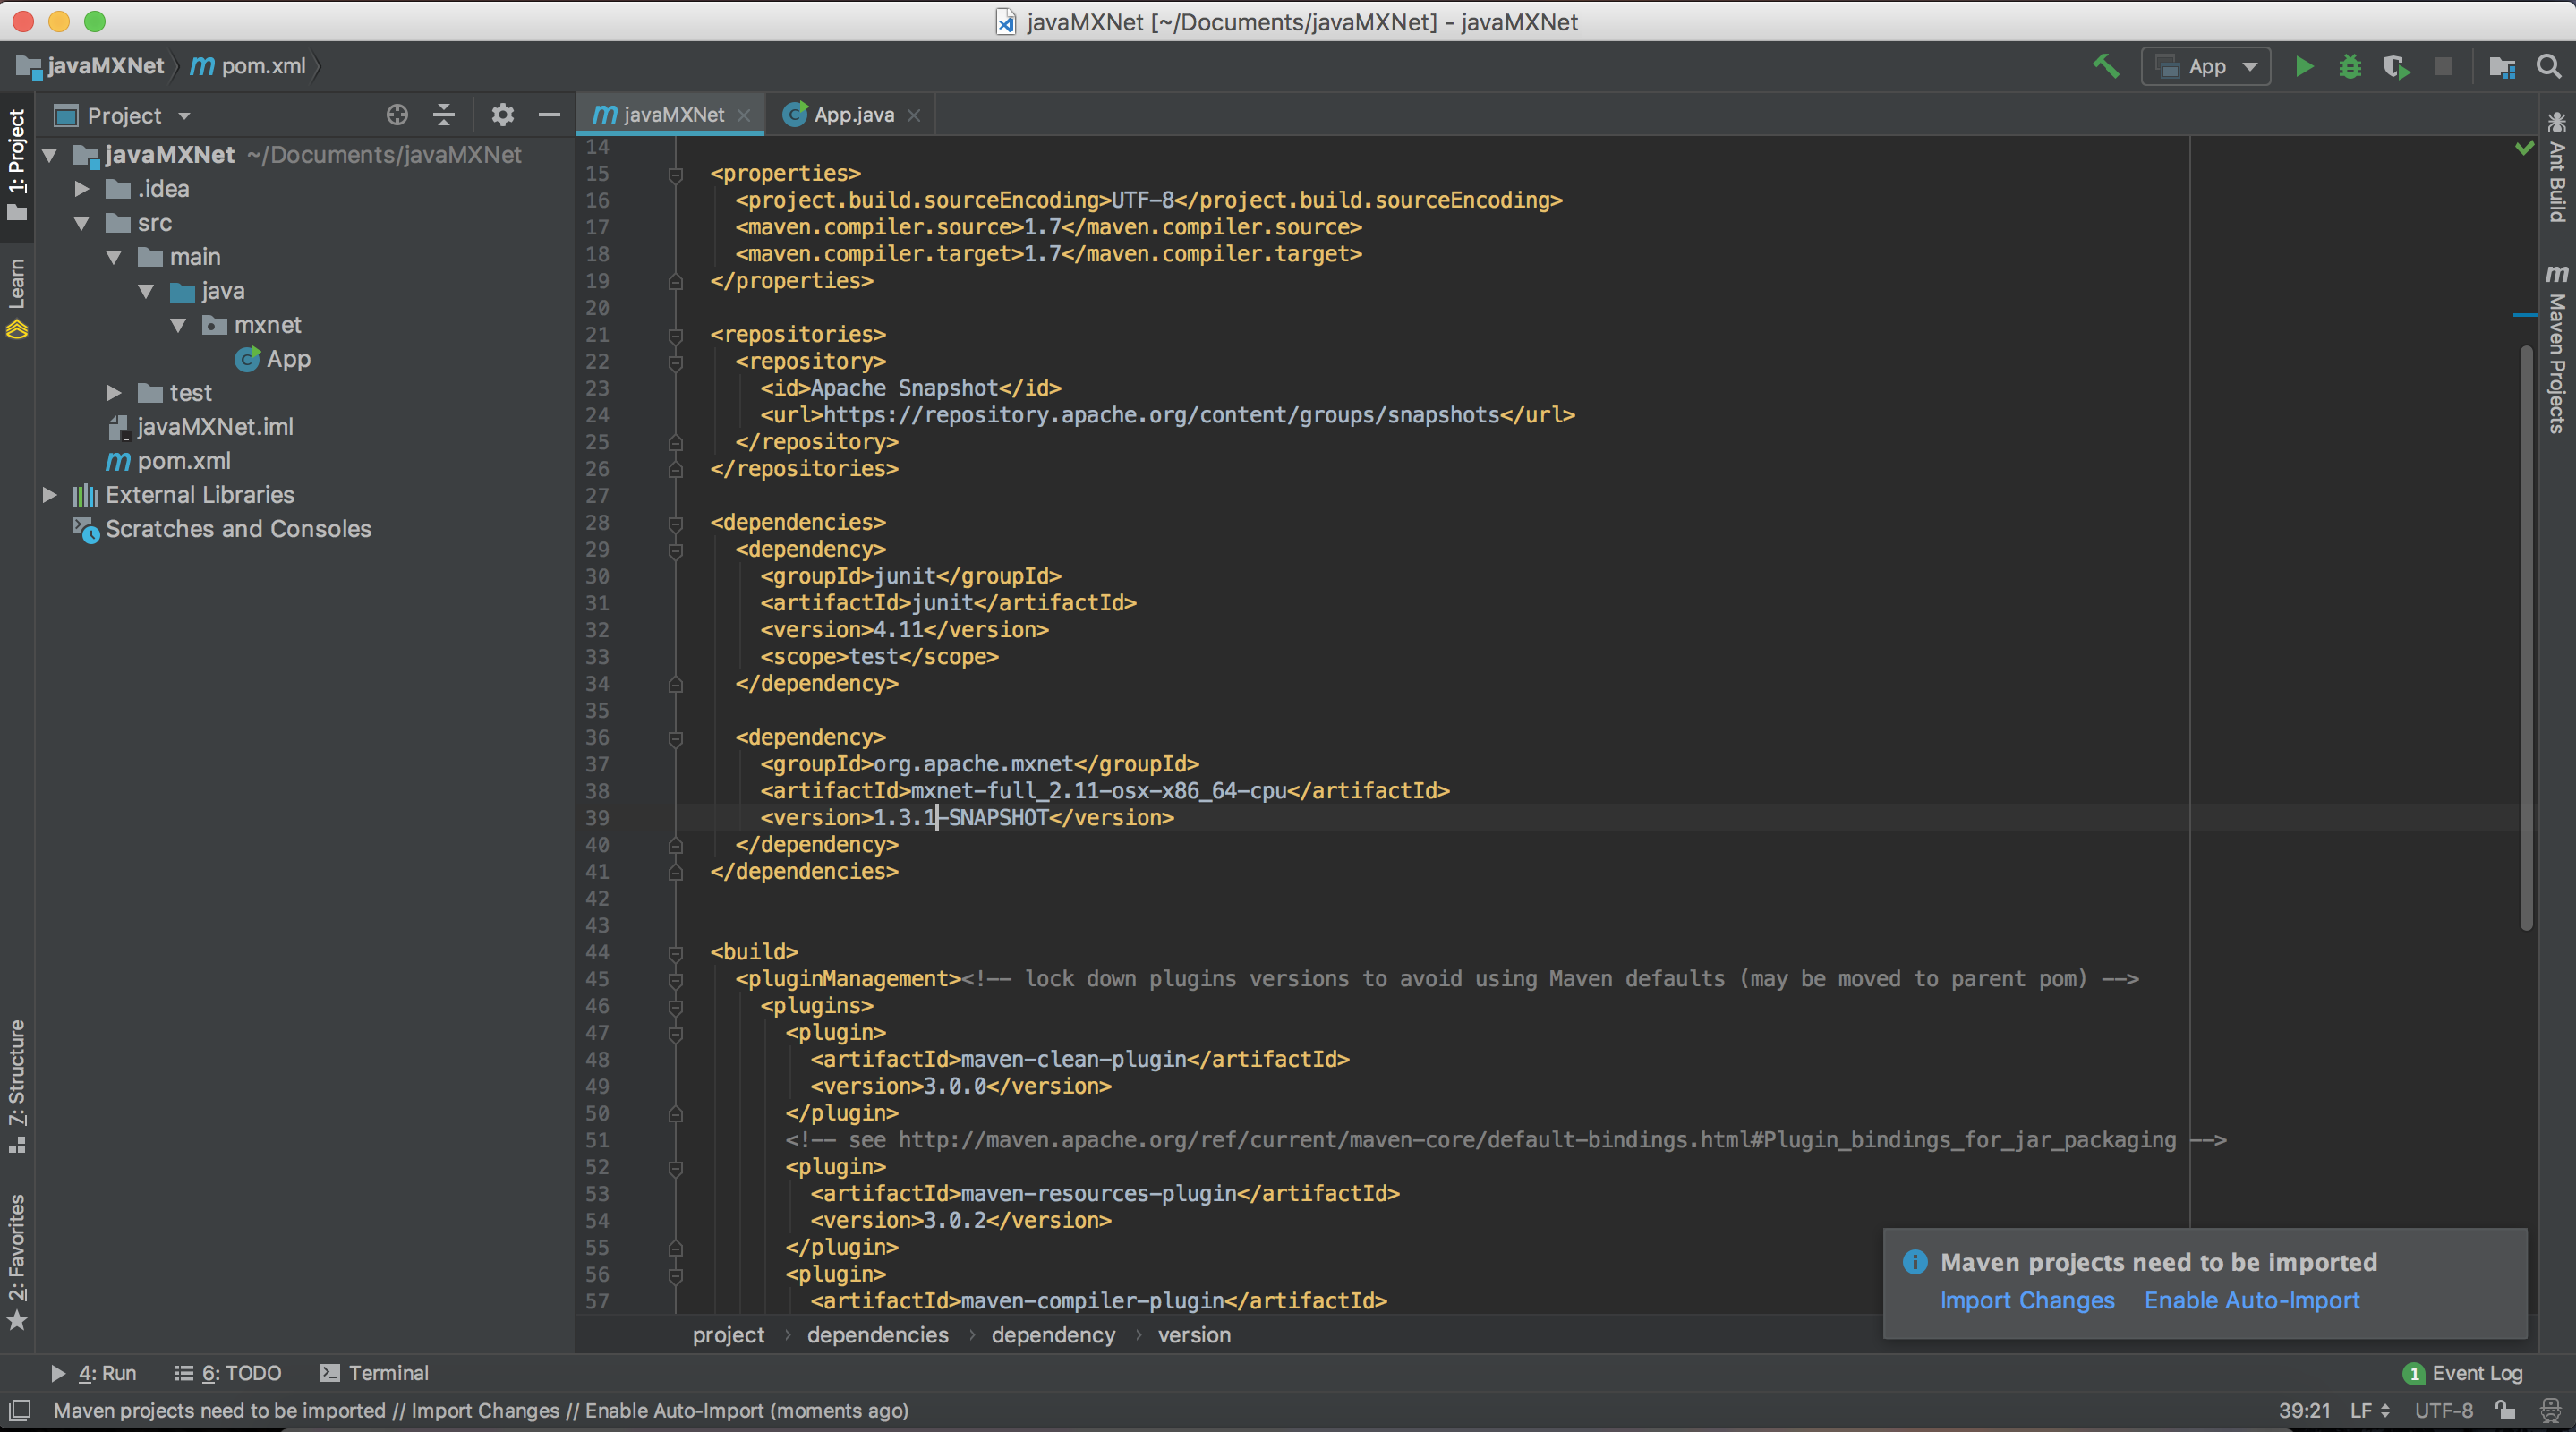
Click “Import Changes” in this prompt.
Step 5. Build the project:
- To build the project, from the menu choose Build, and then choose Build Project.
Step 6. Navigate to the App.java class in the project and paste the code in main method from HelloWorld.java from Java Demo project on MXNet repository, overwriting the original hello world code. You can also grab the entire Java Demo project and run it by following the instructions on the README.
Step 7. Now run the App.java.
The result should be something similar to this:
Hello World!
(1,2)
Process finished with exit code 0
Troubleshooting
If you get an error, check the dependencies at the beginning of this tutorial. For example, you might see the following in the middle of the error messages, where x.x would the version it's looking for.
...
Library not loaded: /usr/local/opt/opencv/lib/libopencv_calib3d.x.x.dylib
...
This can be resolved be installing OpenCV.
Command Line Build Option
- You can also compile the project by using the following command at the command line. Change directories to this project's root folder then run the following:
mvn clean install dependency:copy-dependencies
If the command succeeds, you should see a lot of info and some warning messages, followed by:
[INFO] ------------------------------------------------------------------------
[INFO] BUILD SUCCESS
[INFO] ------------------------------------------------------------------------
[INFO] Total time: 3.475 s
[INFO] Finished at: 2018-11-08T05:06:31-08:00
[INFO] ------------------------------------------------------------------------
The build generates a new jar file in the target folder called javaMXNet-1.0-SNAPSHOT.jar.
To run the App.java use the following command from the project's root folder and you should see the same output as we got when the project was run from IntelliJ.
java -cp "target/javaMXNet-1.0-SNAPSHOT.jar:target/dependency/*" mxnet.App
Next Steps
For more information about MXNet Java resources, see the following: