| <!-- |
| |
| Licensed to the Apache Software Foundation (ASF) under one |
| or more contributor license agreements. See the NOTICE file |
| distributed with this work for additional information |
| regarding copyright ownership. The ASF licenses this file |
| to you under the Apache License, Version 2.0 (the |
| "License"); you may not use this file except in compliance |
| with the License. You may obtain a copy of the License at |
| |
| http://www.apache.org/licenses/LICENSE-2.0 |
| |
| Unless required by applicable law or agreed to in writing, |
| software distributed under the License is distributed on an |
| "AS IS" BASIS, WITHOUT WARRANTIES OR CONDITIONS OF ANY |
| KIND, either express or implied. See the License for the |
| specific language governing permissions and limitations |
| under the License. |
| |
| --> |
| |
| # Command Line Interface(CLI) |
| |
| |
| IoTDB provides Cli/shell tools for users to interact with IoTDB server in command lines. This document shows how Cli/shell tool works and the meaning of its parameters. |
| |
| > Note: In this document, \$IOTDB\_HOME represents the path of the IoTDB installation directory. |
| |
| ## Installation |
| |
| If you use the source code version of IoTDB, then under the root path of IoTDB, execute: |
| |
| ```shell |
| > mvn clean package -pl cli -am -DskipTests |
| ``` |
| |
| After build, the IoTDB Cli will be in the folder "cli/target/iotdb-cli-{project.version}". |
| |
| If you download the binary version, then the Cli can be used directly in sbin folder. |
| |
| ## Running |
| |
| ### Running Cli |
| |
| After installation, there is a default user in IoTDB: `root`, and the |
| default password is `root`. Users can use this username to try IoTDB Cli/Shell tool. The cli startup script is the `start-cli` file under the \$IOTDB\_HOME/bin folder. When starting the script, you need to specify the IP and PORT. (Make sure the IoTDB cluster is running properly when you use Cli/Shell tool to connect to it.) |
| |
| Here is an example where the cluster is started locally and the user has not changed the running port. The default rpc port is |
| 6667 <br> |
| If you need to connect to the remote DataNode or changes |
| the rpc port number of the DataNode running, set the specific IP and RPC PORT at -h and -p.<br> |
| You also can set your own environment variable at the front of the start script ("/sbin/start-cli.sh" for linux and "/sbin/start-cli.bat" for windows) |
| |
| The Linux and MacOS system startup commands are as follows: |
| |
| ```shell |
| Shell > bash sbin/start-cli.sh -h 127.0.0.1 -p 6667 -u root -pw root |
| ``` |
| The Windows system startup commands are as follows: |
| |
| ```shell |
| Shell > sbin\start-cli.bat -h 127.0.0.1 -p 6667 -u root -pw root |
| ``` |
| After operating these commands, the cli can be started successfully. The successful status will be as follows: |
| |
| ``` |
| _____ _________ ______ ______ |
| |_ _| | _ _ ||_ _ `.|_ _ \ |
| | | .--.|_/ | | \_| | | `. \ | |_) | |
| | | / .'`\ \ | | | | | | | __'. |
| _| |_| \__. | _| |_ _| |_.' /_| |__) | |
| |_____|'.__.' |_____| |______.'|_______/ version <version> |
| |
| |
| Successfully login at 127.0.0.1:6667 |
| IoTDB> |
| ``` |
| Enter ```quit``` or `exit` can exit Cli. |
| |
| ### Cli Parameters |
| |
| |Parameter name|Parameter type|Required| Description| Example | |
| |:---|:---|:---|:---|:---| |
| |-disableISO8601 |No parameters | No |If this parameter is set, IoTDB will print the timestamp in digital form|-disableISO8601| |
| |-h <`host`> |string, no quotation marks|Yes|The IP address of the IoTDB server|-h 10.129.187.21| |
| |-help|No parameters|No|Print help information for IoTDB|-help| |
| |-p <`rpcPort`>|int|Yes|The rpc port number of the IoTDB server. IoTDB runs on rpc port 6667 by default|-p 6667| |
| |-pw <`password`>|string, no quotation marks|No|The password used for IoTDB to connect to the server. If no password is entered, IoTDB will ask for password in Cli command|-pw root| |
| |-u <`username`>|string, no quotation marks|Yes|User name used for IoTDB to connect the server|-u root| |
| |-maxPRC <`maxPrintRowCount`>|int|No|Set the maximum number of rows that IoTDB returns|-maxPRC 10| |
| |-e <`execute`> |string|No|manipulate IoTDB in batches without entering cli input mode|-e "show databases"| |
| |-c | empty | No | If the server enables `rpc_thrift_compression_enable=true`, then cli must use `-c` | -c | |
| |
| Following is a cli command which connects the host with IP |
| 10.129.187.21, rpc port 6667, username "root", password "root", and prints the timestamp in digital form. The maximum number of lines displayed on the IoTDB command line is 10. |
| |
| The Linux and MacOS system startup commands are as follows: |
| |
| ```shell |
| Shell > bash sbin/start-cli.sh -h 10.129.187.21 -p 6667 -u root -pw root -disableISO8601 -maxPRC 10 |
| ``` |
| The Windows system startup commands are as follows: |
| |
| ```shell |
| Shell > sbin\start-cli.bat -h 10.129.187.21 -p 6667 -u root -pw root -disableISO8601 -maxPRC 10 |
| ``` |
| |
| ### CLI Special Command |
| Special commands of Cli are below. |
| |
| | Command | Description / Example | |
| |:---|:---| |
| | `set time_display_type=xxx` | eg. long, default, ISO8601, yyyy-MM-dd HH:mm:ss | |
| | `show time_display_type` | show time display type | |
| | `set time_zone=xxx` | eg. +08:00, Asia/Shanghai | |
| | `show time_zone` | show cli time zone | |
| | `set fetch_size=xxx` | set fetch size when querying data from server | |
| | `show fetch_size` | show fetch size | |
| | `set max_display_num=xxx` | set max lines for cli to output, -1 equals to unlimited | |
| | `help` | Get hints for CLI special commands | |
| | `exit/quit` | Exit CLI | |
| |
| ### Note on using the CLI with OpenID Connect Auth enabled on Server side |
| |
| Openid connect (oidc) uses keycloack as the authority authentication service of oidc service |
| |
| |
| #### configuration |
| The configuration is located in iotdb-common.properties , set the author_provider_class is org.apache.iotdb.commons.auth.authorizer.OpenIdAuthorizer Openid service is enabled, and the default value is org.apache.iotdb.db.auth.authorizer.LocalFileAuthorizer Indicates that the openid service is not enabled. |
| |
| ``` |
| authorizer_provider_class=org.apache.iotdb.commons.auth.authorizer.OpenIdAuthorizer |
| ``` |
| If the openid service is turned on, openid_URL is required,openID_url value is http://ip:port/realms/{realmsName} |
| |
| ``` |
| openID_url=http://127.0.0.1:8080/realms/iotdb/ |
| ``` |
| #### keycloack configuration |
| |
| 1、Download the keycloack file (This tutorial is version 21.1.0) and start keycloack in keycloack/bin |
| |
| ```shell |
| Shell >cd bin |
| Shell >./kc.sh start-dev |
| ``` |
| 2、use url(https://ip:port) login keycloack, the first login needs to create a user |
| 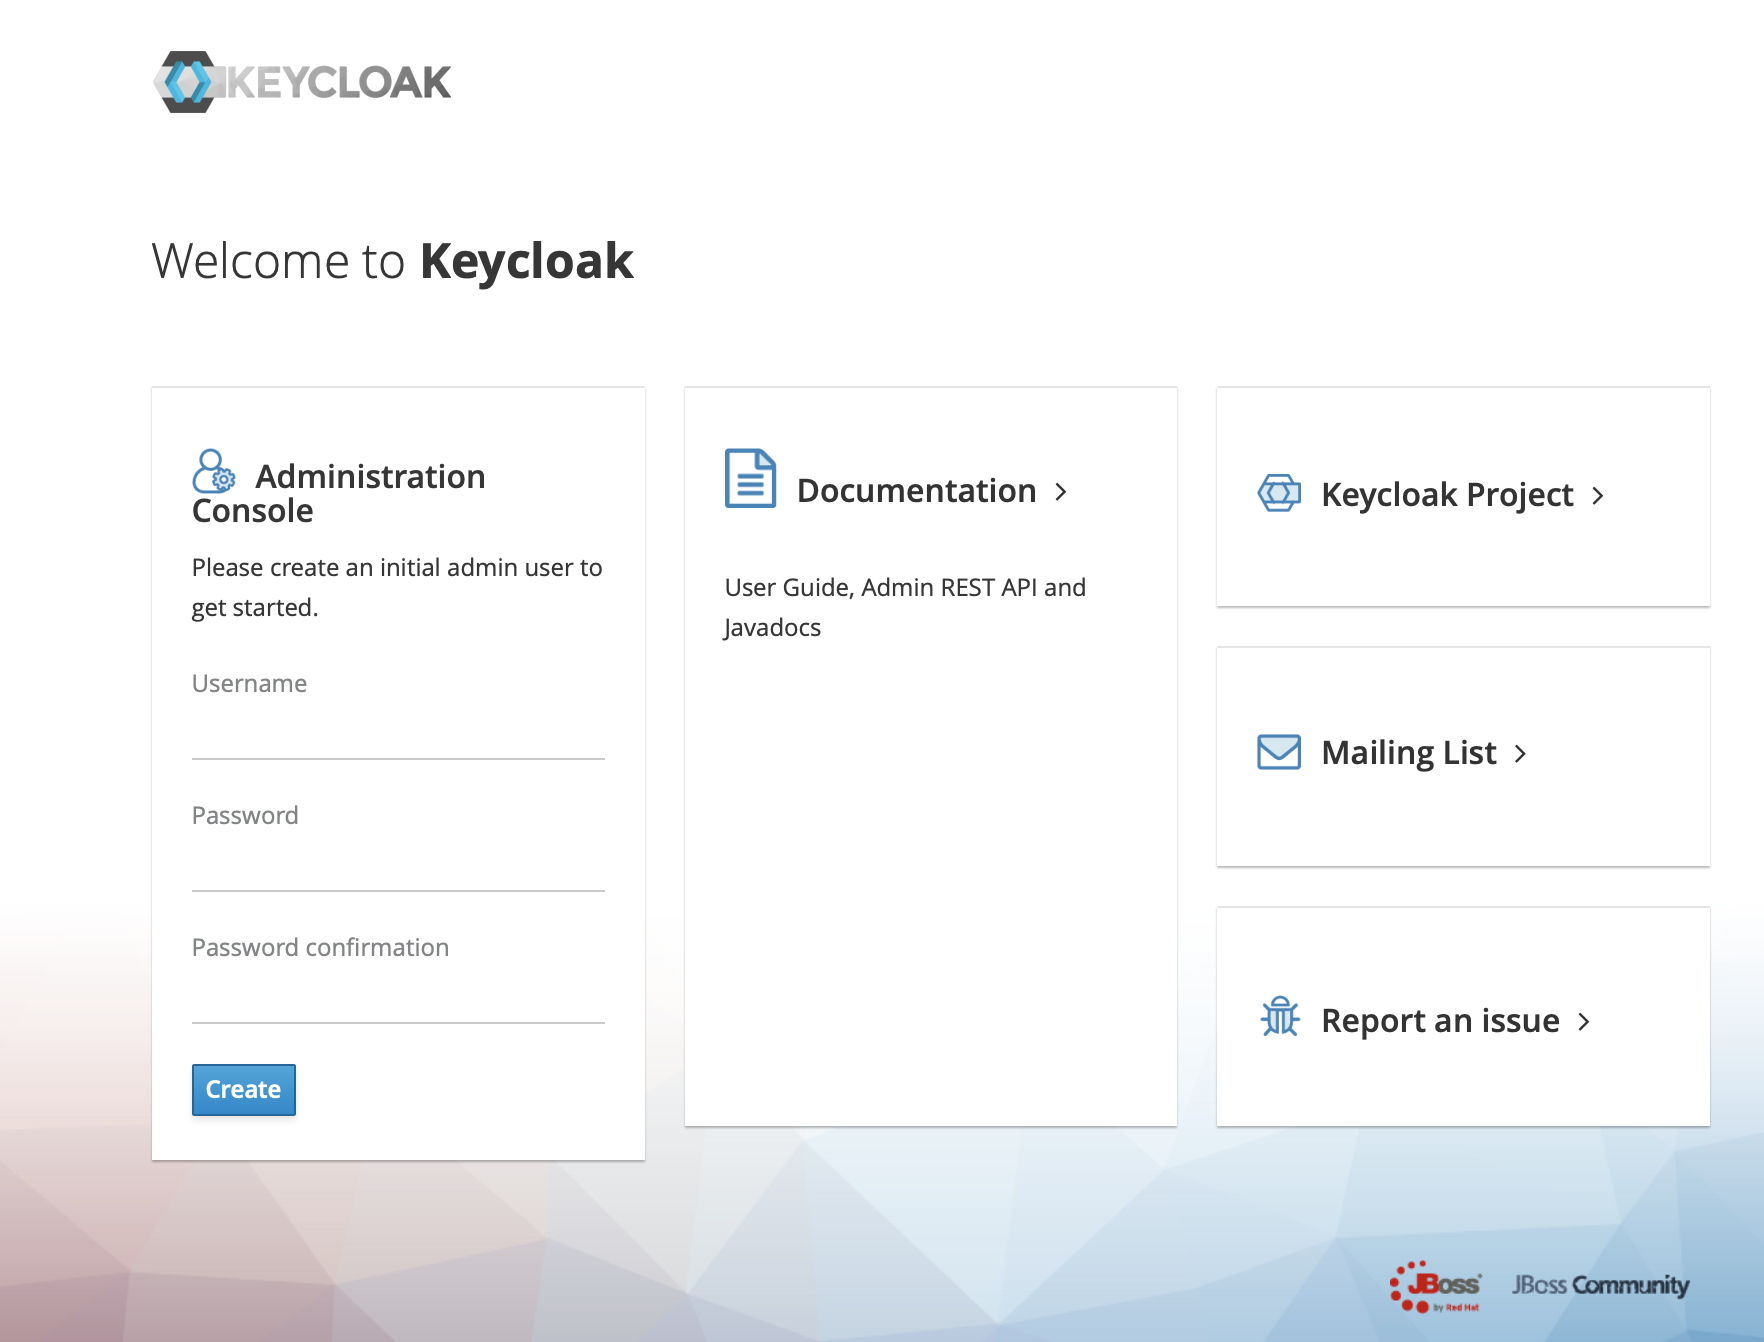 |
| |
| 3、Click administration console |
| 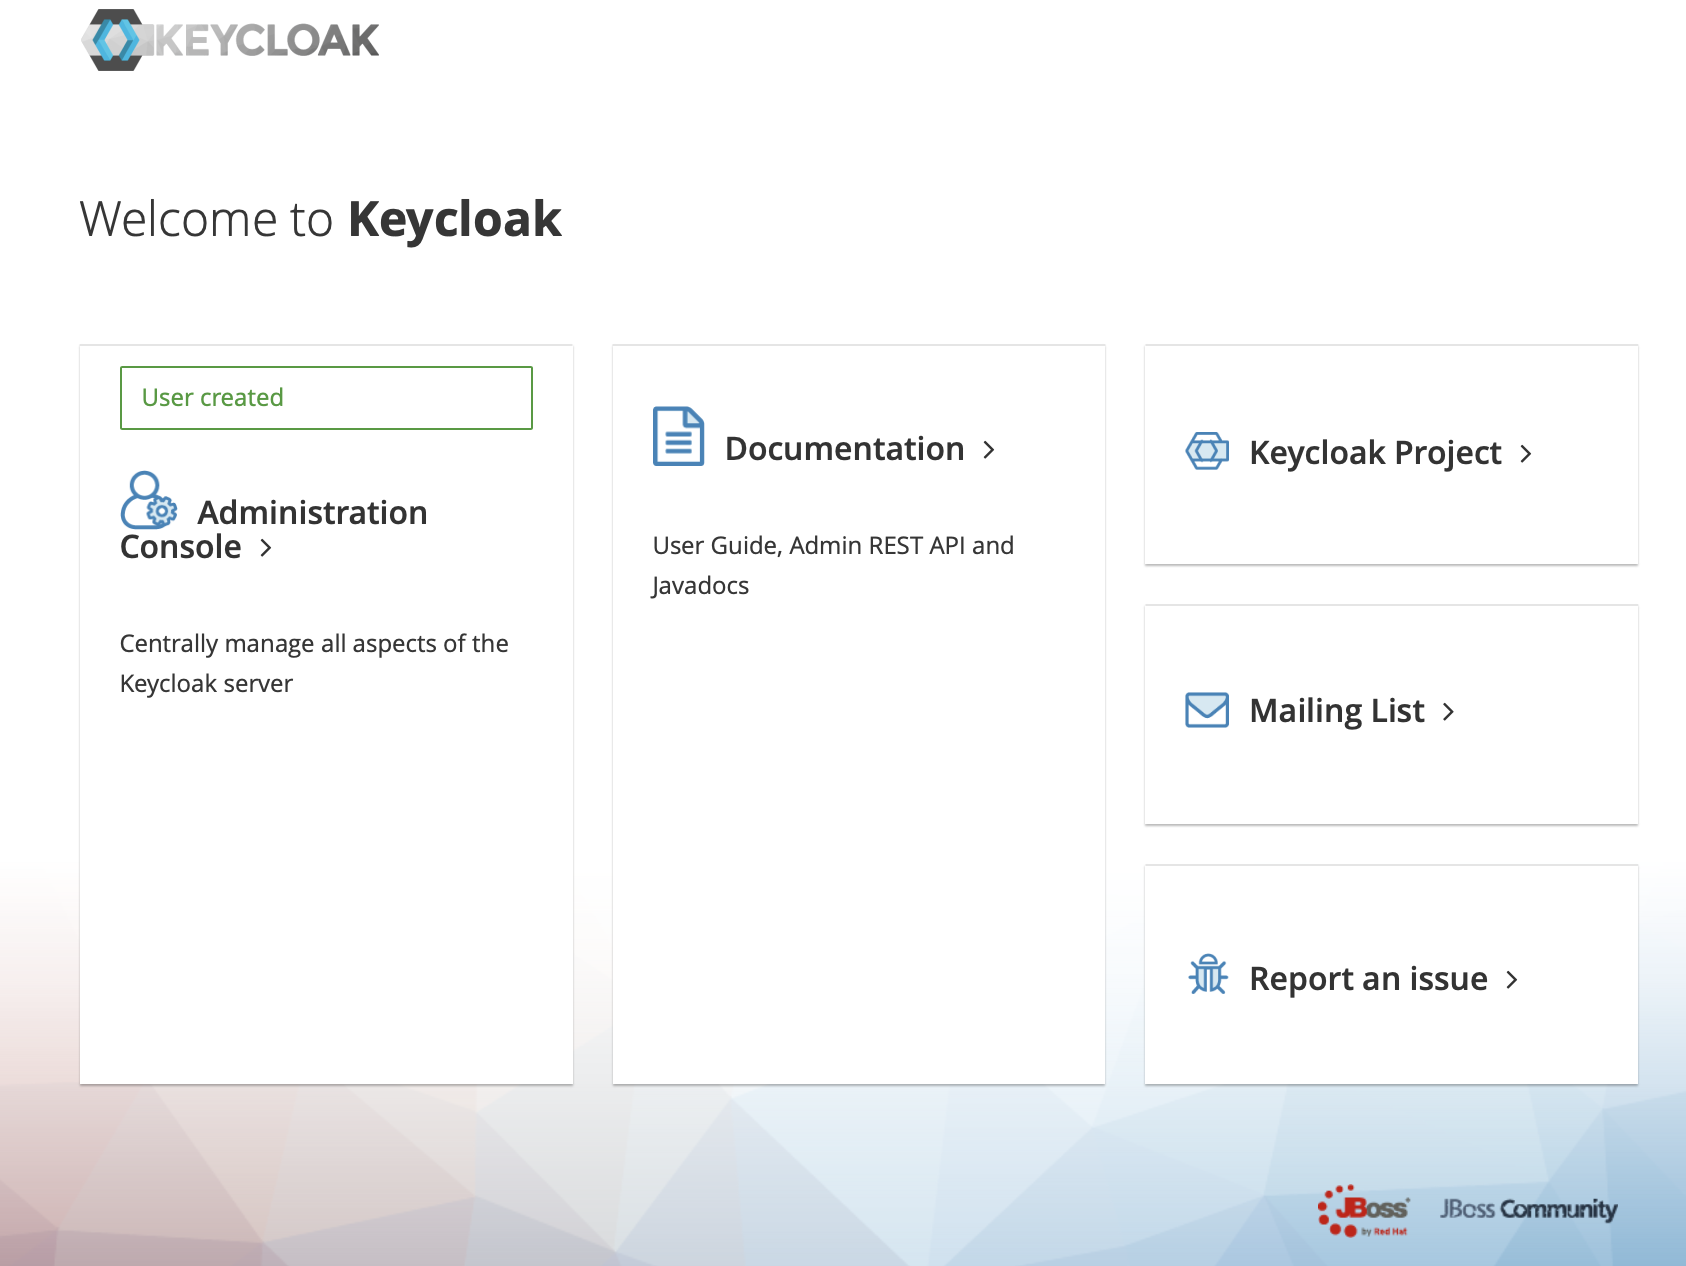 |
| |
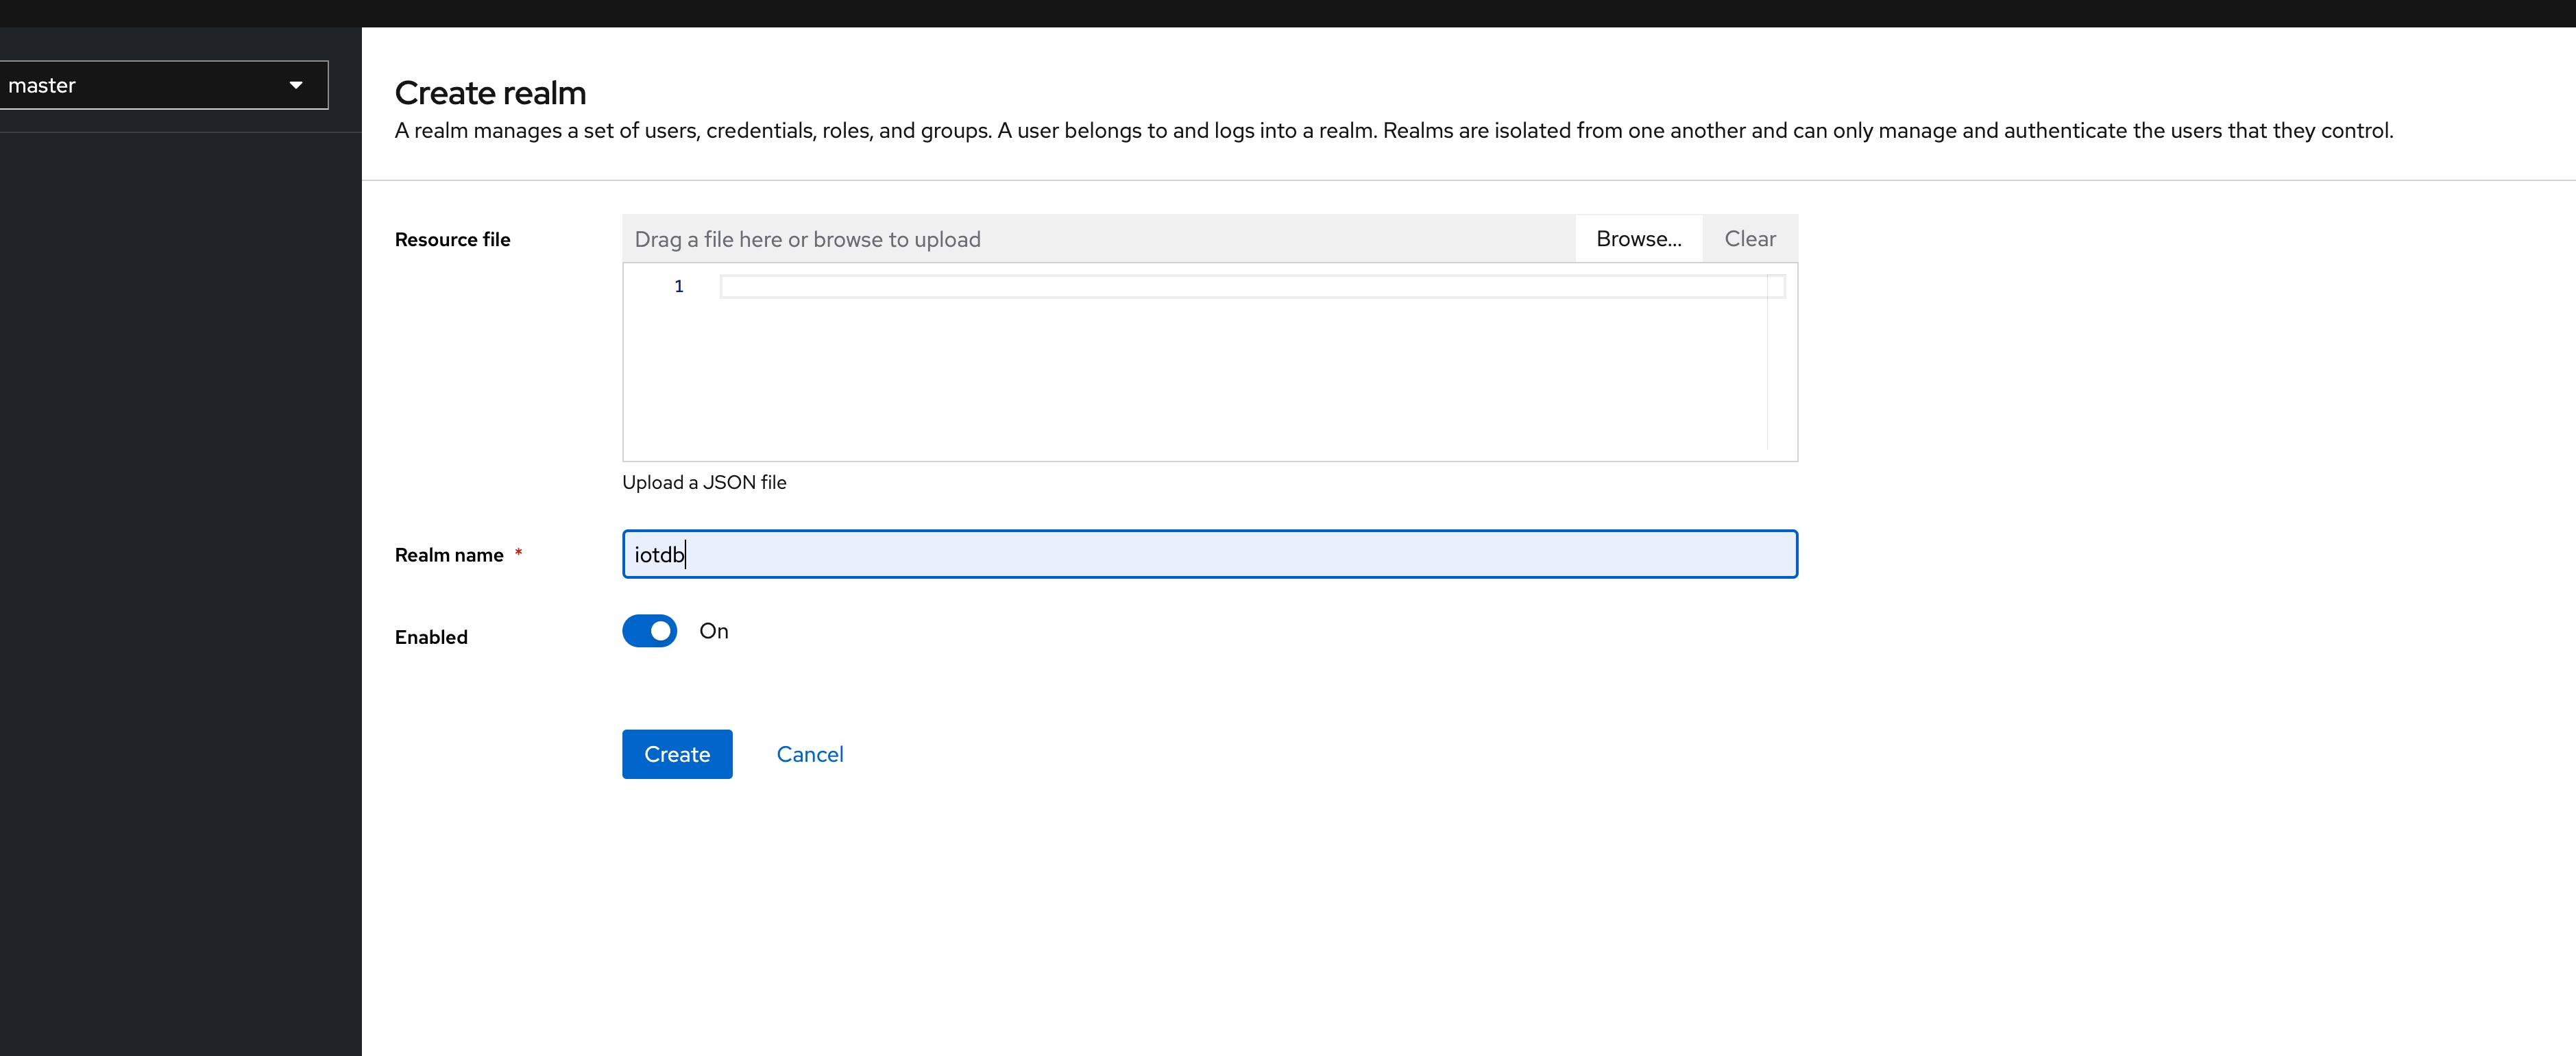
| 4、In the master menu on the left, click Create realm and enter Realm name to create a new realm |
| 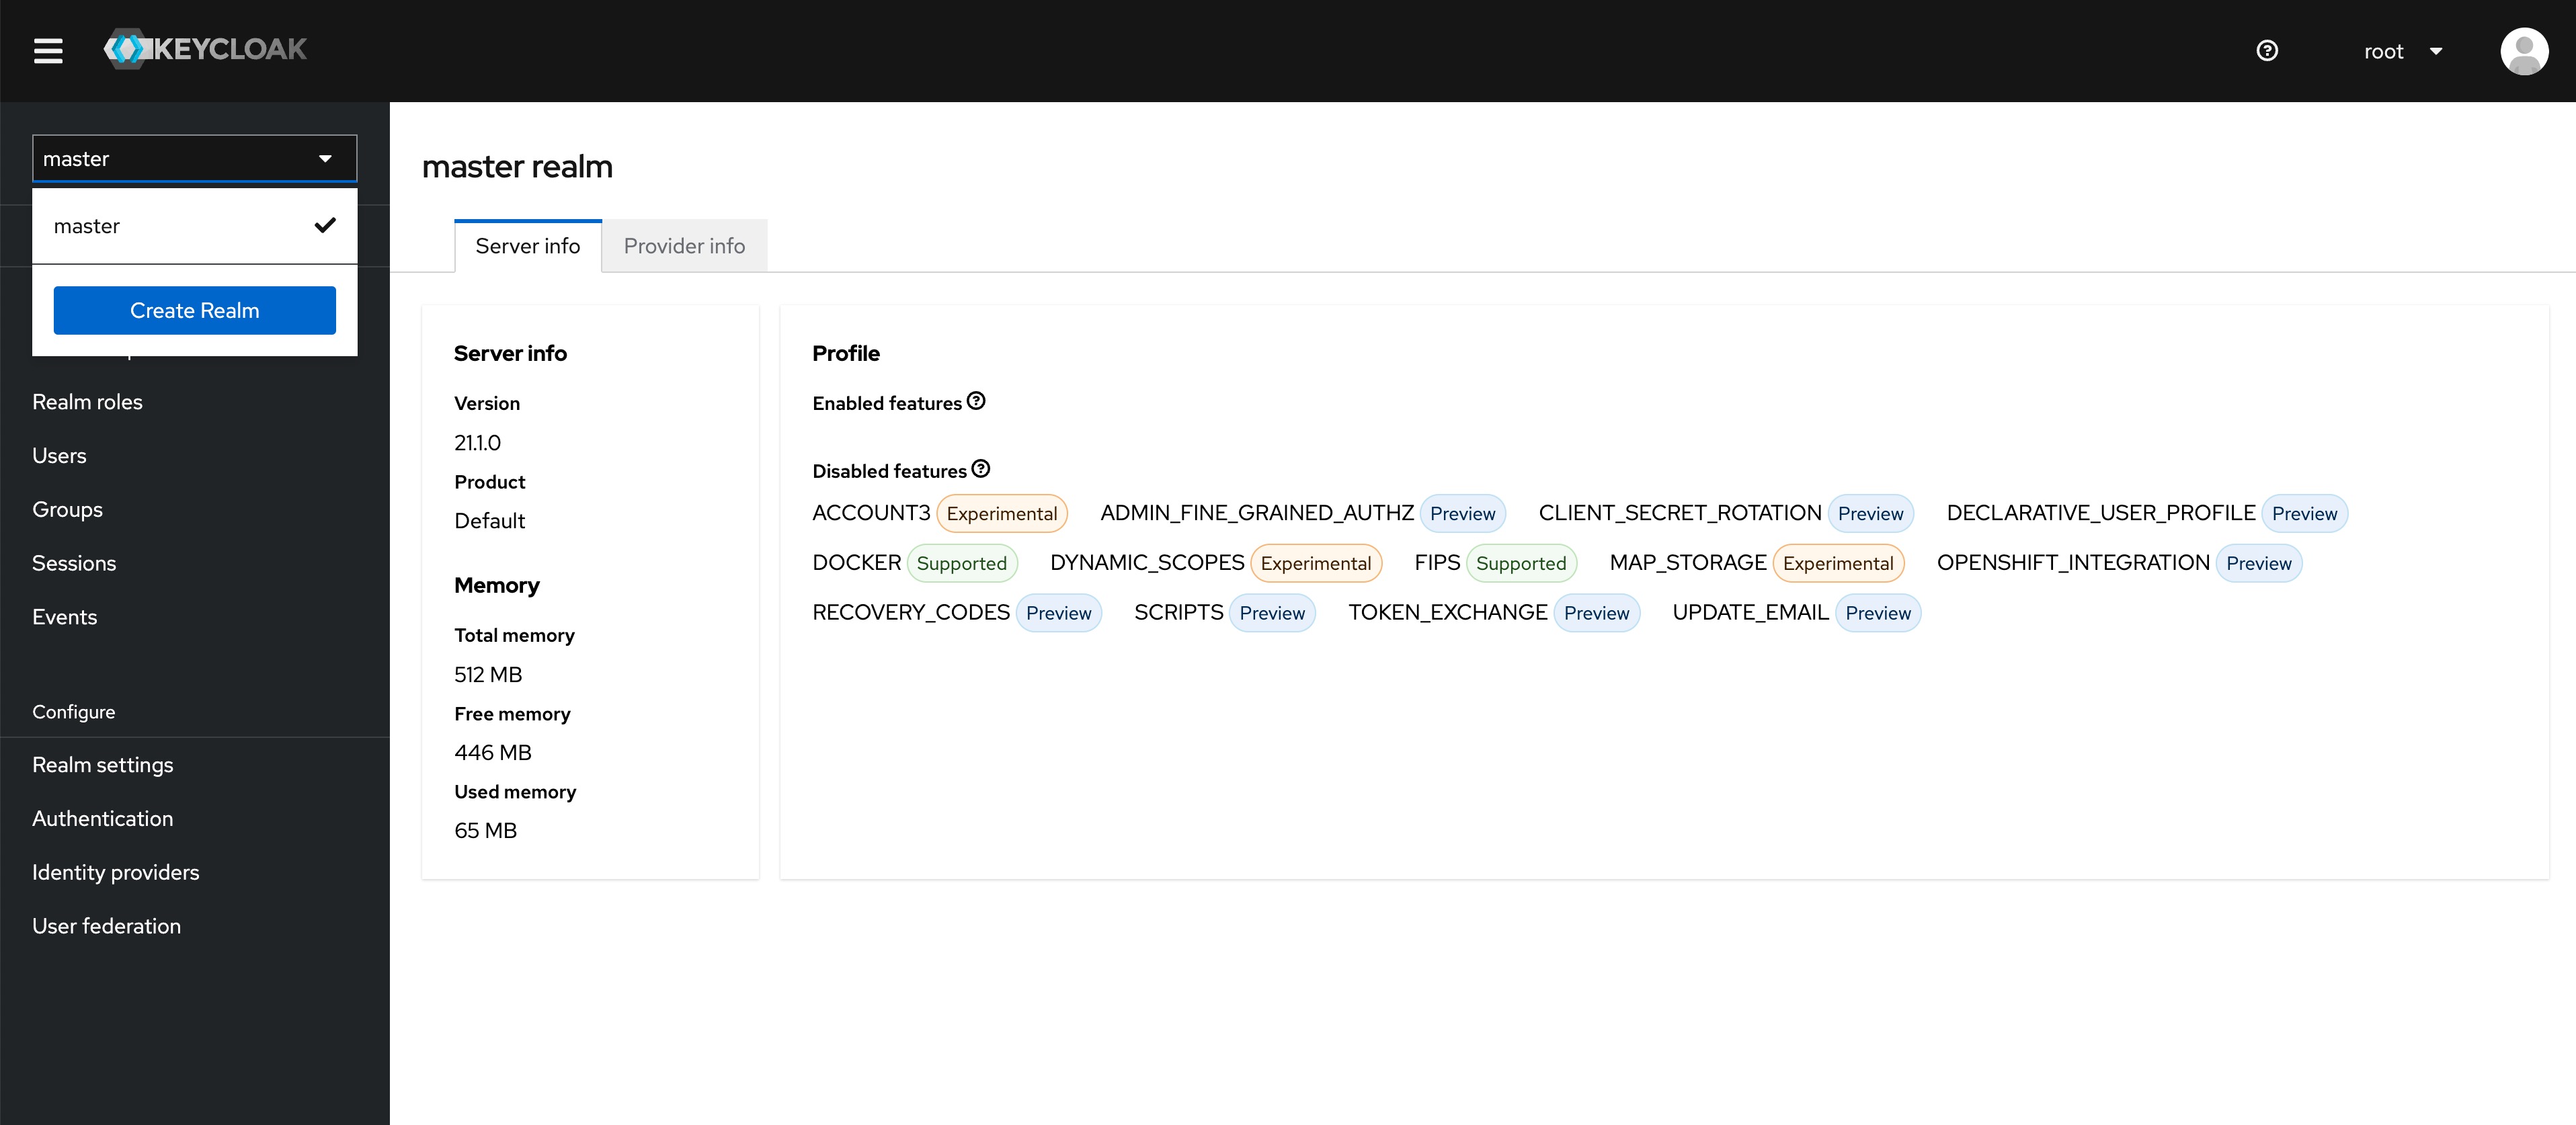 |
| |
|  |
| |
| |
| 5、Click the menu clients on the left to create clients |
| |
| 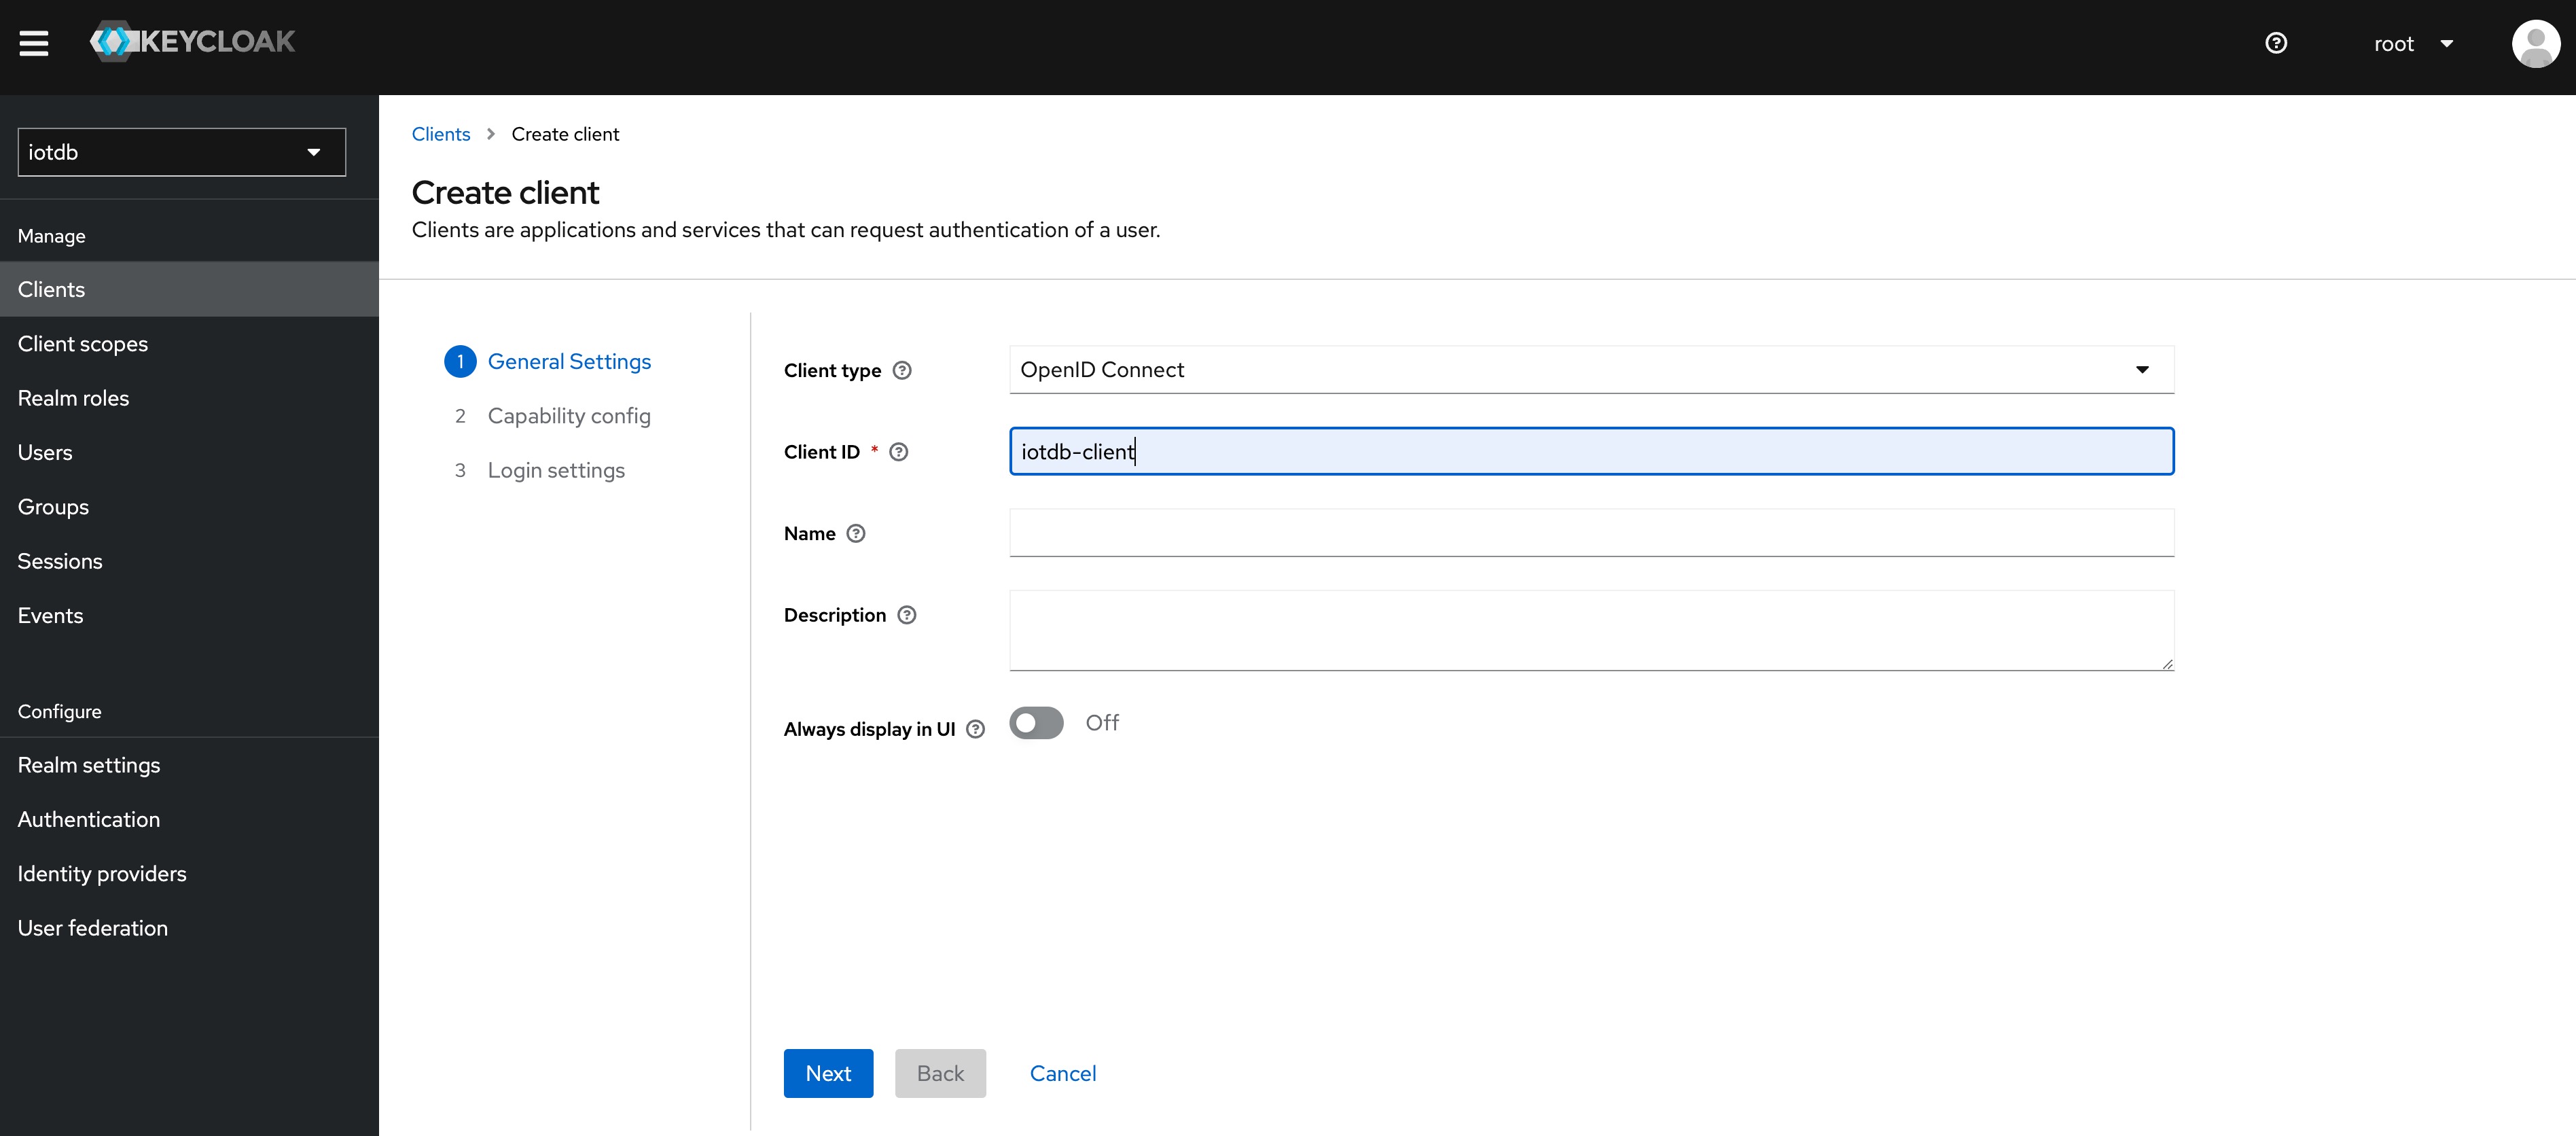 |
| |
| 6、Click user on the left menu to create user |
| |
| 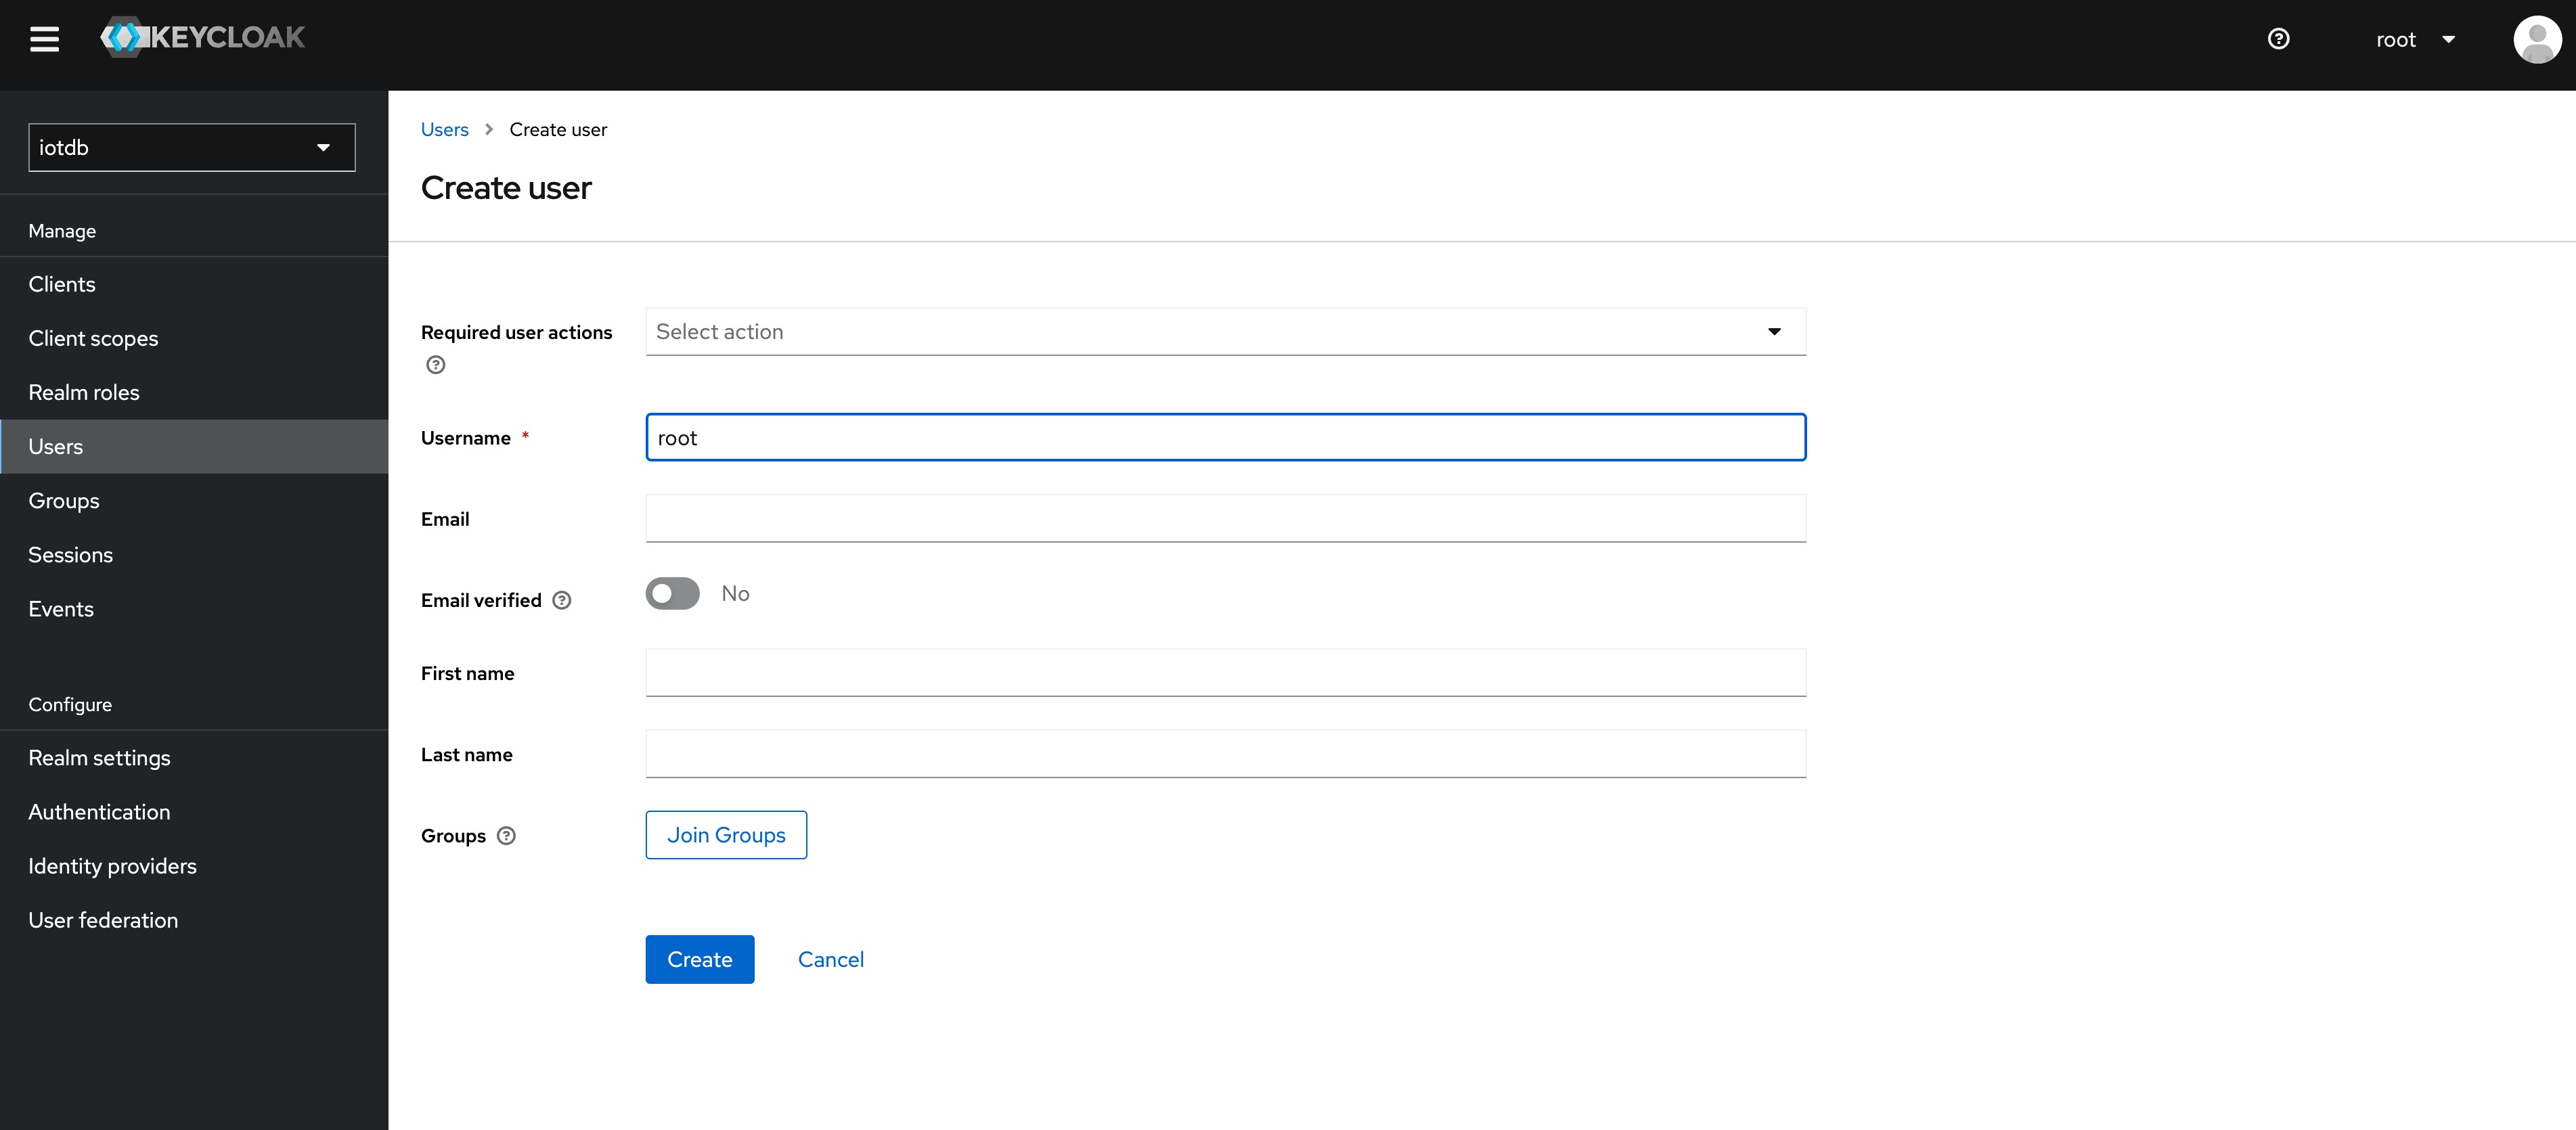 |
| |
| 7、Click the newly created user ID, click the credentials navigation, enter the password and close the temporary option. The configuration of keycloud is completed |
| |
| 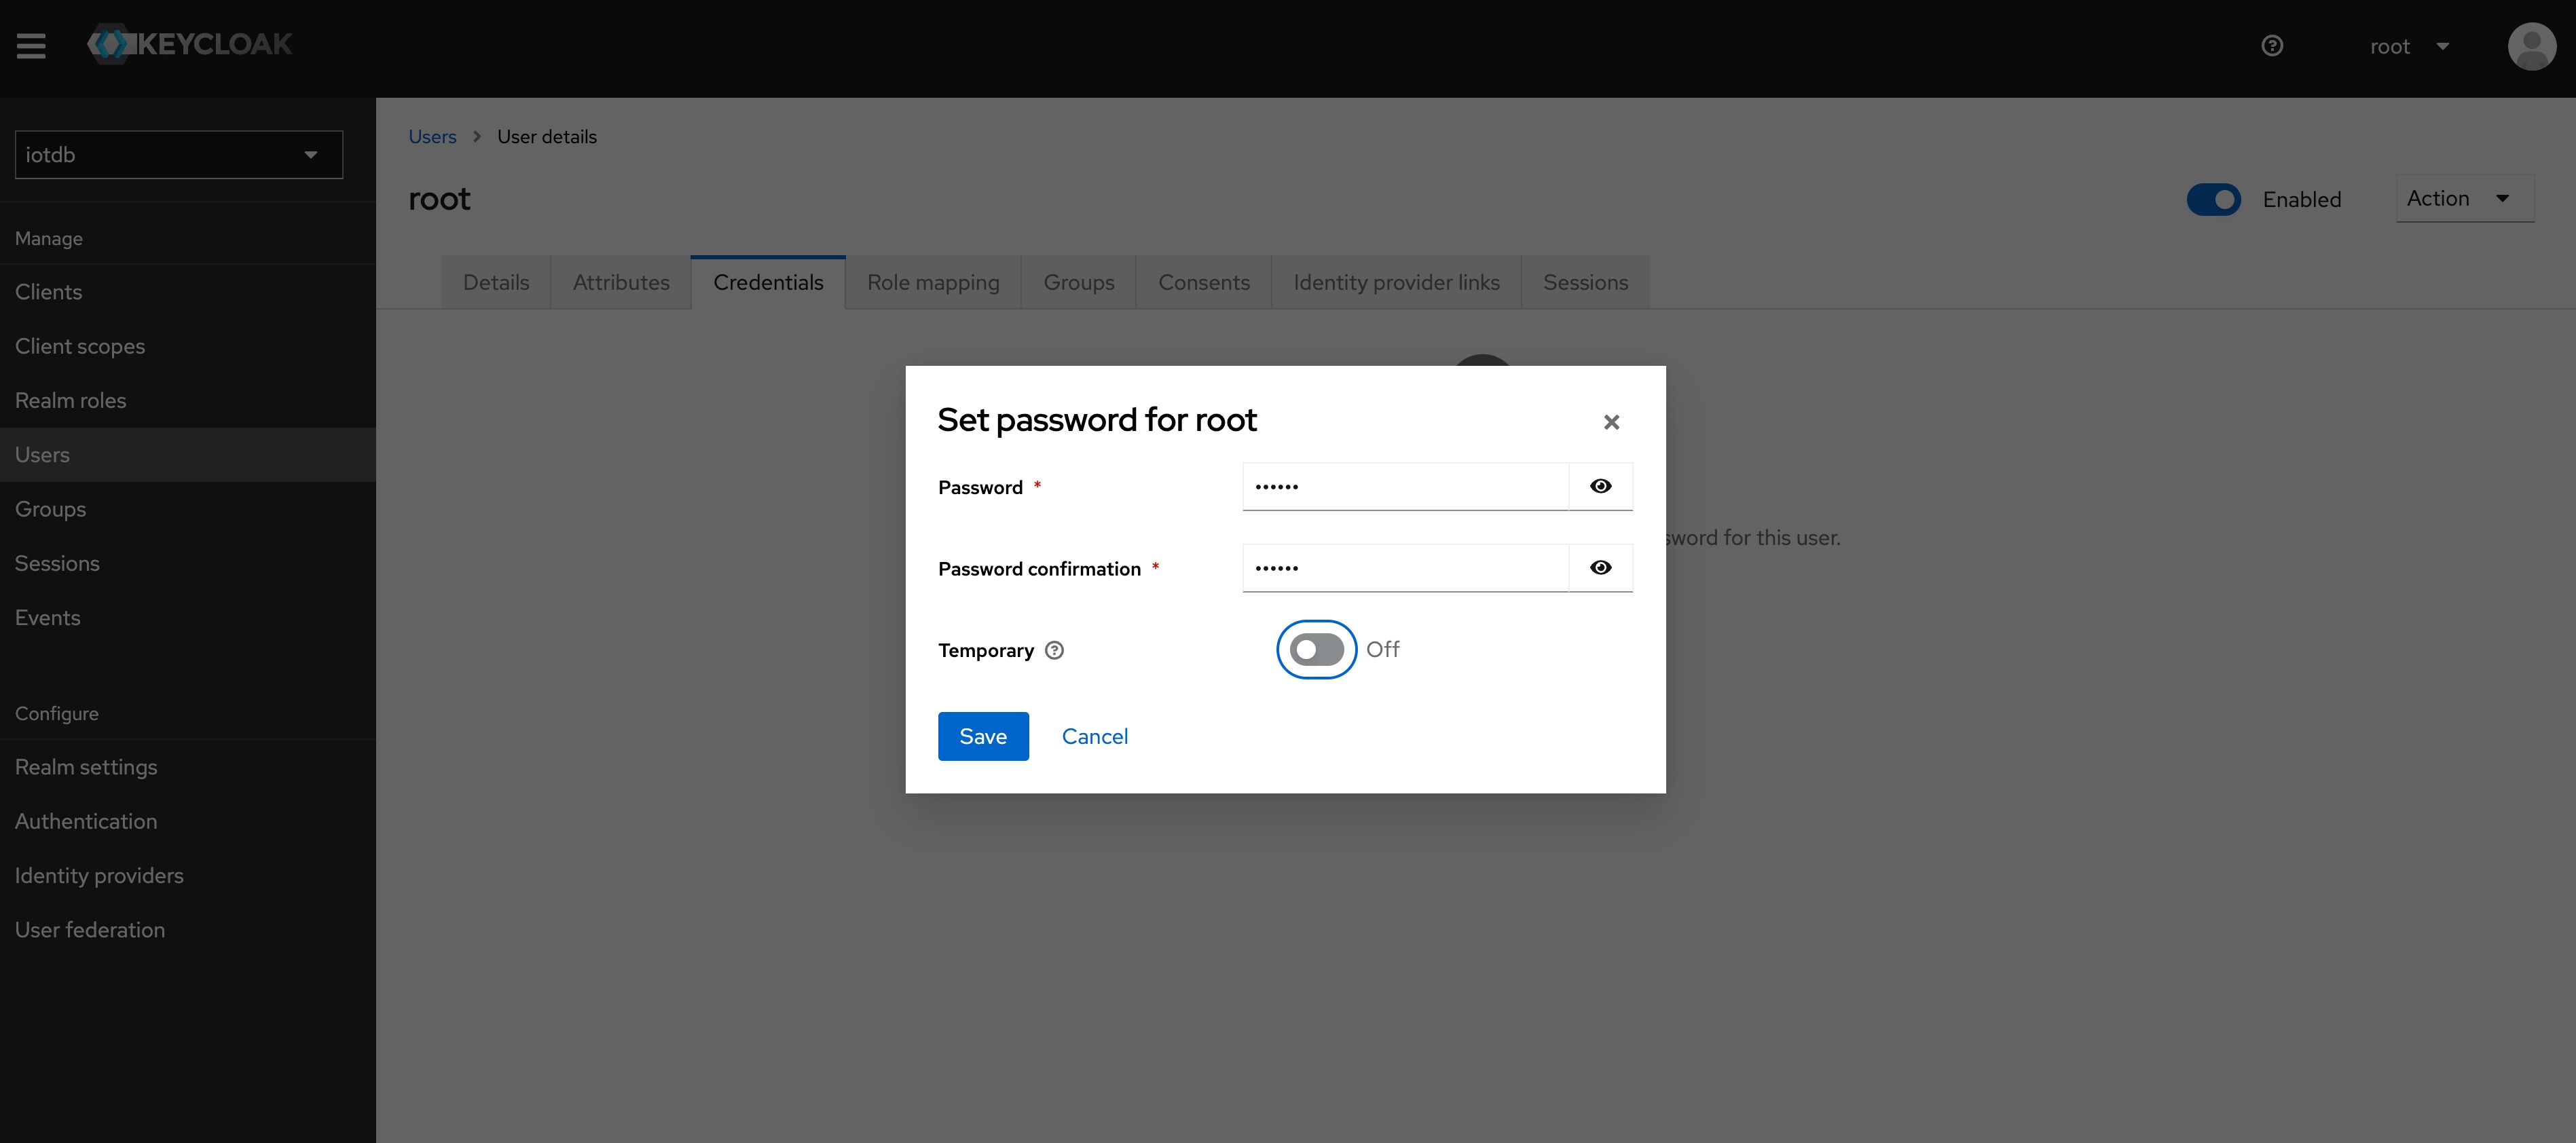 |
| |
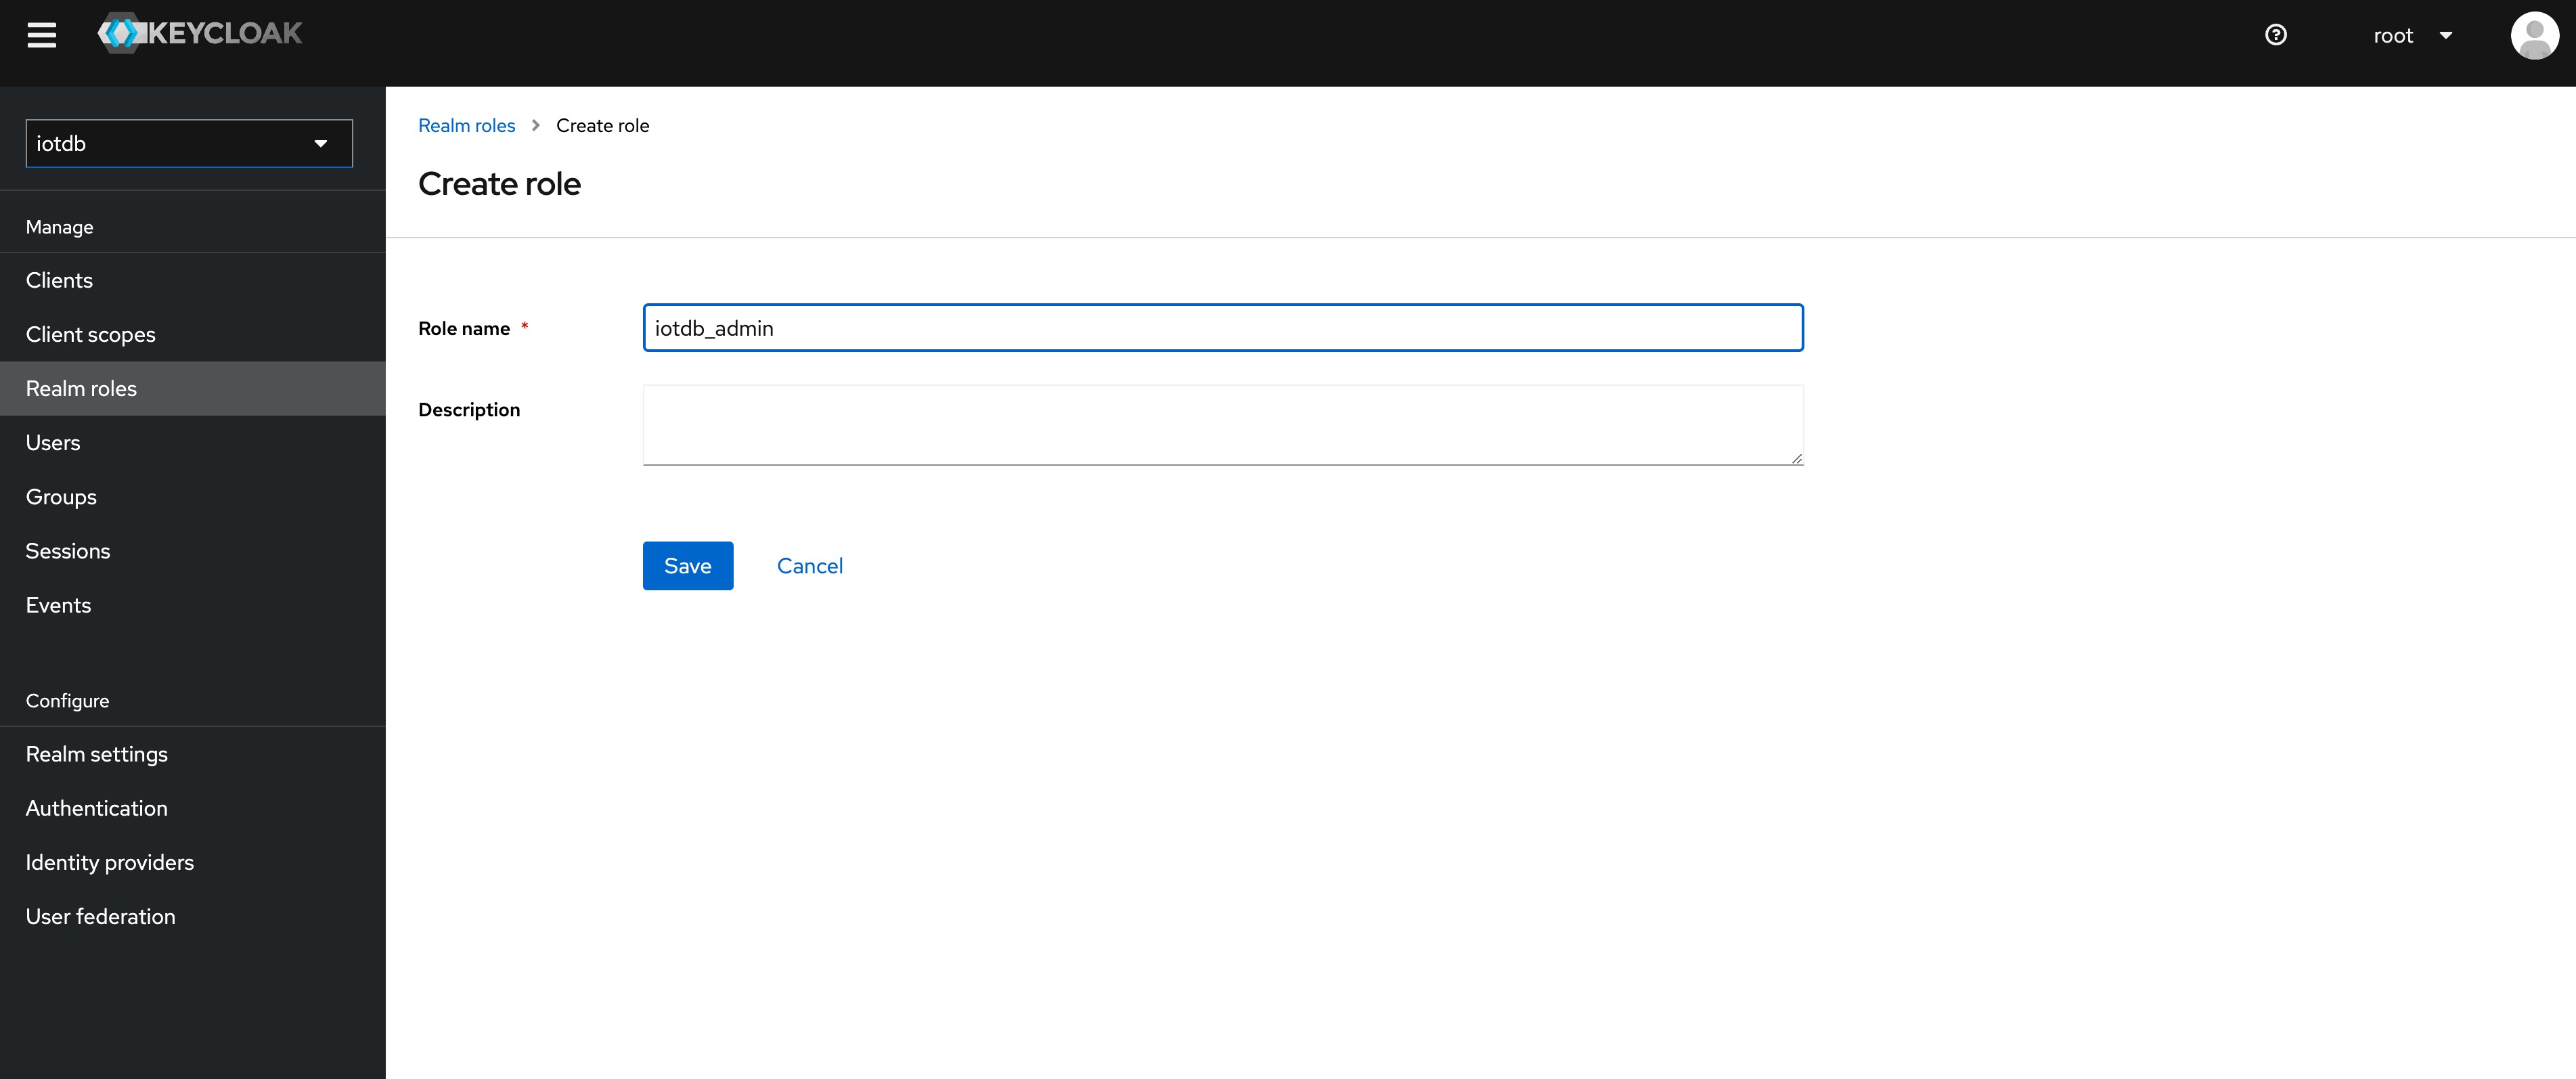
| 8、To create a role, click Roles on the left menu and then click the Create Role button to add a role |
| |
| 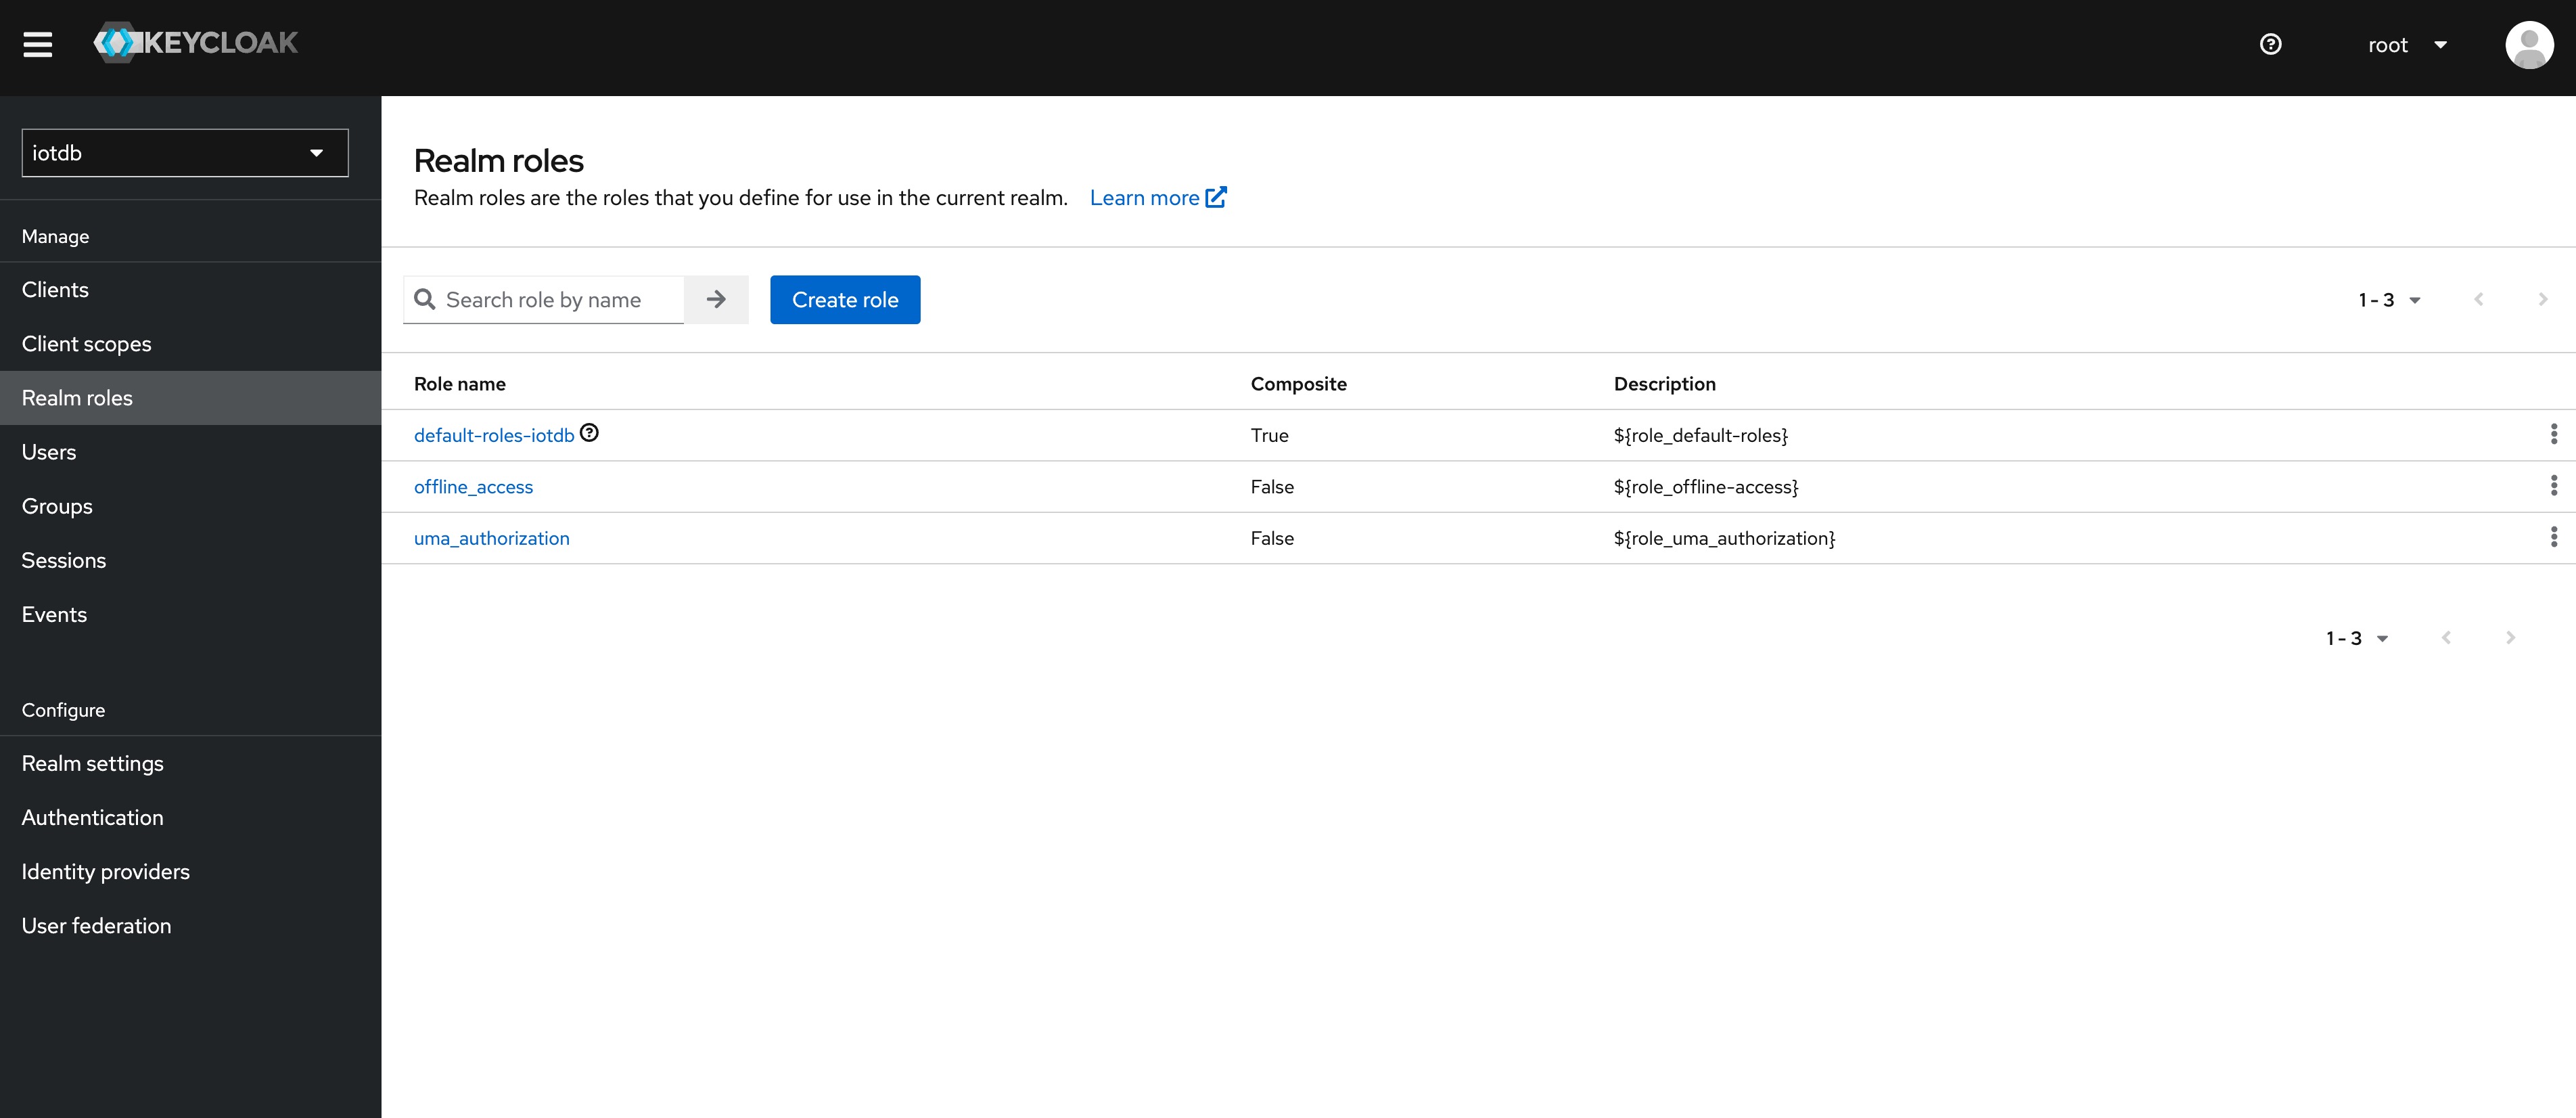 |
| |
| 9、 Enter `iotdb_admin` in the Role Name and click the save button. Tip: `iotdb_admin` here cannot be any other name, otherwise even after successful login, you will not have permission to use iotdb's query, insert, create database, add users, roles and other functions |
| |
|  |
| |
| 10、Click on the User menu on the left and then click on the user in the user list to add the `iotdb_admin` role we just created for that user |
| |
| 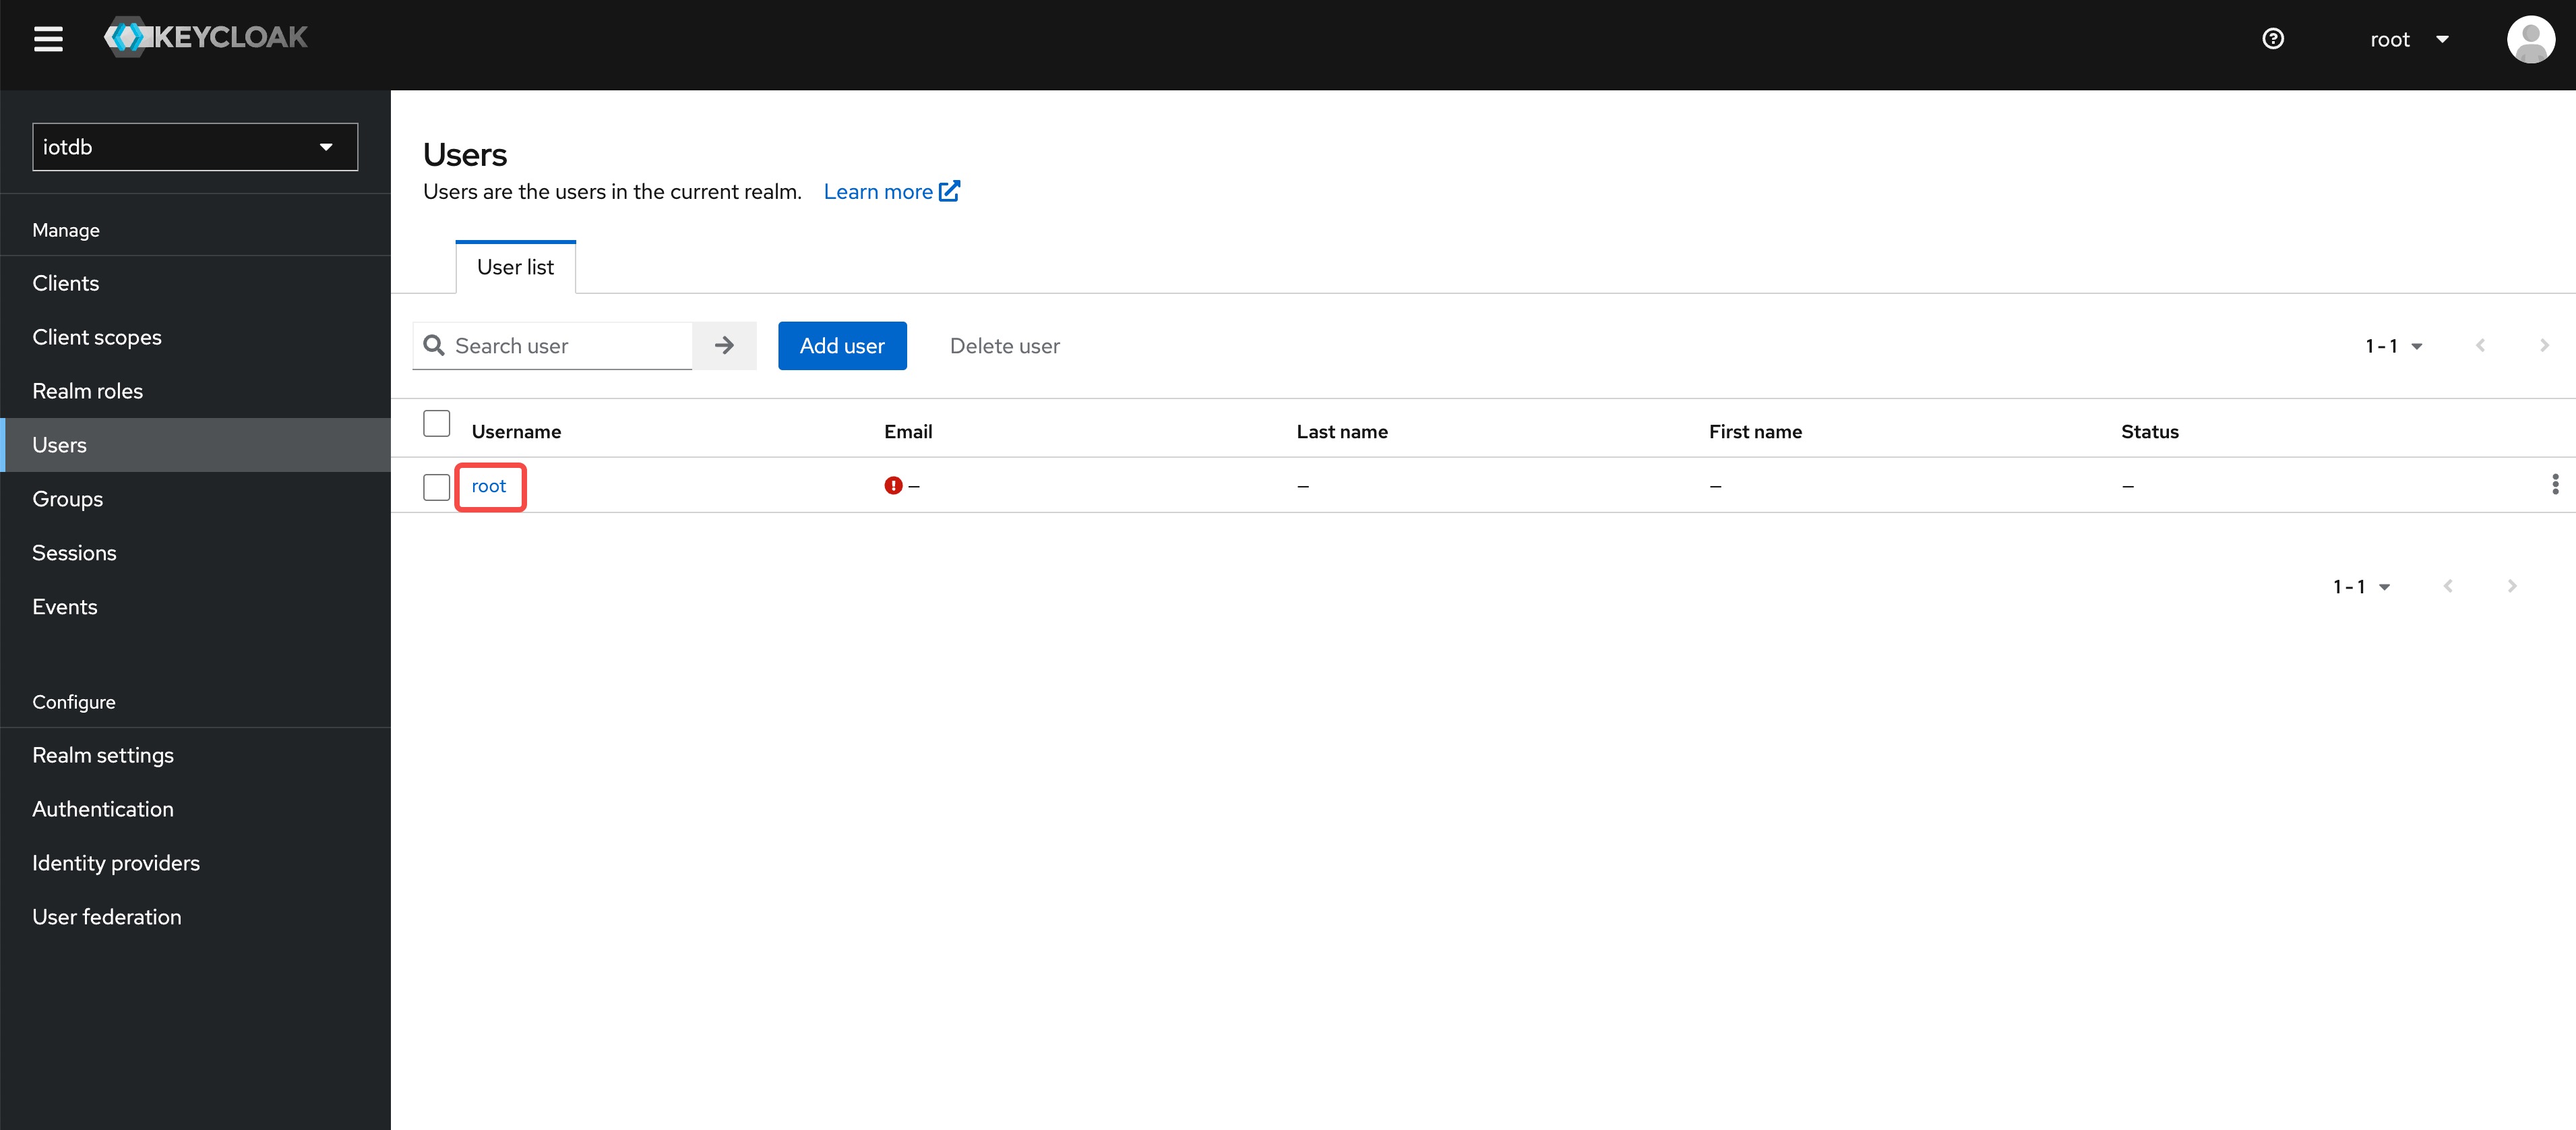 |
| |
| 11、 Select Role Mappings, select the `iotdb_admin` role in Assign Role |
| |
| 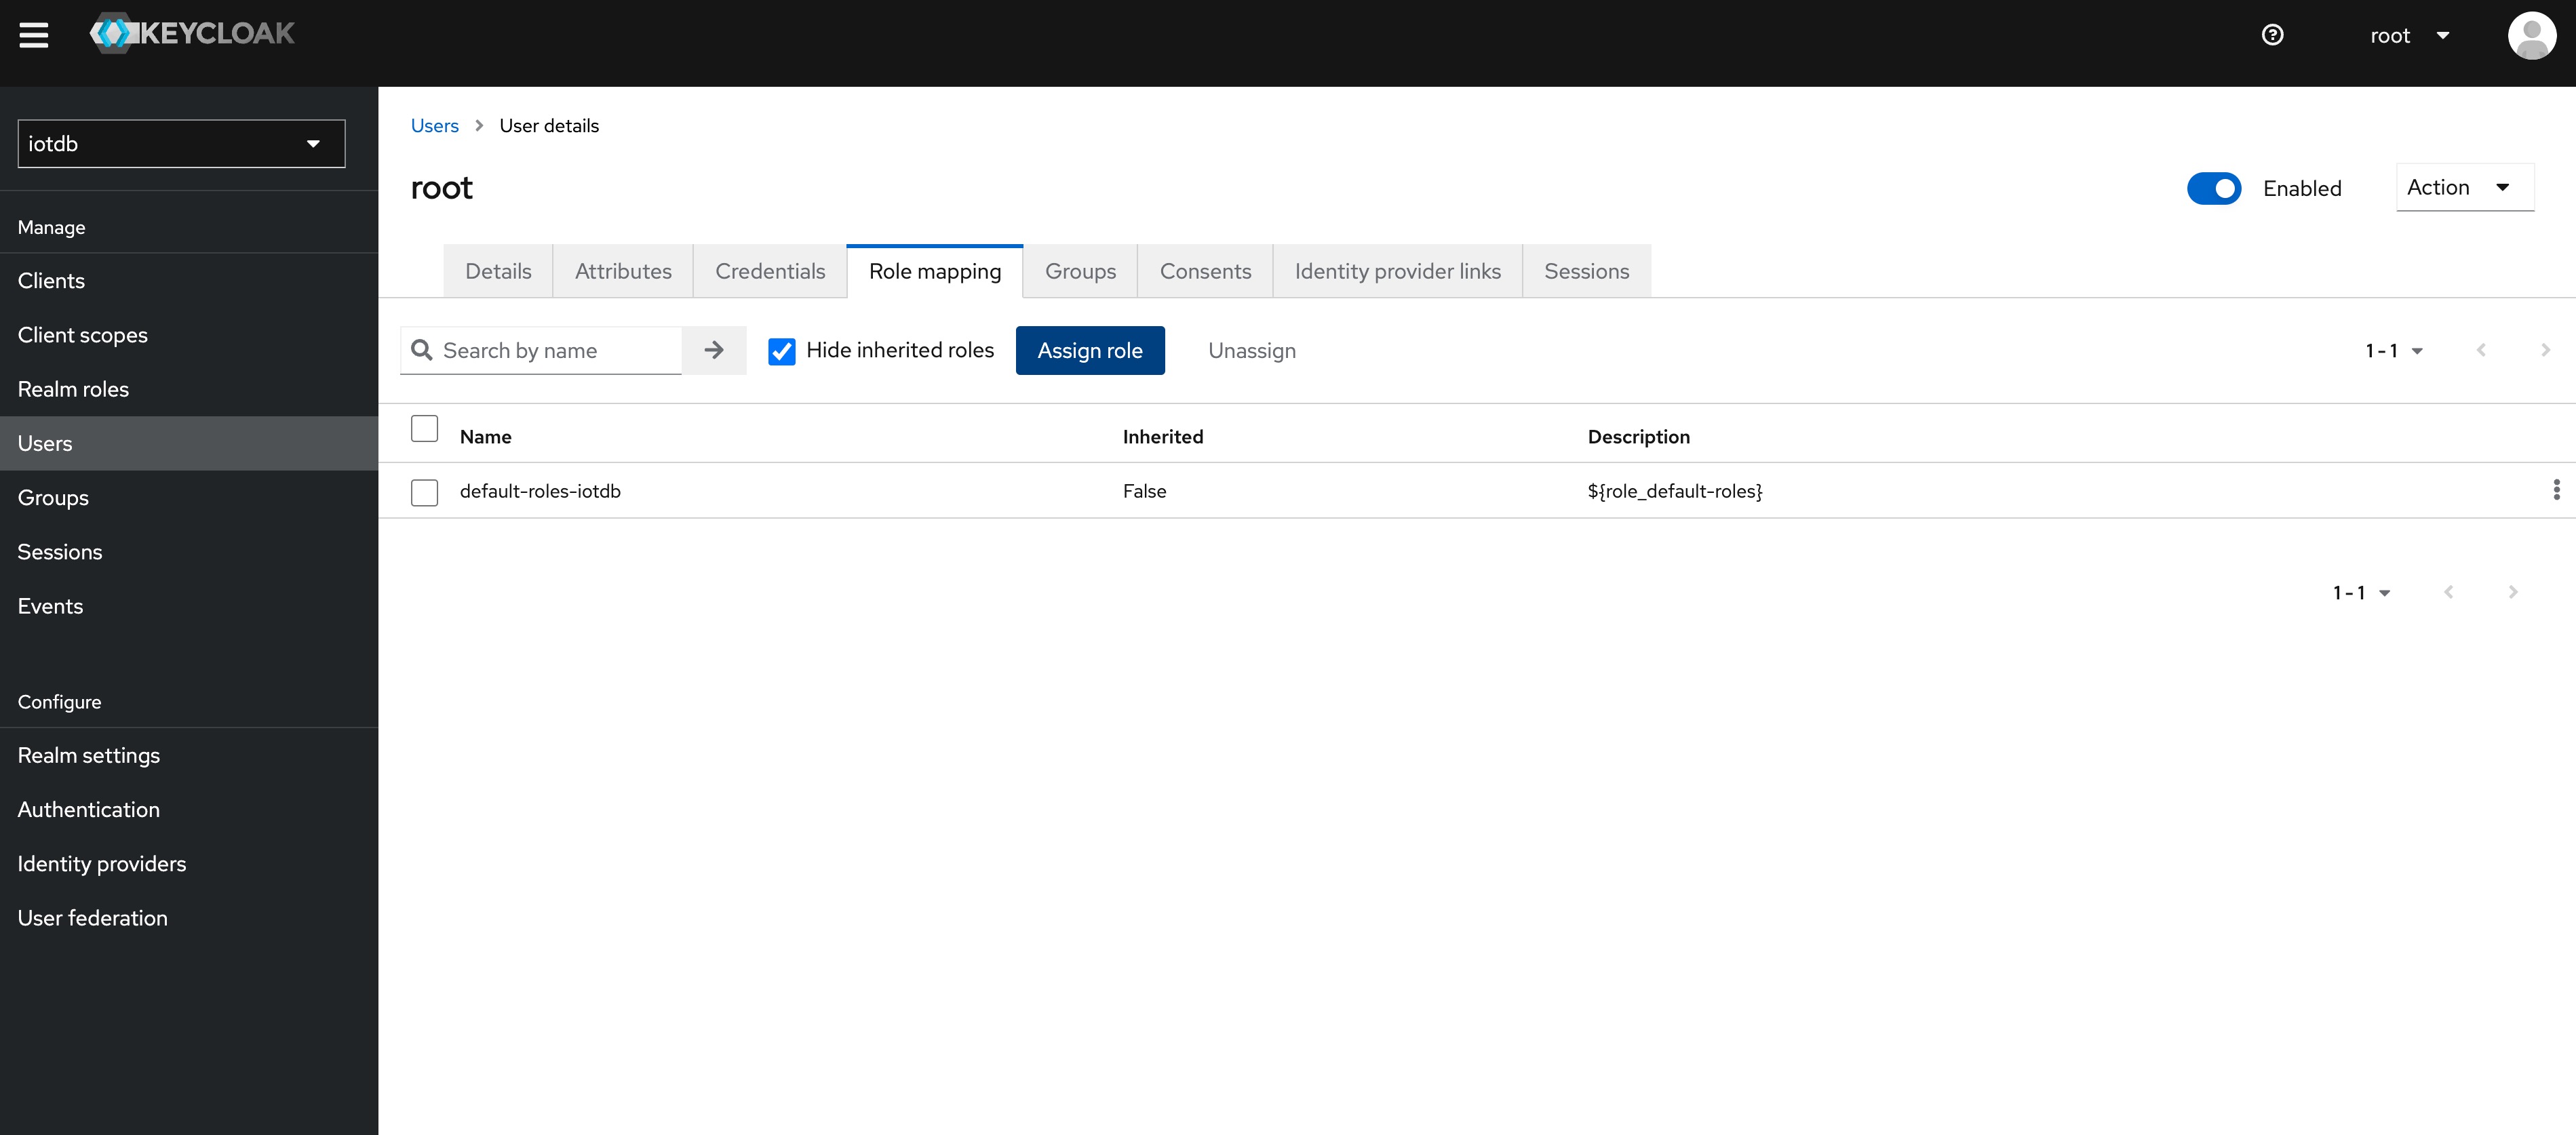 |
| |
| 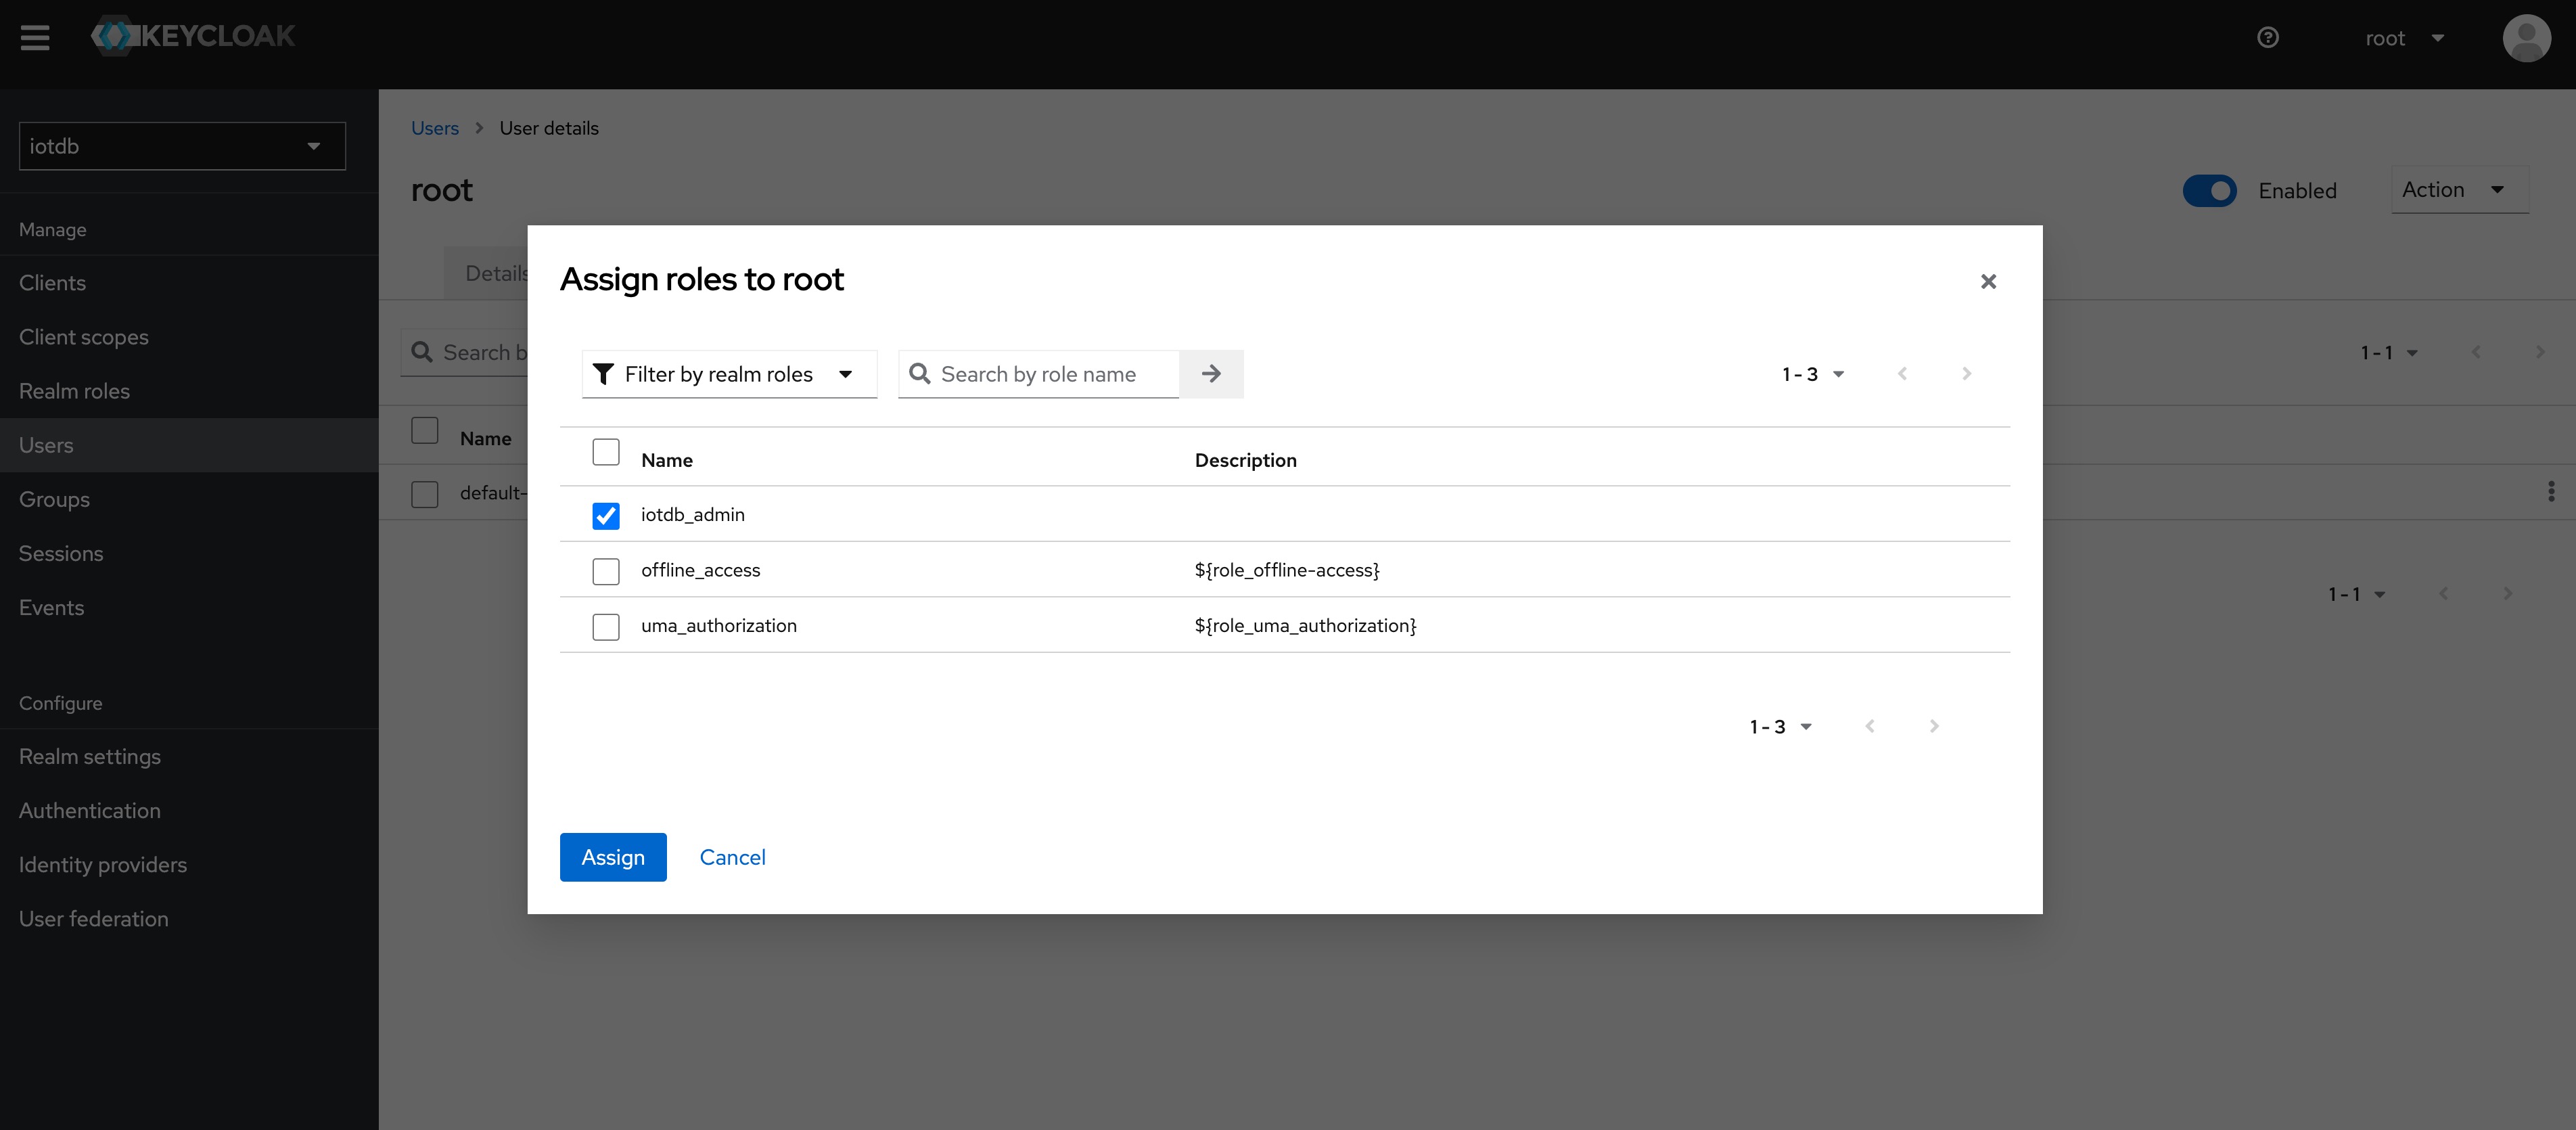 |
| |
| |
| Tip: If the user role is adjusted, you need to regenerate the token and log in to iotdb again to take effect |
| |
| The above steps provide a way for keycloak to log into iotdb. For more ways, please refer to keycloak configuration |
| |
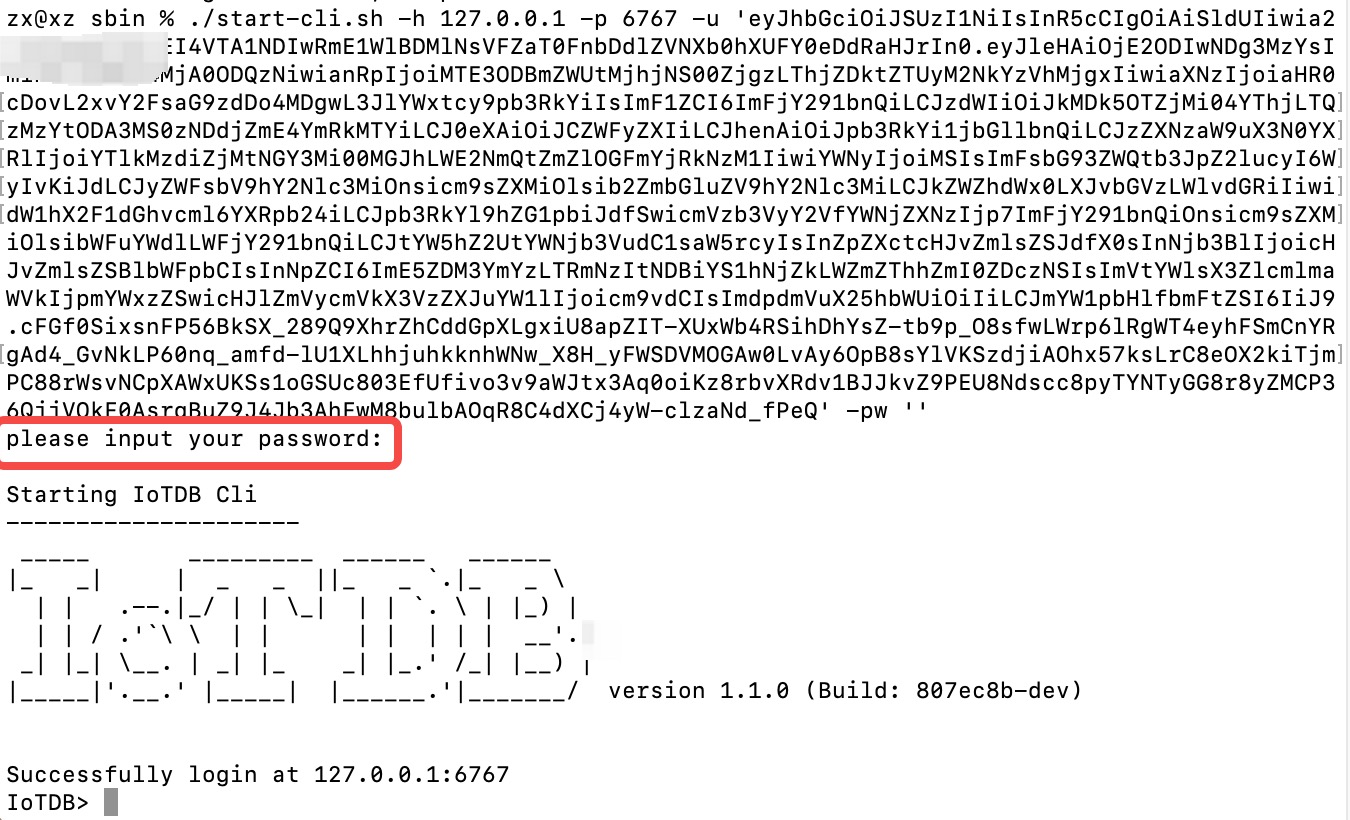
| If OIDC is enabled on server side then no username / passwort is needed but a valid Access Token from the OIDC Provider. |
| So as username you use the token and the password has to be empty, e.g. |
| |
| ```shell |
| Shell > bash sbin/start-cli.sh -h 10.129.187.21 -p 6667 -u {my-access-token} -pw "" |
| ``` |
| |
| Among them, you need to replace {my access token} (note, including {}) with your token, that is, the value corresponding to access_token. The password is empty and needs to be confirmed again. |
| |
|  |
| |
| |
| How to get the token is dependent on your OpenID Connect setup and not covered here. |
| In the simplest case you can get this via the command line with the `passwort-grant`. |
| For example, if you use keycloack as OIDC and you have a realm with a client `iotdb` defined as public you could use |
| the following `curl` command to fetch a token (replace all `{}` with appropriate values). |
| |
| ```shell |
| curl -X POST "https://{your-keycloack-server}/realms/{your-realm}/protocol/openid-connect/token" \ |
| -H "Content-Type: application/x-www-form-urlencoded" \ |
| -d "username={username}" \ |
| -d "password={password}" \ |
| -d 'grant_type=password' \ |
| -d "client_id=iotdb-client" |
| ``` |
| The response looks something like |
| |
| ```json |
| {"access_token":"eyJhbGciOiJSUzI1NiIsInR5cCIgOiAiSldUIiwia2lkIiA6ICJxMS1XbTBvelE1TzBtUUg4LVNKYXAyWmNONE1tdWNXd25RV0tZeFpKNG93In0.eyJleHAiOjE1OTAzOTgwNzEsImlhdCI6MTU5MDM5Nzc3MSwianRpIjoiNjA0ZmYxMDctN2NiNy00NTRmLWIwYmQtY2M2ZDQwMjFiNGU4IiwiaXNzIjoiaHR0cDovL2F1dGguZGVtby5wcmFnbWF0aWNpbmR1c3RyaWVzLmRlL2F1dGgvcmVhbG1zL0lvVERCIiwiYXVkIjoiYWNjb3VudCIsInN1YiI6ImJhMzJlNDcxLWM3NzItNGIzMy04ZGE2LTZmZThhY2RhMDA3MyIsInR5cCI6IkJlYXJlciIsImF6cCI6ImlvdGRiIiwic2Vzc2lvbl9zdGF0ZSI6IjA2MGQyODYyLTE0ZWQtNDJmZS1iYWY3LThkMWY3ODQ2NTdmMSIsImFjciI6IjEiLCJhbGxvd2VkLW9yaWdpbnMiOlsibG9jYWxob3N0OjgwODAiXSwicmVhbG1fYWNjZXNzIjp7InJvbGVzIjpbIm9mZmxpbmVfYWNjZXNzIiwidW1hX2F1dGhvcml6YXRpb24iLCJpb3RkYl9hZG1pbiJdfSwicmVzb3VyY2VfYWNjZXNzIjp7ImFjY291bnQiOnsicm9sZXMiOlsibWFuYWdlLWFjY291bnQiLCJtYW5hZ2UtYWNjb3VudC1saW5rcyIsInZpZXctcHJvZmlsZSJdfX0sInNjb3BlIjoiZW1haWwgcHJvZmlsZSIsImVtYWlsX3ZlcmlmaWVkIjp0cnVlLCJwcmVmZXJyZWRfdXNlcm5hbWUiOiJ1c2VyIn0.nwbrJkWdCNjzFrTDwKNuV5h9dDMg5ytRKGOXmFIajpfsbOutJytjWTCB2WpA8E1YI3KM6gU6Jx7cd7u0oPo5syHhfCz119n_wBiDnyTZkFOAPsx0M2z20kvBLN9k36_VfuCMFUeddJjO31MeLTmxB0UKg2VkxdczmzMH3pnalhxqpnWWk3GnrRrhAf2sZog0foH4Ae3Ks0lYtYzaWK_Yo7E4Px42-gJpohy3JevOC44aJ4auzJR1RBj9LUbgcRinkBy0JLi6XXiYznSC2V485CSBHW3sseXn7pSXQADhnmGQrLfFGO5ZljmPO18eFJaimdjvgSChsrlSEmTDDsoo5Q","expires_in":300,"refresh_expires_in":1800,"refresh_token":"eyJhbGciOiJIUzI1NiIsInR5cCIgOiAiSldUIiwia2lkIiA6ICJhMzZlMGU0NC02MWNmLTQ5NmMtOGRlZi03NTkwNjQ5MzQzMjEifQ.eyJleHAiOjE1OTAzOTk1NzEsImlhdCI6MTU5MDM5Nzc3MSwianRpIjoiNmMxNTBiY2EtYmE5NC00NTgxLWEwODEtYjI2YzhhMmI5YmZmIiwiaXNzIjoiaHR0cDovL2F1dGguZGVtby5wcmFnbWF0aWNpbmR1c3RyaWVzLmRlL2F1dGgvcmVhbG1zL0lvVERCIiwiYXVkIjoiaHR0cDovL2F1dGguZGVtby5wcmFnbWF0aWNpbmR1c3RyaWVzLmRlL2F1dGgvcmVhbG1zL0lvVERCIiwic3ViIjoiYmEzMmU0NzEtYzc3Mi00YjMzLThkYTYtNmZlOGFjZGEwMDczIiwidHlwIjoiUmVmcmVzaCIsImF6cCI6ImlvdGRiIiwic2Vzc2lvbl9zdGF0ZSI6IjA2MGQyODYyLTE0ZWQtNDJmZS1iYWY3LThkMWY3ODQ2NTdmMSIsInNjb3BlIjoiZW1haWwgcHJvZmlsZSJ9.ayNpXdNX28qahodX1zowrMGiUCw2AodlHBQFqr8Ui7c","token_type":"bearer","not-before-policy":0,"session_state":"060d2862-14ed-42fe-baf7-8d1f784657f1","scope":"email profile"} |
| ``` |
| |
| The interesting part here is the access token with the key `access_token`. |
| This has to be passed as username (with parameter `-u`) and empty password to the CLI. |
| |
| ### Batch Operation of Cli |
| |
| -e parameter is designed for the Cli/shell tool in the situation where you would like to manipulate IoTDB in batches through scripts. By using the -e parameter, you can operate IoTDB without entering the cli's input mode. |
| |
| In order to avoid confusion between statements and other parameters, the current version only supports the -e parameter as the last parameter. |
| |
| The usage of -e parameter for Cli/shell is as follows: |
| |
| The Linux and MacOS system commands: |
| |
| ```shell |
| Shell > bash sbin/start-cli.sh -h {host} -p {rpcPort} -u {user} -pw {password} -e {sql for iotdb} |
| ``` |
| |
| The Windows system commands: |
| |
| ```shell |
| Shell > sbin\start-cli.bat -h {host} -p {rpcPort} -u {user} -pw {password} -e {sql for iotdb} |
| ``` |
| |
| In the Windows environment, the SQL statement of the -e parameter needs to use ` `` ` to replace `" "` |
| |
| In order to better explain the use of -e parameter, take following as an example(On linux system). |
| |
| Suppose you want to create a database root.demo to a newly launched IoTDB, create a timeseries root.demo.s1 and insert three data points into it. With -e parameter, you could write a shell like this: |
| |
| ```shell |
| # !/bin/bash |
| |
| host=127.0.0.1 |
| rpcPort=6667 |
| user=root |
| pass=root |
| |
| bash ./sbin/start-cli.sh -h ${host} -p ${rpcPort} -u ${user} -pw ${pass} -e "create database root.demo" |
| bash ./sbin/start-cli.sh -h ${host} -p ${rpcPort} -u ${user} -pw ${pass} -e "create timeseries root.demo.s1 WITH DATATYPE=INT32, ENCODING=RLE" |
| bash ./sbin/start-cli.sh -h ${host} -p ${rpcPort} -u ${user} -pw ${pass} -e "insert into root.demo(timestamp,s1) values(1,10)" |
| bash ./sbin/start-cli.sh -h ${host} -p ${rpcPort} -u ${user} -pw ${pass} -e "insert into root.demo(timestamp,s1) values(2,11)" |
| bash ./sbin/start-cli.sh -h ${host} -p ${rpcPort} -u ${user} -pw ${pass} -e "insert into root.demo(timestamp,s1) values(3,12)" |
| bash ./sbin/start-cli.sh -h ${host} -p ${rpcPort} -u ${user} -pw ${pass} -e "select s1 from root.demo" |
| ``` |
| |
| The results are shown in the figure, which are consistent with the Cli and jdbc operations. |
| |
| ```shell |
| Shell > bash ./shell.sh |
| +-----------------------------+------------+ |
| | Time|root.demo.s1| |
| +-----------------------------+------------+ |
| |1970-01-01T08:00:00.001+08:00| 10| |
| |1970-01-01T08:00:00.002+08:00| 11| |
| |1970-01-01T08:00:00.003+08:00| 12| |
| +-----------------------------+------------+ |
| Total line number = 3 |
| It costs 0.267s |
| ``` |
| |
| It should be noted that the use of the -e parameter in shell scripts requires attention to the escaping of special characters. |