title: Tutorial type: guide order: 1 version: 0.10
Tutorial
We will make a simple but realistic list, in which the technologies Weex uses will be shown. This form of list also works for a lot of e-commercial apps and mobile sites.
Getting Started
Let's get started with the list item, which contains one image element and one text right behind.
<template>
  <div class="container">
    <div class="cell">
      <image class="thumb" src="http://t.cn/RGE3AJt"></image>
      <text class="title">JavaScript</text>
    </div>
  </div>
</template>

<style>
  .cell { margin-top: 10; margin-left: 10; flex-direction: row; }
  .thumb { width: 200; height: 200; }
  .title { text-align: center; flex: 1; color: grey; font-size: 50; }
</style>
You can directly copy and paste the above code into a Weex file named tech_list.we (.we is our recommended filename extension).
Preview
Once created, we want to see the running result of the .we file. But before that, we must make sure the dependencies are installed.
We should install Node first, which our Weex CLI program Weex Toolkit depends on. Then install weex-toolkit by running the command:
$ npm install -g weex-toolkit
When installation completed, you can check if Weex CLI is installed properly by running weex command in the command line. The following text is expected:
Usage: weex foo/bar/your_next_best_weex_script_file.we  [options]

Options:
  --qr     display QR code for native runtime,
  -o,--output  transform weex we file to JS Bundle, output path (single JS bundle file or dir)
  -s,--server  start a http file server, weex .we file will be transforme to JS bundle on the server , specify local root path using the option
  ......
  --help  Show help
  -h, --host [default: "127.0.0.1"]
If all work well, navigate to the directory where you saved tech_list.we, then type:
$ weex tech_list.we
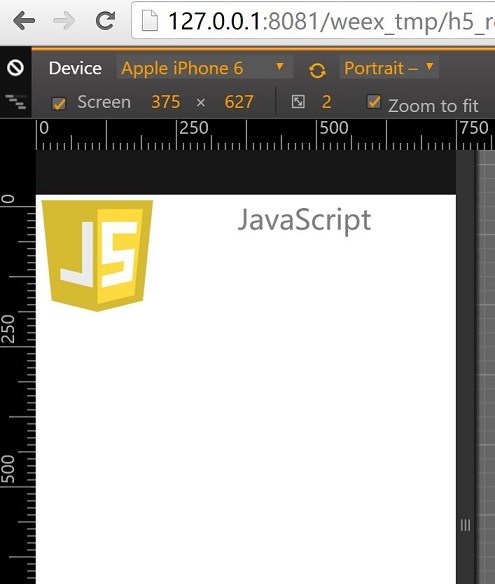
A browser window will be opened automatically to display the running result like below (weex-toolkit version should be greater than 0.1.0, use weex --version to check it):
Introduce to Weex Syntax
So it's time for introducing the syntax.
Given the content of tech_list.we, Weex source code is composed of three parts -- template, style, and script, just like html, css, and javascript for the Web.
Template is the skeleton that gives Weex structure. It is composed of tags which surround content and apply meaning to it. Tags have attributes, different attribute means different feature, for example, class attribute makes it possible to define the same styles for multiple tags, onclick attribute makes the tag respond to click event.
Style describes how Weex tags are to be displayed. We prefer CSS very much. So we try to keep consistent with CSS standard as possible. Weex Style supports a lot of CSS features, like margin, padding, fixed and so on. Better yet, flexbox layout (flex) is well supported in Weex Style.
Script adds data & logic to Weex tags, helping you easily access local or remote data and update tags. You can also define some methods for your tag to respond to different events. Weex Script organization learns a lot from CommonJS module style.
More information about Weex syntax can be found in our Syntax chapter.
Add More Items
We can‘t call one item a list, so we need to add more items to our tech list. Open tech_list.we in your favorite editor and update it’s content like below:
<template>
  <div class="container">
    <div class="cell">
      <image class="thumb" src="http://t.cn/RGE3AJt"></image>
      <text class="title">JavaScript</text>
    </div>
    <div class="cell">
      <image class="thumb" src="http://t.cn/RGE3uo9"></image>
      <text class="title">Java</text>
    </div>
    <div class="cell">
      <image class="thumb" src="http://t.cn/RGE31hq"></image>
      <text class="title">Objective C</text>
    </div>
  </div>
</template>

<style>
  .cell{ margin-top:10 ; margin-left:10 ; flex-direction: row; }
  .thumb { width: 200; height: 200; }
  .title { text-align: center ; flex: 1; color: grey; font-size: 50; }
</style>
Now we will try to render our tech_list.we with Weex native renderer. Open your terminal and navigate to the directory where you save the tech_list.we again, then type:
$ weex tech_list.we --qr -h {ip or hostname}
It's RECOMMENDED to use -h option to specify your local ip address or hostname.
A QR code will be displayed in the terminal window like below:

The QR code can work together with Weex Playground App. Open it and tap the scan icon at the top-right corner, then scan the QR code displayed in your terminal. If all work well, a beautiful list will be displayed in your phone.

Here, I must stress that the list is rendered by a native view, instead of Webkit, so your app gets faster loading and less memory overhead than common Webview renderer.
Now open tech_list.we again and try to change some text, after changes saved the Weex playground App will immediately display these changes. We call that Hot-Reload, which is intended to help you use Weex better.
Add Built-in Components
Instead of writing basic tags by yourself, Weex provides a lot of built-in components. For example, Slider is common to many apps and mobile websites, so Weex includes a built-in Slider so that you can easily use it in your script. Let‘s open tech_list.we and update it’s content like below.
<template>
  <div style="flex-direction: column;">
    <slider class="slider" interval="{{intervalValue}}" auto-play="{{isAutoPlay}}" >
      <div class="slider-pages" repeat="{{itemList}}" onclick="goWeexSite" >
      <image class="thumb" src="{{pictureUrl}}"></image>
      <text class="title">{{title}}</text>
      </div>
    </slider>

  <div class="container" onclick="goWeexSite" >
    <div class="cell">
      <image class="thumb" src="http://t.cn/RGE3AJt"></image>
      <text class="title">JavaScript</text>
    </div>
    <div class="cell">
      <image class="thumb" src="http://t.cn/RGE3uo9"></image>
      <text class="title">Java</text>
    </div>
    <div class="cell">
      <image class="thumb" src="http://t.cn/RGE31hq"></image>
      <text class="title">Objective C</text>
    </div>
  </div>
</template>

<style>
  .cell { margin-top:10 ; margin-left:10 ; flex-direction: row; }
  .thumb { width: 200; height: 200; }
  .title { text-align: center ; flex: 1; color: grey; font-size: 50; }
  .slider {
    margin: 18;
    width: 714;
    height: 230;
  }
  .slider-pages {
    flex-direction: row;
    width: 714;
    height: 200;
  }
</style>

<script>
module.exports = {
  data: {
    intervalValue:"1000",
    isShowIndicators:"true",
    isAutoPlay:"true",
    itemList: [
      {title: 'Java', pictureUrl: 'http://t.cn/RGE3uo9'},
      {title: 'Objective C', pictureUrl: 'http://t.cn/RGE31hq'},
      {title: 'JavaScript', pictureUrl: 'http://t.cn/RGE3AJt'}
    ]
  },
  methods: {
    goWeexSite: function () {
      this.$openURL('http://alibaba.github.io/weex/')
    }
  }
}
</script>
Open terminal and run the command again:
$ weex tech_list.we
You should see a slider prepend to our list.

More information about Slider component can be found here.
Just as the previous example, the slider can be rendered in native, easily in Weex playground, or in your App. Please refer the document for integrating Weex into your App.