Interactive Beam is aimed at integrating Apache Beam with Jupyter notebook to make pipeline prototyping and data exploration much faster and easier. It provides nice features including
Graphical representation
When a pipeline is executed on a Jupyter notebook, it instantly displays the pipeline as a directed acyclic graph. Sampled PCollection results will be added to the graph as the pipeline execution proceeds.
Fetching PCollections as list
PCollections can be fetched as a list from the pipeline result. This unique feature of InteractiveRunner makes it much easier to integrate Beam pipeline into data analysis.
p = beam.Pipeline(interactive_runner.InteractiveRunner())
pcoll = p | SomePTransform | AnotherPTransform
result = p.run().wait_until_finish()
pcoll_list = result.get(pcoll)  # This returns a list!
Faster re-execution
InteractiveRunner caches PCollection results of pipeline executed previously and re-uses it when the same pipeline is submitted again.
p = beam.Pipeline(interactive_runner.InteractiveRunner())
pcoll = p | SomePTransform | AnotherPTransform
result = p.run().wait_until_finish()

pcoll2 = pcoll | YetAnotherPTransform
result = p.run().wait_until_finish()  # <- only executes YetAnotherPTransform
Supported languages: Python
Supported platforms and caching location
| Caching locally | Caching on GCS | |
|---|---|---|
| Running on local machine | supported | supported |
| Running on Flink | / | supported |
Note: This guide assumes that you are somewhat familiar with key concepts in Beam programming model including Pipeline, PCollection, PTransform and PipelineRunner (see The Beam Model for a quick reference). For a more general and complete getting started guide, see Apache Beam Python SDK Quickstart.
Install Jupyter. You can either use the one that's included in Anaconda or
$ pip2 install --upgrade jupyter
Make sure you have Python2 Jupyter since Apache Beam only supports Python 2 at the time being.
Install, create and activate your virtualenv. (optional but recommended)
$ pip2 install --upgrade virtualenv
$ virtualenv -p python2 beam_venv_dir
$ source beam_venv_dir/bin/activate
If you are using shells other than bash (e.g. fish, csh), check beam_venv_dir/bin for other scripts that activates the virtual environment.
CHECK that the virtual environment is activated by running
$ echo $VIRTUAL_ENV  # This should point to beam_venv_dir
# or
$ which python  # This sould point to beam_venv_dir/bin/python
Set up Apache Beam Python. Make sure the virtual environment is activated when you run setup.py
$ git clone https://github.com/apache/beam
$ cd beam/sdks/python
$ python setup.py install
Install a IPython kernel for the virtual environment you've just created. Make sure the virtual environment is activate when you do this. You can skip this step if not using virtualenv.
$ python -m pip install ipykernel
$ python -m ipykernel install --user --name beam_venv_kernel --display-name "Python (beam_venv)"
CHECK that IPython kernel beam_venv_kernel is available for Jupyter to use.
$ jupyter kernelspec list
To start the notebook, simply run
$ jupyter notebook
This automatically opens your default web browser pointing to http://localhost:8888.
You can create a new notebook file by clicking New > Notebook: Python (beam_venv).
Or after you've already opend a notebook, change the kernel by clicking Kernel > Change Kernel > Python (beam_venv).
Voila! You can now run Beam pipelines interactively in your Jupyter notebook!
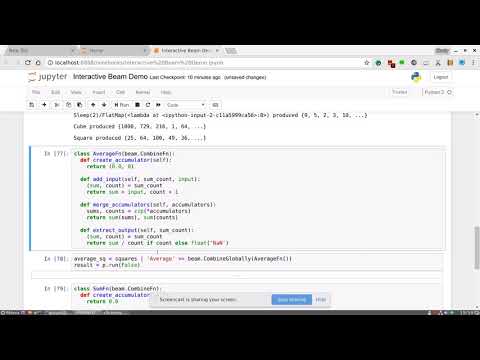
See Interactive Beam Example.ipynb for more examples.
By default, the caches are kept on the local file system of the machine in /tmp directory.
You can specify the caching directory as follows
cache_dir = 'some/path/to/dir'
runner = interactive_runner.InteractiveRunner(cache_dir=cache_dir)
p = beam.Pipeline(runner=runner)
You can choose to cache PCollections on Google Cloud Storage with a few credential settings.
Install Google Cloud SDK, and set your project, account and other configurations with the following command.
$ gcloud init
$ gcloud auth login
Install the following google cloud modules. Make sure the virtual environment is activated when you do this.
$ python -m pip install --upgrade apache-beam[gcp]
$ python -m pip install --upgrade google-cloud-storage
$ python -m pip install --upgrade google-cloud-dataflow
Make sure you have read and write access to that bucket when you specify to use that directory as caching directory.
cache_dir = 'gs://bucket-name/dir'
runner = interactive_runner.InteractiveRunner(cache_dir=cache_dir)
p = beam.Pipeline(runner=runner)
The platform where the pipeline is executed is decided by the underlying runner of InteractiveRunner. The default configuration runs on local machine with direct_runner.DirectRunner() as the underlying runner.
You can choose to run Interactive Beam on Flink with the following settings.
Install docker.
Build the SDK container and start the local FlinkService.
$ ./gradlew -p sdks/python/container docker
$ ./gradlew beam-runners-flink_2.11-job-server:runShadow  # Blocking
Run $ jupyter notebook in another terminal.
Use portable_runner.PortableRunner() as the underlying runner, while providing a pipeline_options.PortableOptions() to the pipeline as follows.
options = pipeline_options.PipelineOptions()
options.view_as(pipeline_options.PortableOptions).job_endpoint = 'localhost:8099'
options.view_as(pipeline_options.SetupOptions).sdk_location = 'container'
options.view_as(pipeline_options.DebugOptions).experiments = 'beam_fn_api'

cache_dir = 'gs://bucket-name/dir'
underlying_runner = portable_runner.PortableRunner()
runner = interactive_runner.InteractiveRunner(underlying_runner=underlying_runner, cache_dir=cache_dir)
p = beam.Pipeline(runner=runner, options=options)
Note: Python Flink Runner (combination of PortableRunner and FlinkService) is being actively developed now, so these setups and commands are subject to changes. This guide and Interactive Beam Running on Flink.ipynb capture the status of the world when it's last updated.
You can now interactively run Beam Python pipeline! Check out the Youtube demo