| --- |
| title: hmac-auth |
| keywords: |
| - Apache APISIX |
| - API Gateway |
| - Plugin |
| - HMAC Authentication |
| - hmac-auth |
| description: This document contains information about the Apache APISIX hmac-auth Plugin. |
| --- |
| |
| <!-- |
| # |
| # Licensed to the Apache Software Foundation (ASF) under one or more |
| # contributor license agreements. See the NOTICE file distributed with |
| # this work for additional information regarding copyright ownership. |
| # The ASF licenses this file to You under the Apache License, Version 2.0 |
| # (the "License"); you may not use this file except in compliance with |
| # the License. You may obtain a copy of the License at |
| # |
| # http://www.apache.org/licenses/LICENSE-2.0 |
| # |
| # Unless required by applicable law or agreed to in writing, software |
| # distributed under the License is distributed on an "AS IS" BASIS, |
| # WITHOUT WARRANTIES OR CONDITIONS OF ANY KIND, either express or implied. |
| # See the License for the specific language governing permissions and |
| # limitations under the License. |
| # |
| --> |
| |
| ## Description |
| |
| The `hmac-auth` Plugin adds [HMAC authentication](https://en.wikipedia.org/wiki/HMAC) to a Route or a Service. |
| |
| This Plugin works with a [Consumer](../terminology/consumer.md) object and a consumer of your API has to add its key to the request header for verification. |
| |
| ## Attributes |
| |
| | Name | Type | Required | Default | Valid values | Description | |
| |-----------------------|---------------|----------|---------------|---------------------------------------------|-----------------------------------------------------------------------------------------------------------------------------------------------------------------------------------------------------------| |
| | access_key | string | True | | | Unique key of a Consumer. If different Consumers have the same key, a request matching exception will occur. | |
| | secret_key | string | True | | | Used in pair with `access_key`. This field supports saving the value in Secret Manager using the [APISIX Secret](../terminology/secret.md) resource. | |
| | algorithm | string | False | "hmac-sha256" | ["hmac-sha1", "hmac-sha256", "hmac-sha512"] | Encryption algorithm used. | |
| | clock_skew | integer | False | 0 | | Clock skew allowed by the signature in seconds. Setting it to `0` will skip checking the date. | |
| | signed_headers | array[string] | False | | | List of headers to be used in the encryption algorithm. If specified, the client request can only contain the specified headers. When unspecified, all the headers are used in the encryption algorithm. | |
| | keep_headers | boolean | False | false | [ true, false ] | When set to `true`, keeps the request headers `X-HMAC-SIGNATURE`, `X-HMAC-ALGORITHM` and `X-HMAC-SIGNED-HEADERS` in the HTTP request after successful authentication. Otherwise, the headers are removed. | |
| | encode_uri_params | boolean | False | true | [ true, false ] | When set to `true` encodes the URI parameters. For example, `params1=hello%2Cworld` is encoded whereas, `params2=hello,world` is not. | |
| | validate_request_body | boolean | False | false | [ true, false ] | When set to `true`, validates the request body. | |
| | max_req_body | integer | False | 512 * 1024 | | Max size of the request body to allow. | |
| |
| NOTE: `encrypt_fields = {"secret_key"}` is also defined in the schema, which means that the field will be stored encrypted in etcd. See [encrypted storage fields](../plugin-develop.md#encrypted-storage-fields). |
| |
| ## Enable Plugin |
| |
| First we enable the Plugin on a Consumer object as shown below: |
| |
| :::note |
| You can fetch the `admin_key` from `config.yaml` and save to an environment variable with the following command: |
| |
| ```bash |
| admin_key=$(yq '.deployment.admin.admin_key[0].key' conf/config.yaml | sed 's/"//g') |
| ``` |
| |
| ::: |
| |
| ```shell |
| curl http://127.0.0.1:9180/apisix/admin/consumers -H "X-API-KEY: $admin_key" -X PUT -d ' |
| { |
| "username": "jack", |
| "plugins": { |
| "hmac-auth": { |
| "access_key": "user-key", |
| "secret_key": "my-secret-key", |
| "clock_skew": 0, |
| "signed_headers": ["User-Agent", "Accept-Language", "x-custom-a"] |
| } |
| } |
| }' |
| ``` |
| |
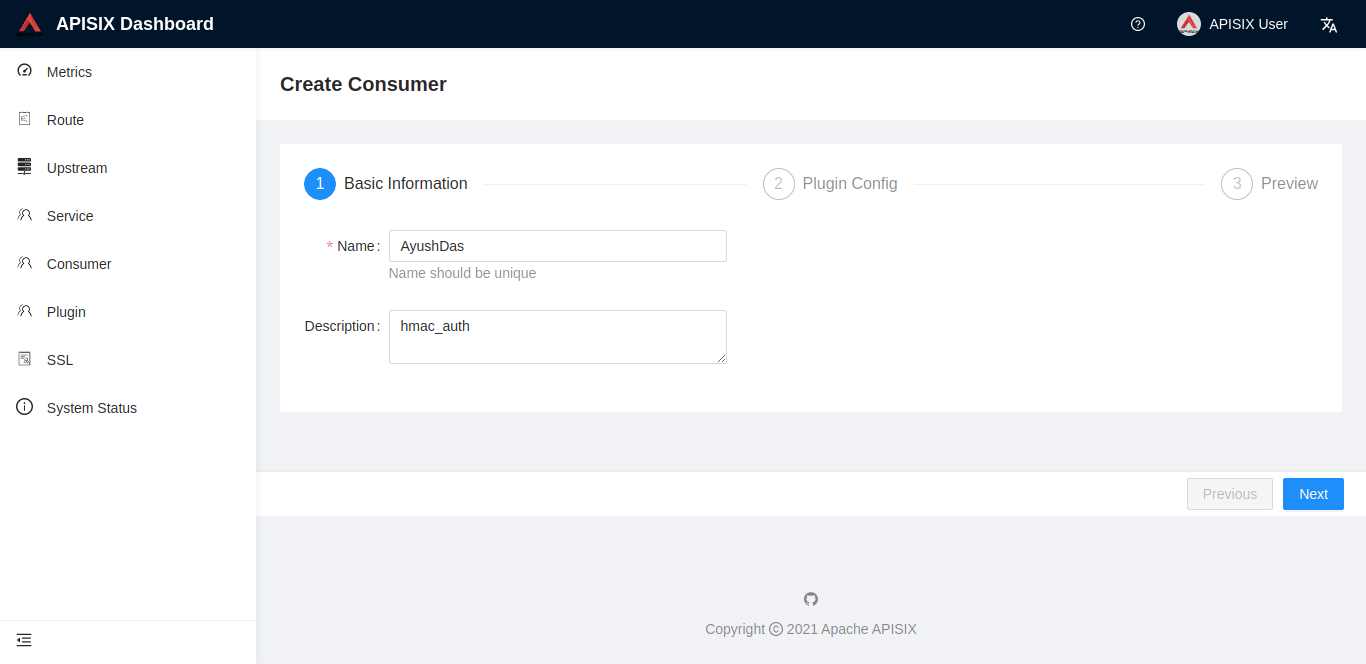
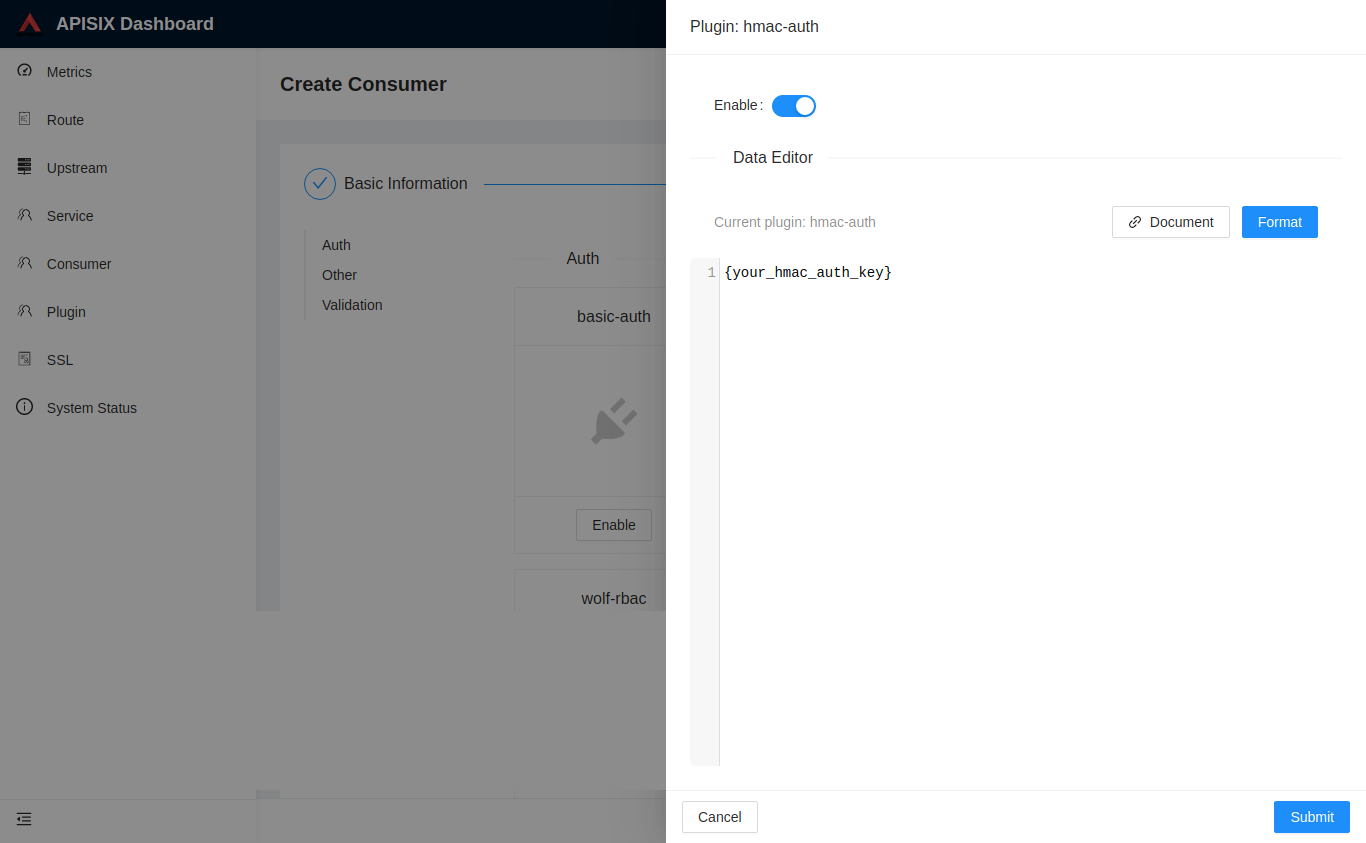
| You can also use the [APISIX Dashboard](/docs/dashboard/USER_GUIDE) to complete the operation through a web UI. |
| |
| <!-- |
|  |
| |
|  |
| --> |
| |
| Next, you can configure the Plugin to a Route or a Service: |
| |
| ```shell |
| curl http://127.0.0.1:9180/apisix/admin/routes/1 -H "X-API-KEY: $admin_key" -X PUT -d ' |
| { |
| "uri": "/index.html", |
| "plugins": { |
| "hmac-auth": {} |
| }, |
| "upstream": { |
| "type": "roundrobin", |
| "nodes": { |
| "127.0.0.1:1980": 1 |
| } |
| } |
| }' |
| ``` |
| |
| ## Example usage |
| |
| ### Generating the signature |
| |
| The formula for calculating the signature is `signature = HMAC-SHAx-HEX(secret_key, signing_string)`. |
| |
| In order to generate the signature, two parameters, `secret_key` and `signing_string` are required. The `secret_key` is configured by a Consumer and the `signing_string` is calculated as `signing_string = HTTP Method + \n + HTTP URI + \n + canonical_query_string + \n + access_key + \n + Date + \n + signed_headers_string`. The different terms in this calculation are explained below: |
| |
| - **HTTP Method** : HTTP request method in uppercase. For example, GET, PUT, POST etc. |
| - **HTTP URI** : HTTP URI. Should start with "/" and "/" denotes an empty path. |
| - **Date** : Date in the HTTP header in GMT format. |
| - **canonical_query_string** : The result of encoding the query string in the URL (the string "key1 = value1 & key2 = value2" after the "?" in the URL). |
| - **signed_headers_string** : Concatenation of the specified request headers. |
| |
| :::tip |
| |
| If any of the terms are missing, they are replaced by an empty string. |
| |
| ::: |
| |
| **The algorithm for generating `canonical_query_string` is described below:** |
| |
| 1. Extract the query terms from the URL. |
| 2. Split the query terms into key-value pairs by using `&` as the separator. |
| 3. If `encode_uri_params` is `true`: |
| 1. If there are only keys, the conversion formula is `uri_encode(key) + "="`. |
| 2. If there are both keys and values, the conversion formula is `uri_encode(key) + "=" + uri_encode(value)`. Here, the value can even be an empty string. |
| 3. Sort by key in lexicographic order and connect them with & symbol to generate the corresponding `canonical_query_string`. |
| 4. If `encode_uri_params` is `false`: |
| 1. If there are only keys, the conversion formula is `key + "="`. |
| 2. If there are both keys and values, the conversion formula is `key + "=" + value`. Here, the value can even be an empty string. |
| 3. Sort by key in lexicographic order and connect them with & symbol to generate the corresponding `canonical_query_string`. |
| |
| And the algorithm for generating the `signed_headers_string` is as follows: |
| |
| 1. Obtain the specified headers to add to the calculation from the request header. |
| 2. Splice the specified headers in `name:value` format. This is the `signed_headers_string`. |
| |
| ```plain |
| HeaderKey1 + ":" + HeaderValue1 + "\n"\+ |
| HeaderKey2 + ":" + HeaderValue2 + "\n"\+ |
| ... |
| HeaderKeyN + ":" + HeaderValueN + "\n" |
| ``` |
| |
| The example below shows signature string splicing: |
| |
| ```shell |
| curl -i http://127.0.0.1:9080/index.html?name=james&age=36 \ |
| -H "X-HMAC-SIGNED-HEADERS: User-Agent;x-custom-a" \ |
| -H "x-custom-a: test" \ |
| -H "User-Agent: curl/7.29.0" |
| ``` |
| |
| ### Explanation of signature generation formula process |
| |
| 1. The default HTTP Method for the above request is GET, which gives `signing_string` as |
| |
| ```plain |
| "GET" |
| ``` |
| |
| 2. The requested URI is `/index.html`, and the `signing_string` is obtained from the HTTP Method + \n + HTTP URI as |
| |
| ```plain |
| "GET |
| /index.html" |
| ``` |
| |
| 3. The query item in the URL is `name=james&age=36`, assuming that `encode_uri_params` is false. |
| According to the algorithm of `canonical_query_string`, the focus is on dictionary sorting of `key` to get `age=36&name=james`. |
| |
| ```plain |
| "GET |
| /index.html |
| age=36&name=james" |
| ``` |
| |
| 4. The `access_key` is `user-key`, and the `signing_string` is obtained from HTTP Method + \n + HTTP URI + \n + canonical_query_string + \n + access_key as |
| |
| ```plain |
| "GET |
| /index.html |
| age=36&name=james |
| user-key" |
| ``` |
| |
| 5. Date is in GMT format, as in `Tue, 19 Jan 2021 11:33:20 GMT`, and the `signing_string` is obtained from the HTTP Method + \n + HTTP URI + \n + canonical_query_string + \n + access_key + \n + Date as |
| |
| ```plain |
| "GET |
| /index.html |
| age=36&name=james |
| user-key |
| Tue, 19 Jan 2021 11:33:20 GMT" |
| ``` |
| |
| 6. `signed_headers_string` is used to specify the headers involved in the signature, which in the above example includes `User-Agent: curl/7.29.0` and `x-custom-a: test`. |
| |
| And the `signing_string` is obtained from the HTTP Method + \n + HTTP URI + \n + canonical_query_string + \n + access_key + \n + Date + \n as |
| |
| ```plain |
| "GET |
| /index.html |
| age=36&name=james |
| user-key |
| Tue, 19 Jan 2021 11:33:20 GMT |
| User-Agent:curl/7.29.0 |
| x-custom-a:test |
| " |
| ``` |
| |
| The Python code below shows how to generate the signature: |
| |
| ```python |
| import base64 |
| import hashlib |
| import hmac |
| |
| secret = bytes('my-secret-key', 'utf-8') |
| message = bytes("""GET |
| /index.html |
| age=36&name=james |
| user-key |
| Tue, 19 Jan 2021 11:33:20 GMT |
| User-Agent:curl/7.29.0 |
| x-custom-a:test |
| """, 'utf-8') |
| |
| hash = hmac.new(secret, message, hashlib.sha256) |
| |
| # to lowercase base64 |
| print(base64.b64encode(hash.digest())) |
| ``` |
| |
| | Type | Hash | |
| | --------- | -------------------------------------------- | |
| | SIGNATURE | 8XV1GB7Tq23OJcoz6wjqTs4ZLxr9DiLoY4PxzScWGYg= | |
| |
| You can also refer to [Generating HMAC signatures](../examples/plugins-hmac-auth-generate-signature.md) for how to generate signatures for different programming languages. |
| |
| ### Validating request body |
| |
| When the `validate_request_body` attribute is set to `true`, the Plugin will calculate the HMAC-SHA value of the request body and checks it again the `X-HMAC-DIGEST` header: |
| |
| ``` |
| X-HMAC-DIGEST: base64(hmac-sha(<body>)) |
| ``` |
| |
| If there is no request body, you can set the `X-HMAC-DIGEST` value to the HMAC-SHA of an empty string. |
| |
| :::note |
| |
| To calculate the digest of the request body, the Plugin will load the body to memory which can cause high memory consumption if the body is large. To avoid this, you can limit the max allowed body size by configuring `max_req_body` (default 512KB). Request bodies larger than the set size will be rejected. |
| |
| ::: |
| |
| ### Using the generated signature to make requests |
| |
| You can now use the generated signature to make requests as shown below: |
| |
| ```shell |
| curl -i "http://127.0.0.1:9080/index.html?name=james&age=36" \ |
| -H "X-HMAC-SIGNATURE: 8XV1GB7Tq23OJcoz6wjqTs4ZLxr9DiLoY4PxzScWGYg=" \ |
| -H "X-HMAC-ALGORITHM: hmac-sha256" \ |
| -H "X-HMAC-ACCESS-KEY: user-key" \ |
| -H "Date: Tue, 19 Jan 2021 11:33:20 GMT" \ |
| -H "X-HMAC-SIGNED-HEADERS: User-Agent;x-custom-a" \ |
| -H "x-custom-a: test" \ |
| -H "User-Agent: curl/7.29.0" |
| ``` |
| |
| ```shell |
| HTTP/1.1 200 OK |
| Content-Type: text/html; charset=utf-8 |
| Transfer-Encoding: chunked |
| Connection: keep-alive |
| Date: Tue, 19 Jan 2021 11:33:20 GMT |
| Server: APISIX/2.2 |
| ...... |
| ``` |
| |
| The signature can be put in the `Authorization` header of the request: |
| |
| ```shell |
| curl http://127.0.0.1:9080/index.html -H 'Authorization: hmac-auth-v1# + ACCESS_KEY + # + base64_encode(SIGNATURE) + # + ALGORITHM + # + DATE + # + SIGNED_HEADERS' -i |
| ``` |
| |
| ```shell |
| HTTP/1.1 200 OK |
| Content-Type: text/html |
| Content-Length: 13175 |
| ... |
| Accept-Ranges: bytes |
| |
| <!DOCTYPE html> |
| <html lang="cn"> |
| ... |
| ``` |
| |
| Or, the signature can be placed separately in another request header: |
| |
| ```shell |
| curl http://127.0.0.1:9080/index.html -H 'X-HMAC-SIGNATURE: base64_encode(SIGNATURE)' -H 'X-HMAC-ALGORITHM: ALGORITHM' -H 'Date: DATE' -H 'X-HMAC-ACCESS-KEY: ACCESS_KEY' -H 'X-HMAC-SIGNED-HEADERS: SIGNED_HEADERS' -i |
| ``` |
| |
| ```shell |
| HTTP/1.1 200 OK |
| Content-Type: text/html |
| Content-Length: 13175 |
| ... |
| Accept-Ranges: bytes |
| |
| <!DOCTYPE html> |
| <html lang="cn"> |
| ``` |
| |
| :::note |
| |
| 1. If there are multiple signed headers, they must be separated by `;`. For example, `x-custom-header-a;x-custom-header-b`. |
| 2. `SIGNATURE` needs to be base64 encoded for encryption. |
| |
| ::: |
| |
| ### Using custom header keys |
| |
| You can use custom header keys for the auth parameters by changing the `plugin_attr` in your configuration file (`conf/config.yaml`): |
| |
| ```yaml |
| plugin_attr: |
| hmac-auth: |
| signature_key: X-APISIX-HMAC-SIGNATURE |
| algorithm_key: X-APISIX-HMAC-ALGORITHM |
| date_key: X-APISIX-DATE |
| access_key: X-APISIX-HMAC-ACCESS-KEY |
| signed_headers_key: X-APISIX-HMAC-SIGNED-HEADERS |
| body_digest_key: X-APISIX-HMAC-BODY-DIGEST |
| ``` |
| |
| Now you can use the new keys while making a request: |
| |
| ```shell |
| curl http://127.0.0.1:9080/index.html \ |
| -H 'X-APISIX-HMAC-SIGNATURE: base64_encode(SIGNATURE)' \ |
| -H 'X-APISIX-HMAC-ALGORITHM: ALGORITHM' \ |
| -H 'X-APISIX-DATE: DATE' \ |
| -H 'X-APISIX-HMAC-ACCESS-KEY: ACCESS_KEY' \ |
| -H 'X-APISIX-HMAC-SIGNED-HEADERS: SIGNED_HEADERS' \ |
| -H 'X-APISIX-HMAC-BODY-DIGEST: BODY_DIGEST' -i |
| ``` |
| |
| ```shell |
| HTTP/1.1 200 OK |
| Content-Type: text/html |
| Content-Length: 13175 |
| ... |
| Accept-Ranges: bytes |
| |
| <!DOCTYPE html> |
| <html lang="cn"> |
| ``` |
| |
| ## Delete Plugin |
| |
| To remove the `hmac-auth` Plugin, you can delete the corresponding JSON configuration from the Plugin configuration. APISIX will automatically reload and you do not have to restart for this to take effect. |
| |
| ```shell |
| curl http://127.0.0.1:9180/apisix/admin/routes/1 -H "X-API-KEY: $admin_key" -X PUT -d ' |
| { |
| "uri": "/index.html", |
| "plugins": {}, |
| "upstream": { |
| "type": "roundrobin", |
| "nodes": { |
| "127.0.0.1:1980": 1 |
| } |
| } |
| }' |
| ``` |