| --- |
| title: 密钥验证 |
| slug: /getting-started/key-authentication |
| --- |
| |
| <head> |
| <link rel="canonical" href="https://docs.api7.ai/apisix/getting-started/key-authentication" /> |
| </head> |
| |
| > 本教程由 [API7.ai](https://api7.ai/) 编写。 |
| |
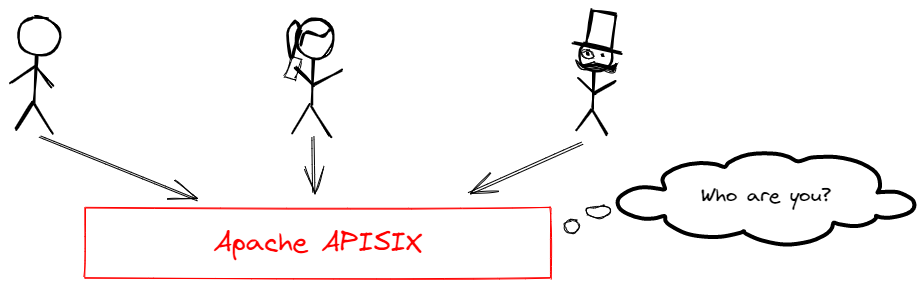
| API 网关主要作用是连接 API 消费者和提供者。出于安全考虑,在访问内部资源之前,应先对消费者进行身份验证和授权。 |
| |
|  |
| |
| APISIX 拥有灵活的插件扩展系统,目前有很多可用于用户身份验证和授权的插件。例如: |
| |
| - [Key Authentication](https://apisix.apache.org/zh/docs/apisix/plugins/key-auth/) |
| - [Basic Authentication](https://apisix.apache.org/zh/docs/apisix/plugins/basic-auth/) |
| - [JSON Web Token (JWT) Authentication](https://apisix.apache.org/zh/docs/apisix/plugins/jwt-auth/) |
| - [Keycloak](https://apisix.apache.org/zh/docs/apisix/plugins/authz-keycloak/) |
| - [Casdoor](https://apisix.apache.org/zh/docs/apisix/plugins/authz-casdoor/) |
| - [Wolf RBAC](https://apisix.apache.org/zh/docs/apisix/plugins/wolf-rbac/) |
| - [OpenID Connect](https://apisix.apache.org/zh/docs/apisix/plugins/openid-connect/) |
| - [Central Authentication Service (CAS)](https://apisix.apache.org/zh/docs/apisix/plugins/cas-auth/) |
| - [HMAC](https://apisix.apache.org/zh/docs/apisix/plugins/hmac-auth/) |
| - [Casbin](https://apisix.apache.org/zh/docs/apisix/plugins/authz-casbin/) |
| - [LDAP](https://apisix.apache.org/zh/docs/apisix/plugins/ldap-auth/) |
| - [Open Policy Agent (OPA)](https://apisix.apache.org/zh/docs/apisix/plugins/opa/) |
| - [Forward Authentication](https://apisix.apache.org/zh/docs/apisix/plugins/forward-auth/) |
| - [Multiple Authentications](https://apisix.apache.org/docs/apisix/plugins/multi-auth/) |
| |
| 本教程中,你将创建一个带有 _密钥验证_ 插件的 _消费者_,并学习如何启用和停用身份验证插件。 |
| |
| ## Consumer 是什么 |
| |
| Consumer(也称之为消费者)是指使用 API 的应用或开发人员。 |
| |
| 在 APISIX 中,消费者需要一个全局唯一的 _名称_,并从上面的列表中选择一个身份验证 _插件_。 |
| |
| ## Key Authentication 是什么 |
| |
| Key Authentication(也称之为密钥验证)是一个相对比较简单但是应用广泛的身份验证方法,它的设计思路如下: |
| |
| 1. 管理员为路由添加一个身份验证密钥(API 密钥)。 |
| 2. API 消费者在发送请求时,在查询字符串或者请求头中添加密钥。 |
| |
| ## 启用 Key Authentication |
| |
| ### 前置条件 |
| |
| 1. 参考[快入门指南](./README.md)完成 APISIX 的安装。 |
| 2. 完成[配置路由](./configure-routes.md#route-是什么)。 |
| |
| ### 创建消费者 |
| |
| 创建一个名为 `tom` 的消费者,并启用 `key-auth` 插件,密钥设置为 `secret-key`。所有携带密钥 `secret-key` 的请求都会被识别为消费者 `tom`。 |
| |
| :::caution |
| |
| 生产环境请使用复杂的密钥。 |
| |
| ::: |
| |
| ```shell |
| curl -i "http://127.0.0.1:9180/apisix/admin/consumers" -X PUT -d ' |
| { |
| "username": "tom", |
| "plugins": { |
| "key-auth": { |
| "key": "secret-key" |
| } |
| } |
| }' |
| ``` |
| |
| 如果消费者创建成功,你将得到返回 `HTTP/1.1 201 Created`。 |
| |
| ### 启用 Authentication |
| |
| 在教程[配置路由](./configure-routes.md)中,我们已经创建了路由 `getting-started-ip`,我们通过 `PATCH` 方法为该路由增加 `key-auth` 插件: |
| |
| ```shell |
| curl -i "http://127.0.0.1:9180/apisix/admin/routes/getting-started-ip" -X PATCH -d ' |
| { |
| "plugins": { |
| "key-auth": {} |
| } |
| }' |
| ``` |
| |
| 如果增加插件成功,你将得到返回 `HTTP/1.1 201 Created`。 |
| |
| ### 验证 |
| |
| 我们可以在以下场景中进行验证: |
| |
| #### 1. 发送不带任何密钥的请求 |
| |
| 发送一个不带请求头 `apikey` 的请求。 |
| |
| ```shell |
| curl -i "http://127.0.0.1:9080/ip" |
| ``` |
| |
| 如果你已经启用了密钥身份验证,你将会得到返回 `HTTP/1.1 401 Unauthorized`,即未授权。 |
| |
| ```text |
| HTTP/1.1 401 Unauthorized |
| Date: Wed, 08 Feb 2023 09:38:36 GMT |
| Content-Type: text/plain; charset=utf-8 |
| Transfer-Encoding: chunked |
| Connection: keep-alive |
| Server: APISIX/3.1.0 |
| ``` |
| |
| #### 2. 发送携带错误密钥的请求 |
| |
| 发送一个携带错误密钥(比如 `wrong-key`)的请求。 |
| |
| ```shell |
| curl -i "http://127.0.0.1:9080/ip" -H 'apikey: wrong-key' |
| ``` |
| |
| 如果密钥错误,你也将得到返回 `HTTP/1.1 401 Unauthorized`,即未授权。 |
| |
| ```text |
| HTTP/1.1 401 Unauthorized |
| Date: Wed, 08 Feb 2023 09:38:27 GMT |
| Content-Type: text/plain; charset=utf-8 |
| Transfer-Encoding: chunked |
| Connection: keep-alive |
| Server: APISIX/3.1.0 |
| ``` |
| |
| #### 3. 发送携带正确密钥的请求 |
| |
| 发送一个携带正确密钥(`secret-key`)的请求。 |
| |
| ```shell |
| curl -i "http://127.0.0.1:9080/ip" -H 'apikey: secret-key' |
| ``` |
| |
| 你将会得到返回 `HTTP/1.1 200 OK`。 |
| |
| ```text |
| HTTP/1.1 200 OK |
| Content-Type: application/json |
| Content-Length: 44 |
| Connection: keep-alive |
| Date: Thu, 09 Feb 2023 03:27:57 GMT |
| Access-Control-Allow-Origin: * |
| Access-Control-Allow-Credentials: true |
| Server: APISIX/3.1.0 |
| ``` |
| |
| ### 禁用 Authentication |
| |
| 将参数设置 `_meta.disable` 为 `true`,即可禁用密钥验证插件。 |
| |
| ```shell |
| curl "http://127.0.0.1:9180/apisix/admin/routes/getting-started-ip" -X PATCH -d ' |
| { |
| "plugins": { |
| "key-auth": { |
| "_meta": { |
| "disable": true |
| } |
| } |
| } |
| }' |
| ``` |
| |
| 你可以发送一个不带任何密钥的请求来验证: |
| |
| ```shell |
| curl -i "http://127.0.0.1:9080/ip" |
| ``` |
| |
| 因为你已经禁用了密钥验证插件,所以你将会得到返回 `HTTP/1.1 200 OK`。 |
| |
| ## 下一步 |
| |
| 你已经学习了如何为路由配置密钥验证。在下个教程中,你将学习如何配置限速。 |