| --- |
| title: WebSocket Authentication |
| keywords: |
| - API Gateway |
| - Apache APISIX |
| - WebSocket |
| - Authentication |
| description: This article is a guide on how to configure authentication for WebSocket connections. |
| --- |
| |
| <!-- |
| # |
| # Licensed to the Apache Software Foundation (ASF) under one or more |
| # contributor license agreements. See the NOTICE file distributed with |
| # this work for additional information regarding copyright ownership. |
| # The ASF licenses this file to You under the Apache License, Version 2.0 |
| # (the "License"); you may not use this file except in compliance with |
| # the License. You may obtain a copy of the License at |
| # |
| # http://www.apache.org/licenses/LICENSE-2.0 |
| # |
| # Unless required by applicable law or agreed to in writing, software |
| # distributed under the License is distributed on an "AS IS" BASIS, |
| # WITHOUT WARRANTIES OR CONDITIONS OF ANY KIND, either express or implied. |
| # See the License for the specific language governing permissions and |
| # limitations under the License. |
| # |
| --> |
| |
| Apache APISIX supports [WebSocket](https://en.wikipedia.org/wiki/WebSocket) traffic, but the WebSocket protocol doesn't handle authentication. This article guides you on how to configure authentication for WebSocket connections using Apache APISIX. |
| |
| ## WebSocket Protocol |
| |
| To establish a WebSocket connection, the client sends a WebSocket handshake request, for which the server returns a WebSocket handshake response as shown below: |
| |
| ```text title="Client request" |
| GET /chat HTTP/1.1 |
| Host: server.example.com |
| Upgrade: websocket |
| Connection: Upgrade |
| Sec-WebSocket-Key: x3JJHMbDL1EzLkh9GBhXDw== |
| Sec-WebSocket-Protocol: chat, superchat |
| Sec-WebSocket-Version: 13 |
| Origin: http://example.com |
| ``` |
| |
| ```text title="Server response" |
| HTTP/1.1 101 Switching Protocols |
| Upgrade: websocket |
| Connection: Upgrade |
| Sec-WebSocket-Accept: HSmrc0sMlYUkAGmm5OPpG2HaGWk= |
| Sec-WebSocket-Protocol: chat |
| ``` |
| |
| The handshake workflow is shown below: |
| |
| 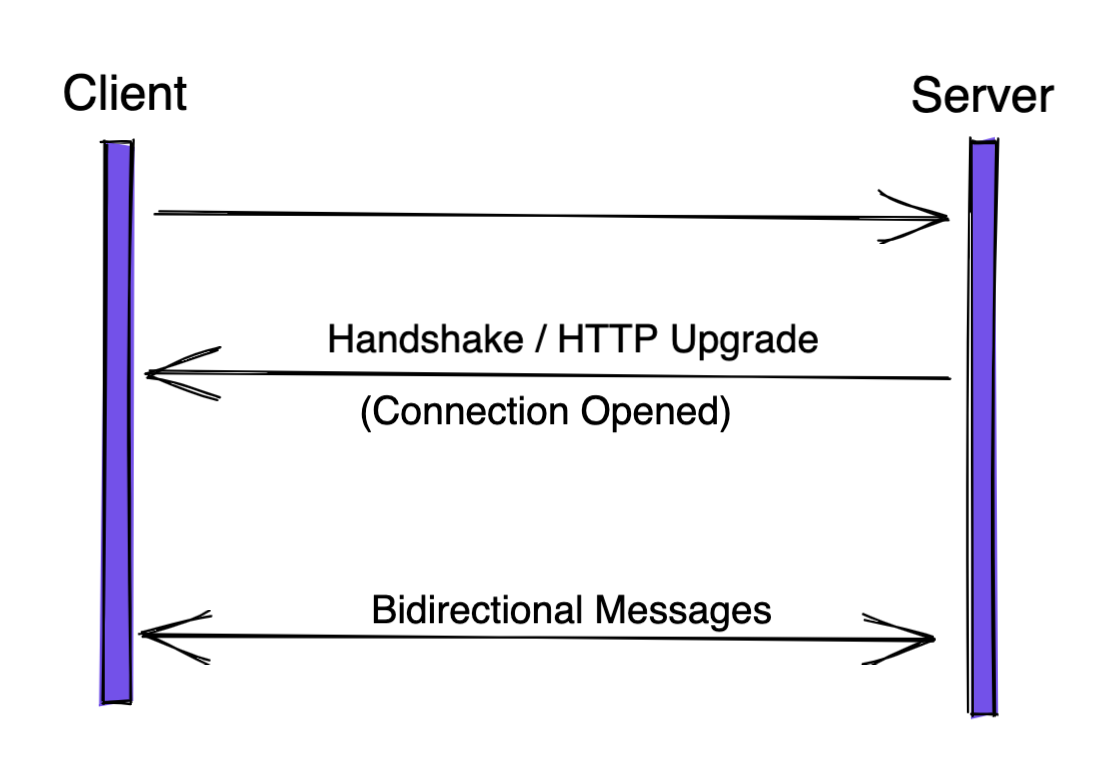 |
| |
| ## WebSocket Authentication |
| |
| APISIX supports several authentication methods like [basic-auth](https://apisix.apache.org/docs/apisix/plugins/basic-auth/), [key-auth](https://apisix.apache.org/docs/apisix/plugins/key-auth/), and [jwt-auth](https://apisix.apache.org/docs/apisix/plugins/jwt-auth/). |
| |
| While establishing connections from the client to server in the _handshake_ phase, APISIX first checks its authentication information before choosing to forward the request or deny it. |
| |
| ## Prerequisites |
| |
| Before you move on, make sure you have: |
| |
| 1. A WebSocket server as the Upstream. This article uses [Postman's public echo service](https://blog.postman.com/introducing-postman-websocket-echo-service/): `wss://ws.postman-echo.com/raw`. |
| 2. APISIX 3.0 installed. |
| |
| ## Configuring Authentication |
| |
| ### Create a Route |
| |
| First we will create a Route to the Upstream echo service. |
| |
| Since the Upstream uses wss protocol, the scheme is set to `https`. We should also set `enable_websocket` to `true`. |
| |
| In this tutorial, we will use the [key-auth](https://apisix.apache.org/docs/apisix/plugins/key-auth/) Plugin. This would work similarly for other authentication methods: |
| |
| ```shell |
| curl --location --request PUT 'http://127.0.0.1:9180/apisix/admin/routes/1' \ |
| --header 'X-API-KEY: edd1c9f034335f136f87ad84b625c8f1' \ |
| --header 'Content-Type: application/json' \ |
| --data-raw '{ |
| "uri": "/*", |
| "methods": ["GET"], |
| "enable_websocket": true, |
| "upstream": { |
| "type": "roundrobin", |
| "nodes": { |
| "ws.postman-echo.com:443": 1 |
| }, |
| "scheme": "https" |
| }, |
| "plugins": { |
| "key-auth": {} |
| } |
| }' |
| ``` |
| |
| ### Create a Consumer |
| |
| We will now create a [Consumer](https://apisix.apache.org/docs/apisix/terminology/consumer/) and add a key `this_is_the_key`. A user would now need to use this key configured in the Consumer object to access the API. |
| |
| ```sh |
| curl --location --request PUT 'http://127.0.0.1:9180/apisix/admin/consumers/jack' \ |
| --header 'X-API-KEY: edd1c9f034335f136f87ad84b625c8f1' \ |
| --header 'Content-Type: application/json' \ |
| --data-raw '{ |
| "username": "jack", |
| "plugins": { |
| "key-auth": { |
| "key": "this_is_the_key" |
| } |
| } |
| }' |
| ``` |
| |
| ## Testing the Route |
| |
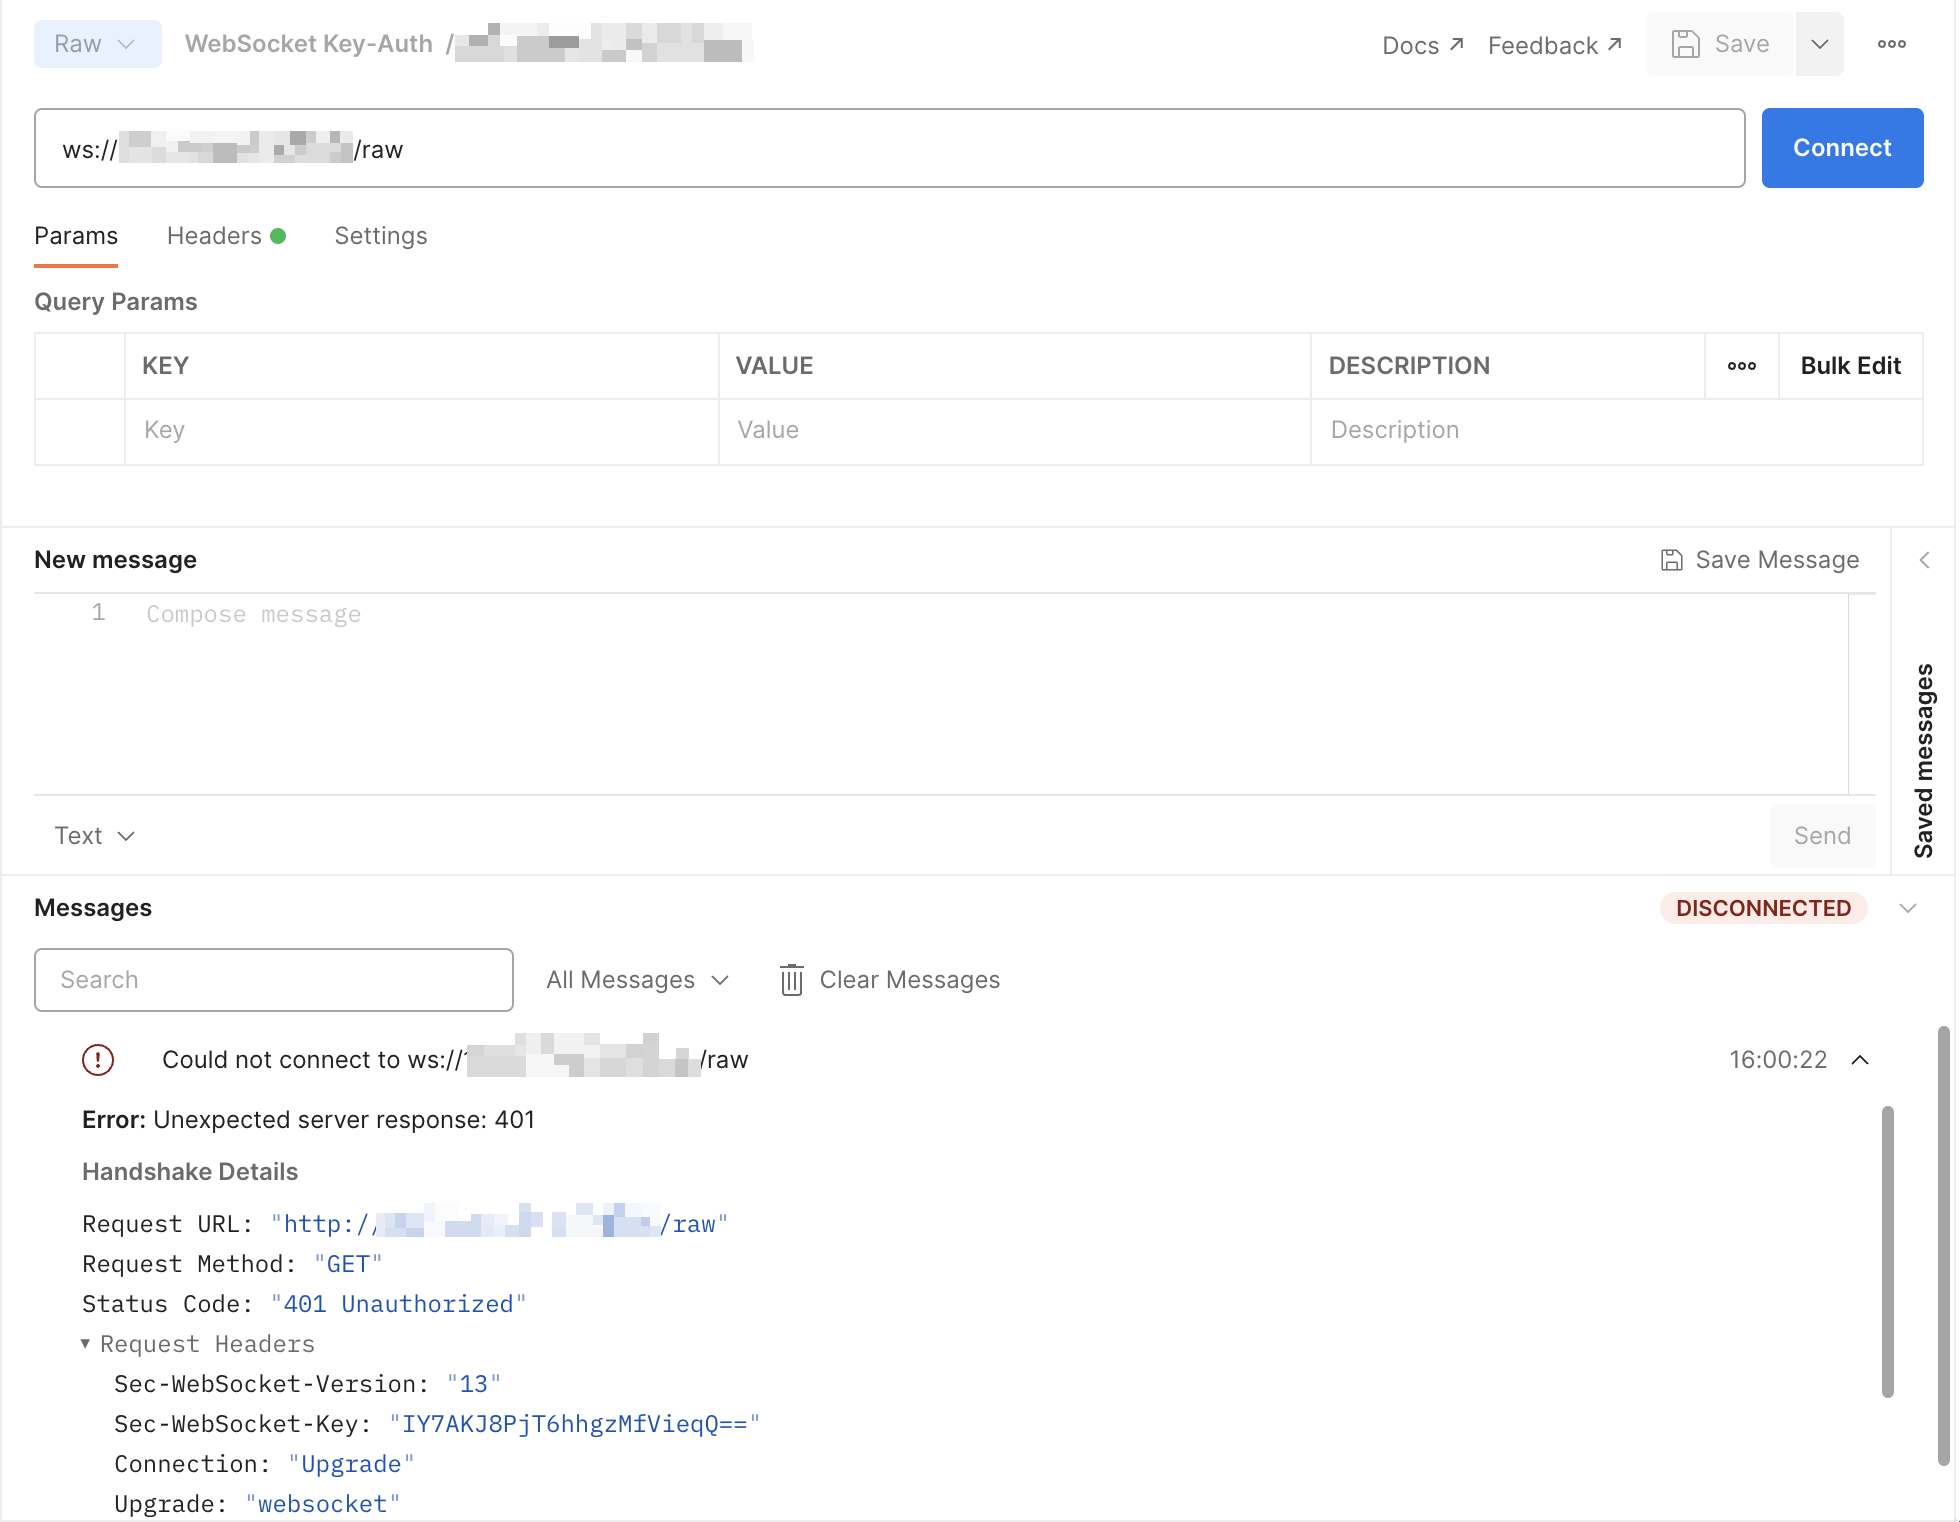
| Now, if you try to connect `ws://127.0.0.1:9080/raw` without the `apikey` header or an incorrect key, APISIX will return a `401 Unauthorized`. |
| |
|  |
| |
| To authenticate, you can add the header `apikey` with the value `this_is_the_key`: |
| |
| 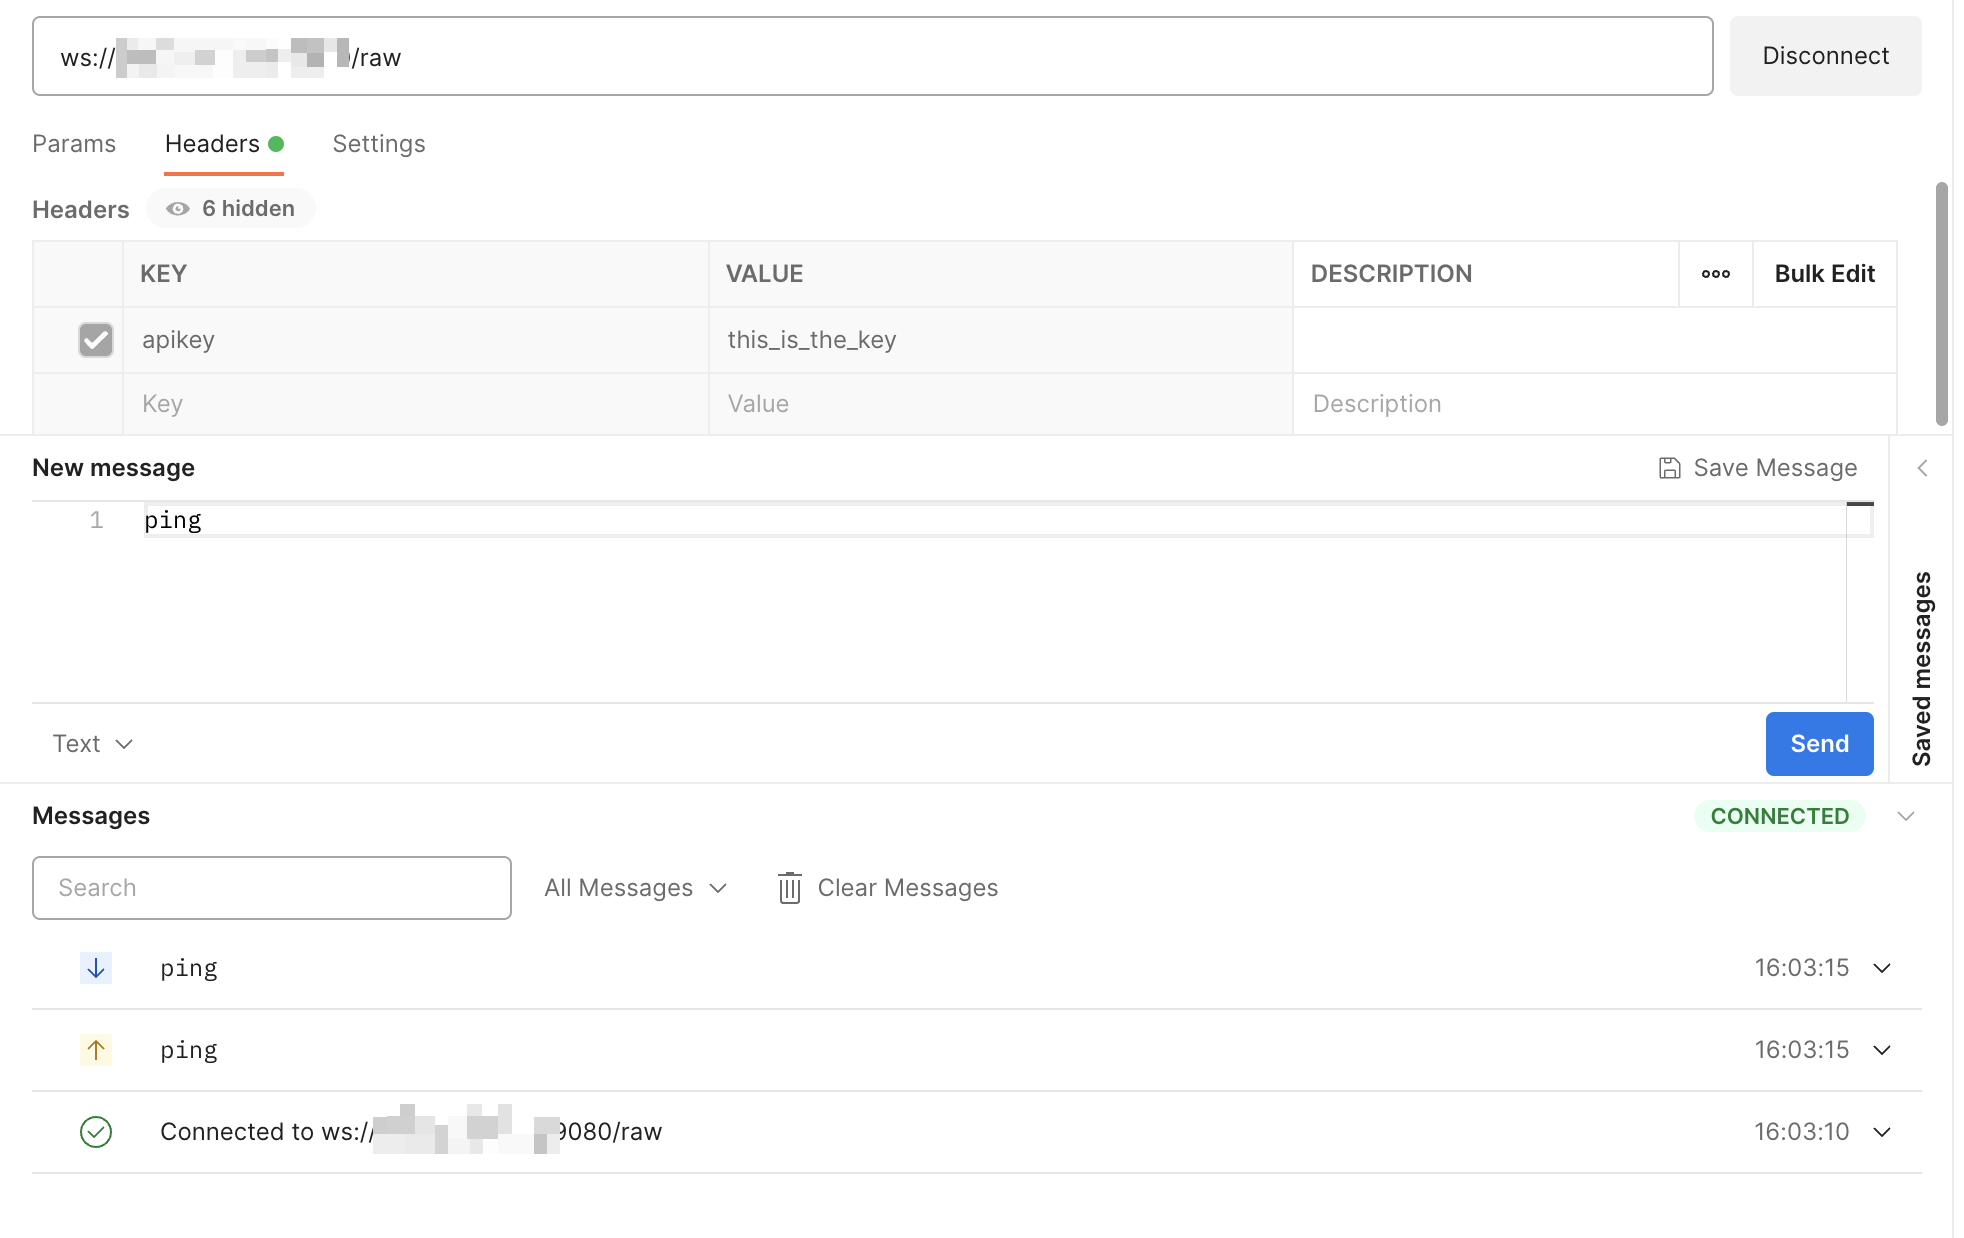 |