| --- |
| title: Set Up SSO with Keycloak (OIDC) |
| keywords: |
| - APISIX |
| - API Gateway |
| - OIDC |
| - Keycloak |
| description: This article describes how to integrate APISIX with Keycloak using the authorization code grant, client credentials grant, and password grant, using the openid-connect Plugin. |
| --- |
| |
| <!-- |
| # |
| # Licensed to the Apache Software Foundation (ASF) under one or more |
| # contributor license agreements. See the NOTICE file distributed with |
| # this work for additional information regarding copyright ownership. |
| # The ASF licenses this file to You under the Apache License, Version 2.0 |
| # (the "License"); you may not use this file except in compliance with |
| # the License. You may obtain a copy of the License at |
| # |
| # http://www.apache.org/licenses/LICENSE-2.0 |
| # |
| # Unless required by applicable law or agreed to in writing, software |
| # distributed under the License is distributed on an "AS IS" BASIS, |
| # WITHOUT WARRANTIES OR CONDITIONS OF ANY KIND, either express or implied. |
| # See the License for the specific language governing permissions and |
| # limitations under the License. |
| # |
| --> |
| |
| [OpenID Connect (OIDC)](https://openid.net/connect/) is a simple identity layer on top of the [OAuth 2.0 protocol](https://www.rfc-editor.org/rfc/rfc6749). It allows clients to verify the identity of end users based on the authentication performed by the identity provider, as well as to obtain basic profile information about end users in an interoperable and REST-like manner. With APISIX and [Keycloak](https://www.keycloak.org/), you can implement OIDC-based authentication processes to protect your APIs and enable single sign-on (SSO). |
| |
| [Keycloak](https://www.keycloak.org/) is an open-source identity and access management solution for modern applications and services. Keycloak supports single sign-on (SSO), which enables services to interface with Keycloak through protocols such as OIDC and OAuth 2.0. In addition, Keycloak also supports delegating authentication to third party identity providers such as Facebook and Google. |
| |
| This tutorial will show you how to integrate APISIX with Keycloak using [authorization code grant](#implement-authorization-code-grant), [client credentials grant](#implement-client-credentials-grant), and [password grant](#implement-password-grant), using the [`openid-connect`](/hub/openid-connect) Plugin. |
| |
| ## Configure Keycloak |
| |
| Start a Keycloak instance named `apisix-quickstart-keycloak` with the administrator name `quickstart-admin` and password `quickstart-admin-pass` in [development mode](https://www.keycloak.org/server/configuration#_starting_keycloak_in_development_mode) in Docker. The exposed port is mapped to `8080` on the host machine: |
| |
| ```shell |
| docker run -d --name "apisix-quickstart-keycloak" \ |
| -e 'KEYCLOAK_ADMIN=quickstart-admin' \ |
| -e 'KEYCLOAK_ADMIN_PASSWORD=quickstart-admin-pass' \ |
| -p 8080:8080 \ |
| quay.io/keycloak/keycloak:18.0.2 start-dev |
| ``` |
| |
| Keycloak provides an easy-to-use web UI to help the administrator manage all resources, such as clients, roles, and users. |
| |
| Navigate to `http://localhost:8080` in browser to access the Keycloak web page, then click __Administration Console__: |
| |
| 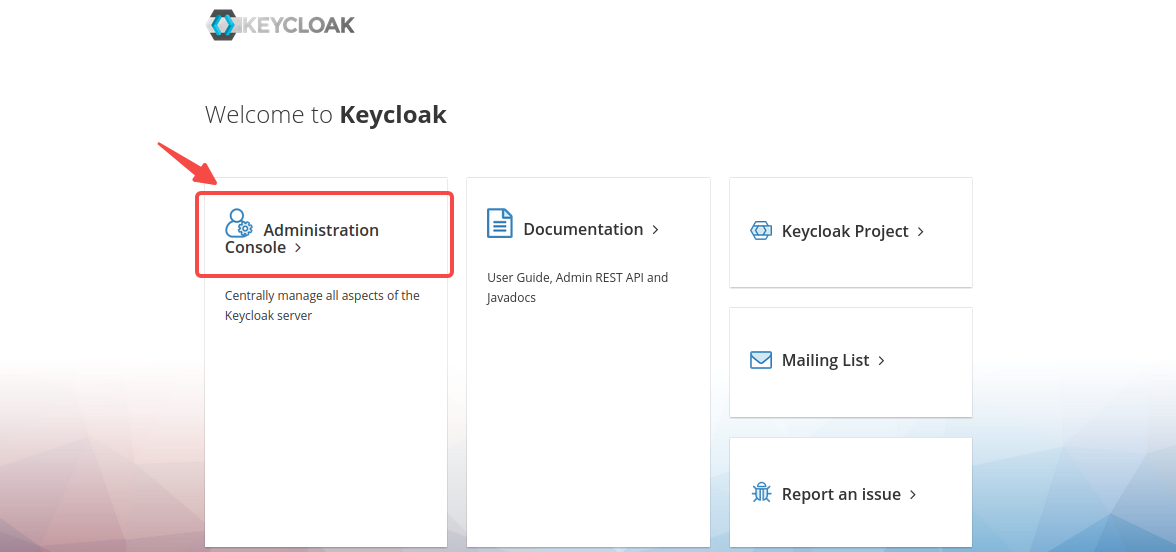 |
| |
| Enter the administrator’s username `quickstart-admin` and password `quickstart-admin-pass` and sign in: |
| |
| 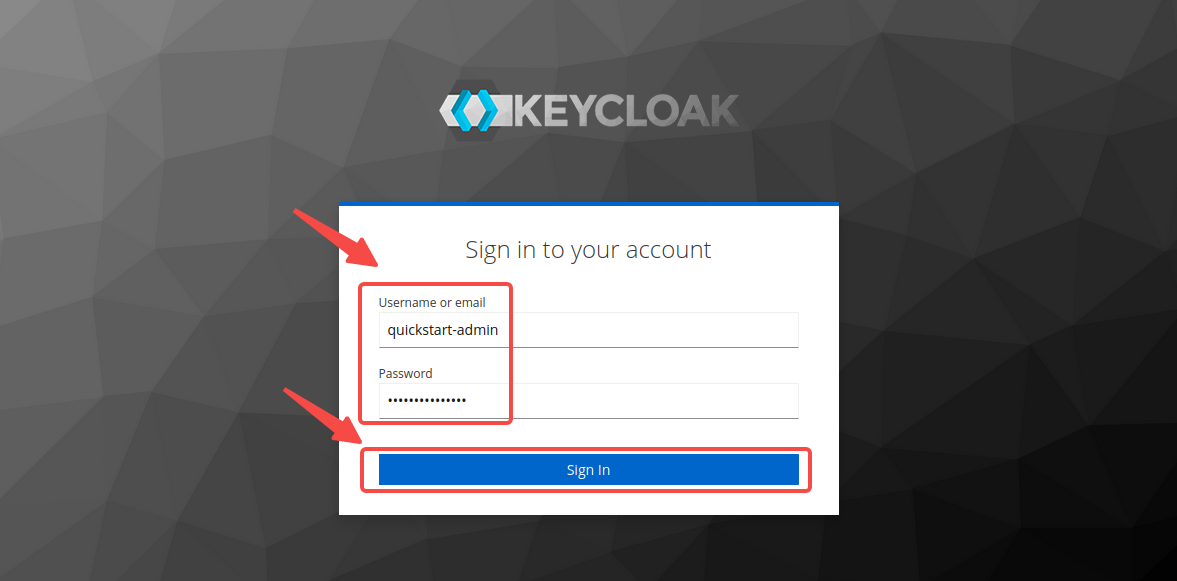 |
| |
| You need to maintain the login status to configure Keycloak during the following steps. |
| |
| ### Create a Realm |
| |
| _Realms_ in Keycloak are workspaces to manage resources such as users, credentials, and roles. The resources in different realms are isolated from each other. You need to create a realm named `quickstart-realm` for APISIX. |
| |
| In the left menu, hover over **Master**, and select __Add realm__ in the dropdown: |
| |
| 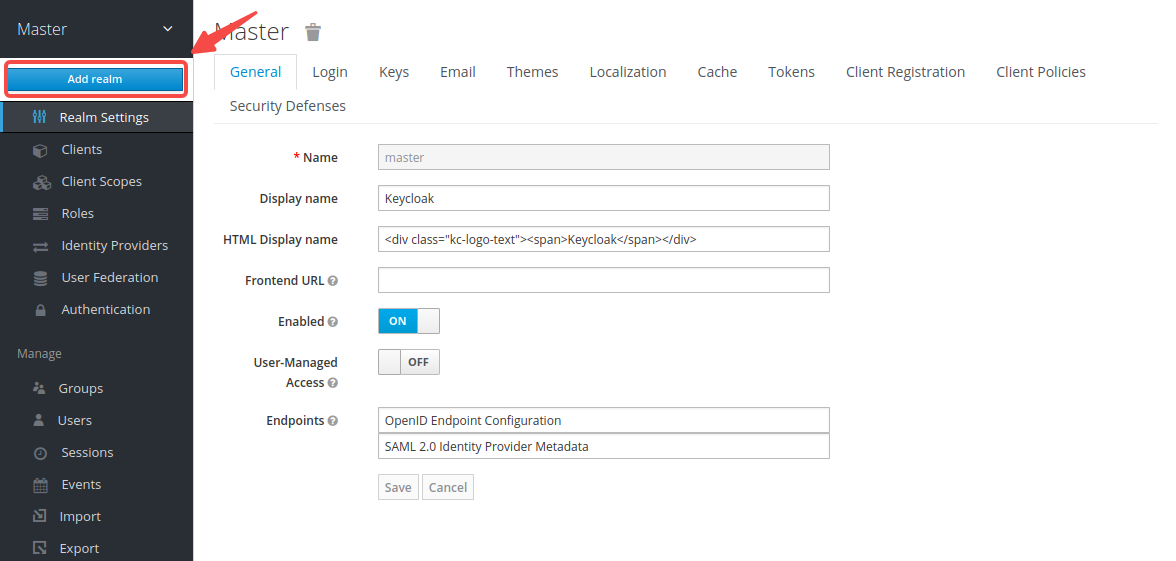 |
| |
| Enter the realm name `quickstart-realm` and click __Create__ to create it: |
| |
|  |
| |
| ### Create a Client |
| |
| _Clients_ in Keycloak are entities that request Keycloak to authenticate a user. More often, clients are applications that want to use Keycloak to secure themselves and provide a single sign-on solution. APISIX is equivalent to a client that is responsible for initiating authentication requests to Keycloak, so you need to create its corresponding client named `apisix-quickstart-client`. |
| |
| Click __Clients__ > __Create__ to open the __Add Client__ page: |
| |
| 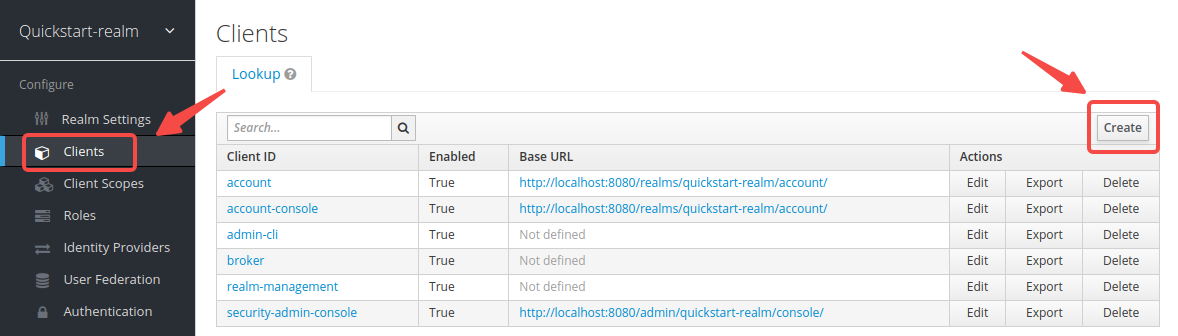 |
| |
| Enter __Client ID__ as `apisix-quickstart-client`, then select __Client Protocol__ as `openid-connect` and __Save__: |
| |
| 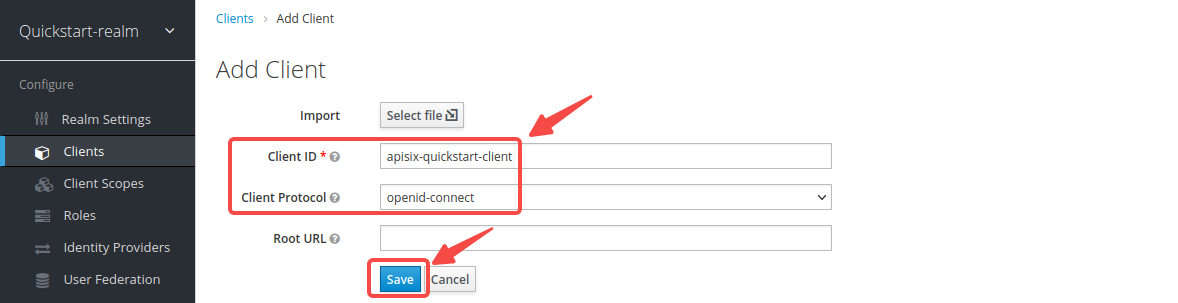 |
| |
| The client `apisix-quickstart-client` is created. After redirecting to the detailed page, select `confidential` as the __Access Type__: |
| |
| 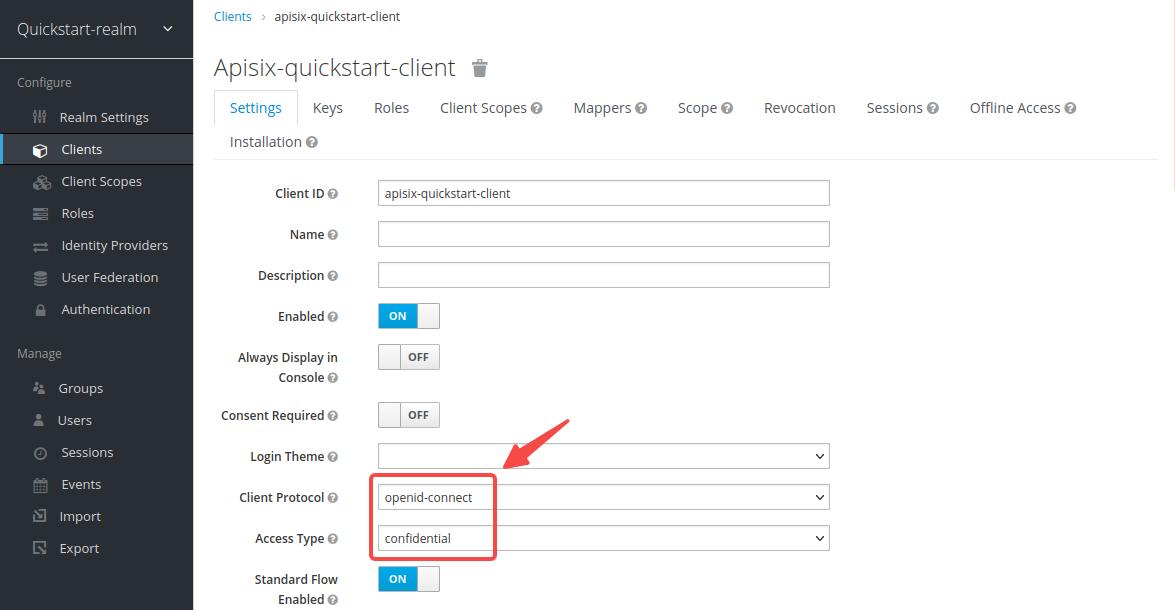 |
| |
| When the user login is successful during the SSO, Keycloak will carry the state and code to redirect the client to the addresses in __Valid Redirect URIs__. To simplify the operation, enter wildcard `*` to consider any URI valid: |
| |
|  |
| |
| If you are implementing the [authorization code grant with PKCE](#implement-authorization-code-grant), configure the PKCE challenge method in the client's advanced settings: |
| |
| <div style={{textAlign: 'center'}}> |
| <img src="https://static.api7.ai/uploads/2024/11/04/xvnCNb20_pkce-keycloak-revised.jpeg" alt="PKCE keycloak configuration" style={{width: '70%'}} /> |
| </div> |
| |
| If you are implementing [client credentials grant](#implement-client-credentials-grant), enable service accounts for the client: |
| |
|  |
| |
| Select __Save__ to apply custom configurations. |
| |
| ### Create a User |
| |
| Users in Keycloak are entities that are able to log into the system. They can have attributes associated with themselves, such as username, email, and address. |
| |
| If you are only implementing [client credentials grant](#implement-client-credentials-grant), you can [skip this section](#obtain-the-oidc-configuration). |
| |
| Click __Users__ > __Add user__ to open the __Add user__ page: |
| |
| 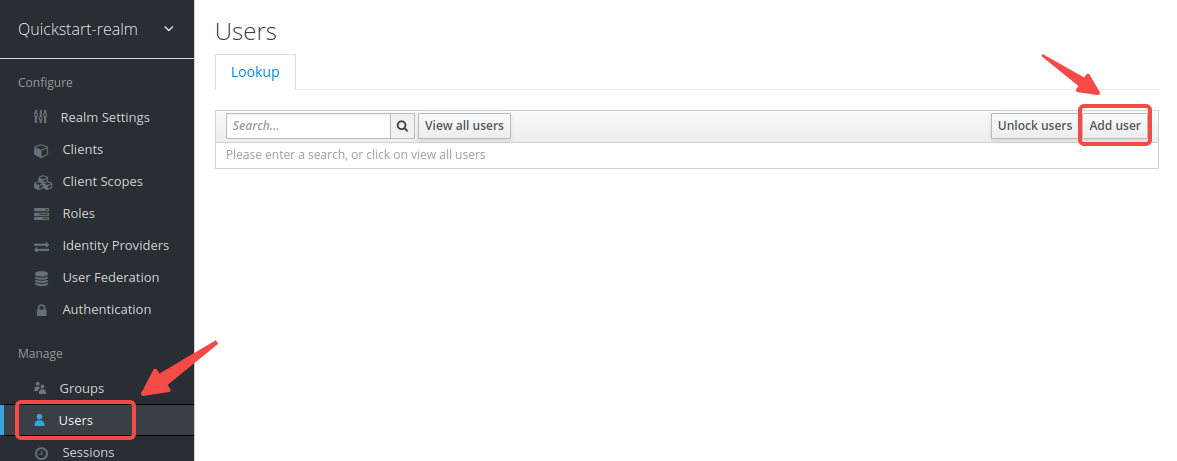 |
| |
| Enter the __Username__ as `quickstart-user` and select __Save__: |
| |
| 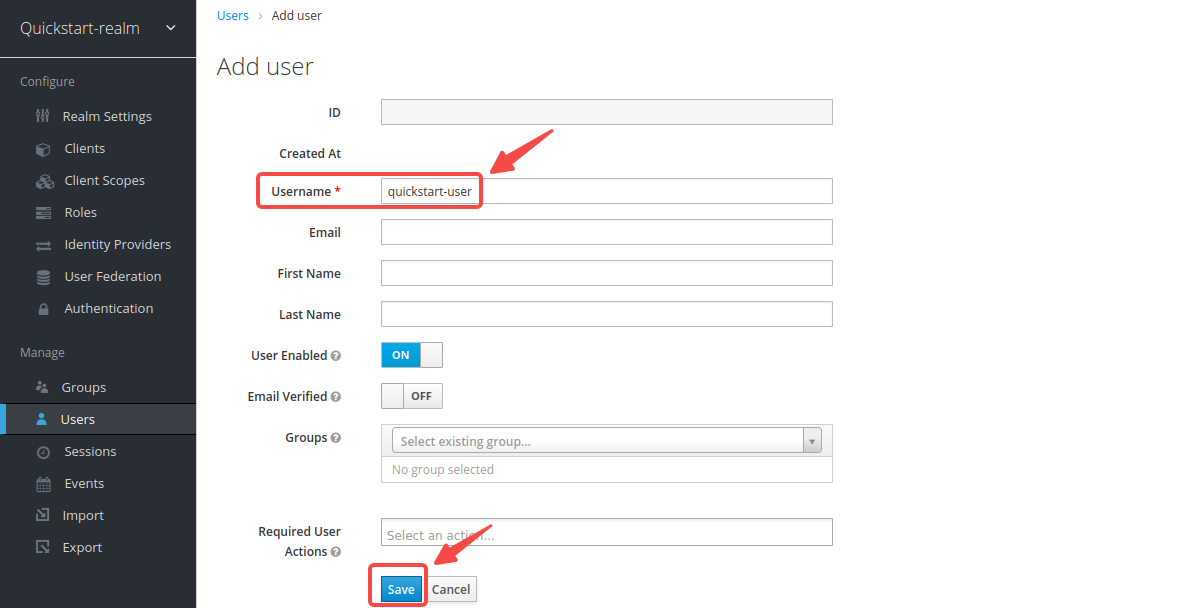 |
| |
| Click on __Credentials__, then set the __Password__ as `quickstart-user-pass`. Switch __Temporary__ to `OFF` to turn off the restriction, so that you need not to change password the first time you log in: |
| |
| 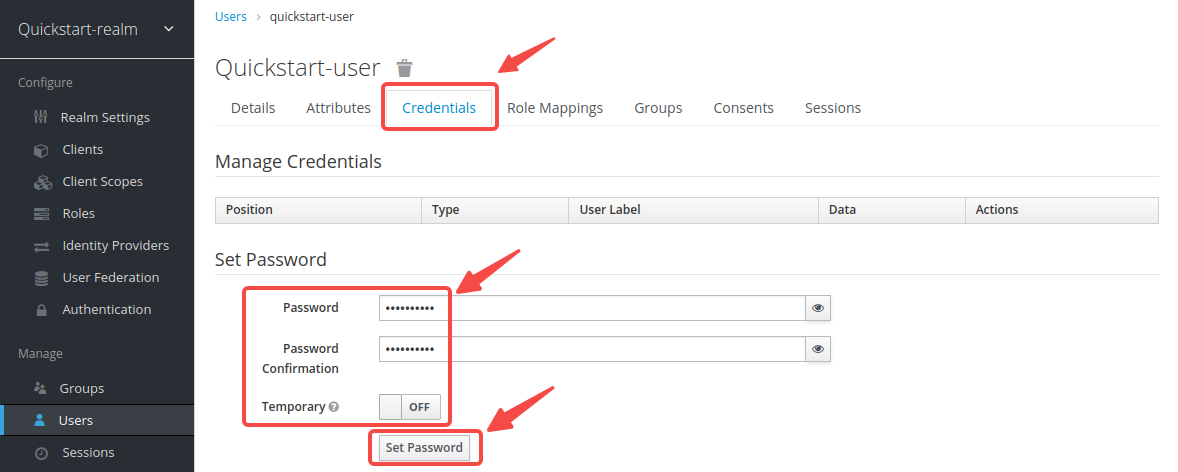 |
| |
| ## Obtain the OIDC Configuration |
| |
| In this section, you will obtain the key OIDC configuration from Keycloak and define them as shell variables. Steps after this section will use these variables to configure the OIDC by shell commands. |
| |
| :::info |
| |
| Open a separate terminal to follow the steps and define related shell variables. Then steps after this section could use the defined variables directly. |
| |
| ::: |
| |
| ### Get Discovery Endpoint |
| |
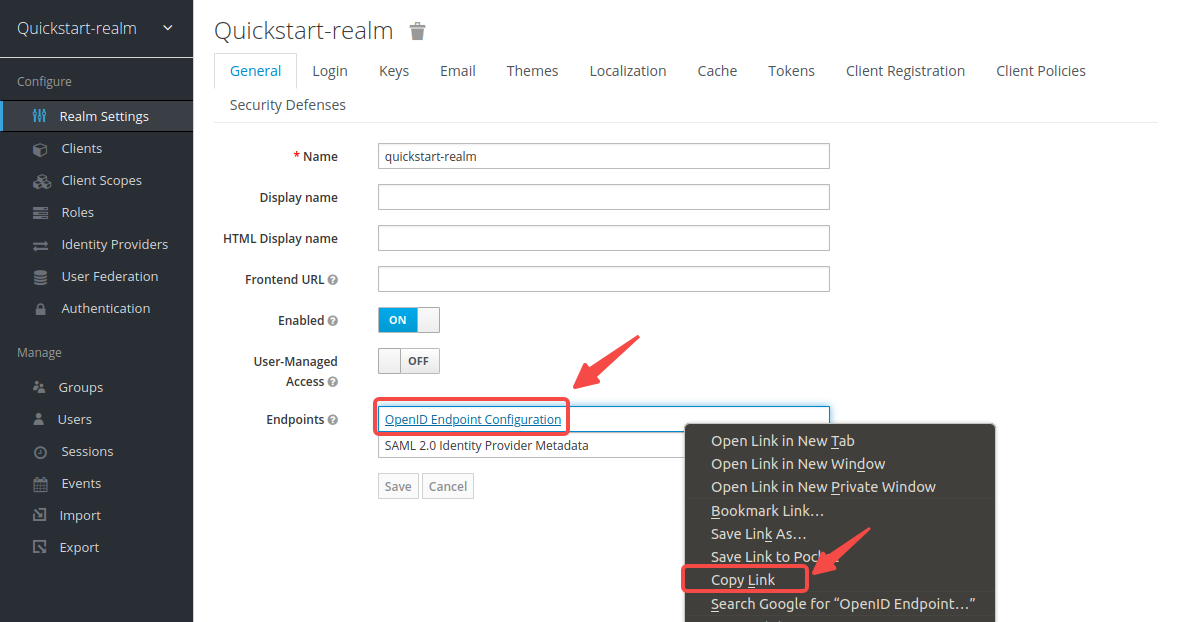
| Click __Realm Settings__, then right click __OpenID Endpoints Configuration__ and copy the link. |
| |
|  |
| |
| The link should be the same as the following: |
| |
| ```text |
| http://localhost:8080/realms/quickstart-realm/.well-known/openid-configuration |
| ``` |
| |
| Configuration values exposed with this endpoint are required during OIDC authentication. Update the address with your host IP and save to environment variables: |
| |
| ```shell |
| export KEYCLOAK_IP=192.168.42.145 # replace with your host IP |
| export OIDC_DISCOVERY=http://${KEYCLOAK_IP}:8080/realms/quickstart-realm/.well-known/openid-configuration |
| ``` |
| |
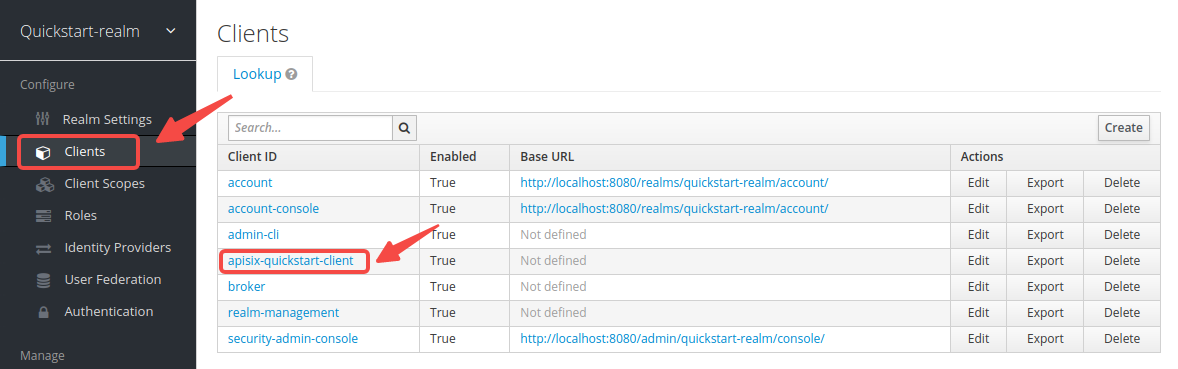
| ### Get Client ID and Secret |
| |
| Click on __Clients__ > `apisix-quickstart-client` > __Credentials__, and copy the client secret from __Secret__: |
| |
|  |
| |
|  |
| |
| Save the OIDC client ID and secret to environment variables: |
| |
| ```shell |
| export OIDC_CLIENT_ID=apisix-quickstart-client |
| export OIDC_CLIENT_SECRET=bSaIN3MV1YynmtXvU8lKkfeY0iwpr9cH # replace with your value |
| ``` |
| |
| ## Implement Authorization Code Grant |
| |
| The authorization code grant is used by web and mobile applications. The flow starts by authorization server displaying a login page in browser where users could key in their credentials. During the process, a short-lived authorization code is exchanged for an access token, which APISIX stores in browser session cookies and will be sent with every request visiting the upstream resource server. |
| |
| To implement authorization code grant, create a Route with `openid-connect` Plugin as such: |
| |
| ```shell |
| curl -i "http://127.0.0.1:9180/apisix/admin/routes" -X PUT -d ' |
| { |
| "id": "auth-with-oidc", |
| "uri":"/anything/*", |
| "plugins": { |
| "openid-connect": { |
| "bearer_only": false, |
| "session": { |
| "secret": "change_to_whatever_secret_you_want" |
| }, |
| "client_id": "'"$OIDC_CLIENT_ID"'", |
| "client_secret": "'"$OIDC_CLIENT_SECRET"'", |
| "discovery": "'"$OIDC_DISCOVERY"'", |
| "scope": "openid profile", |
| "redirect_uri": "http://localhost:9080/anything/callback" |
| } |
| }, |
| "upstream":{ |
| "type":"roundrobin", |
| "nodes":{ |
| "httpbin.org:80":1 |
| } |
| } |
| }' |
| ``` |
| |
| Alternatively, if you would like to implement authorization code grant with PKCE, create a Route with `openid-connect` Plugin as such: |
| |
| ```shell |
| curl -i "http://127.0.0.1:9180/apisix/admin/routes" -X PUT -d ' |
| { |
| "id": "auth-with-oidc", |
| "uri":"/anything/*", |
| "plugins": { |
| "openid-connect": { |
| "bearer_only": false, |
| "session": { |
| "secret": "change_to_whatever_secret_you_want" |
| }, |
| "use_pkce": true, |
| "client_id": "'"$OIDC_CLIENT_ID"'", |
| "client_secret": "'"$OIDC_CLIENT_SECRET"'", |
| "discovery": "'"$OIDC_DISCOVERY"'", |
| "scope": "openid profile", |
| "redirect_uri": "http://localhost:9080/anything/callback" |
| } |
| }, |
| "upstream":{ |
| "type":"roundrobin", |
| "nodes":{ |
| "httpbin.org:80":1 |
| } |
| } |
| }' |
| ``` |
| |
| ### Verify with Valid Credentials |
| |
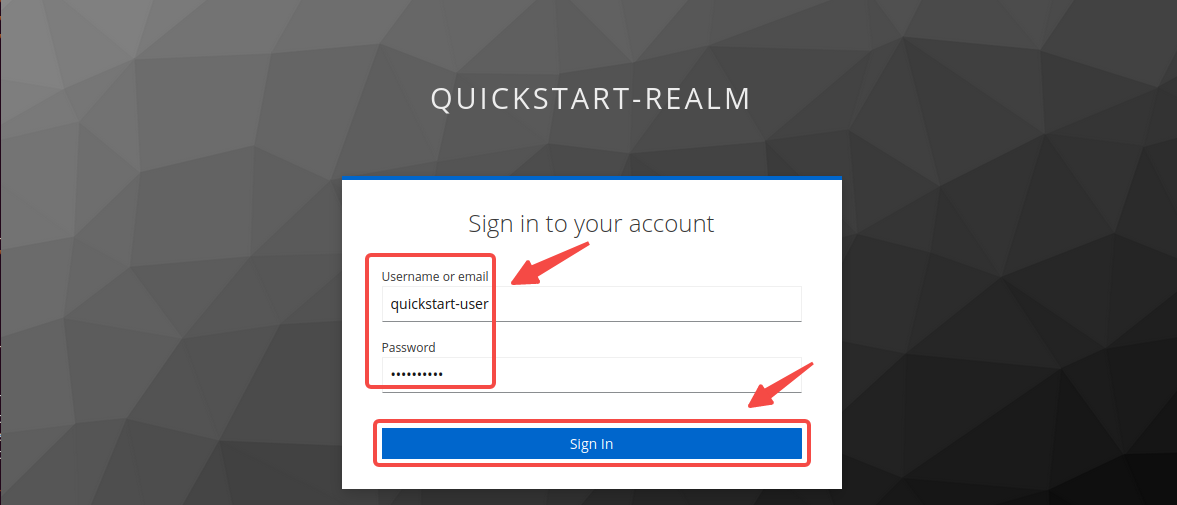
| Navigate to `http://127.0.0.1:9080/anything/test` in browser. The request will be redirected to a login page: |
| |
|  |
| |
| Log in with the correct username `quickstart-user` and password `quickstart-user-pass`. If successful, the request will be forwarded to `httpbin.org` and you should see a response similar to the following: |
| |
| ```json |
| { |
| "args": {}, |
| "data": "", |
| "files": {}, |
| "form": {}, |
| "headers": { |
| "Accept": "text/html..." |
| ... |
| }, |
| "json": null, |
| "method": "GET", |
| "origin": "127.0.0.1, 59.71.244.81", |
| "url": "http://127.0.0.1/anything/test" |
| } |
| ``` |
| |
| ### Verify with Invalid Credentials |
| |
| Sign in with the wrong credentials. You should see an authentication failure: |
| |
| 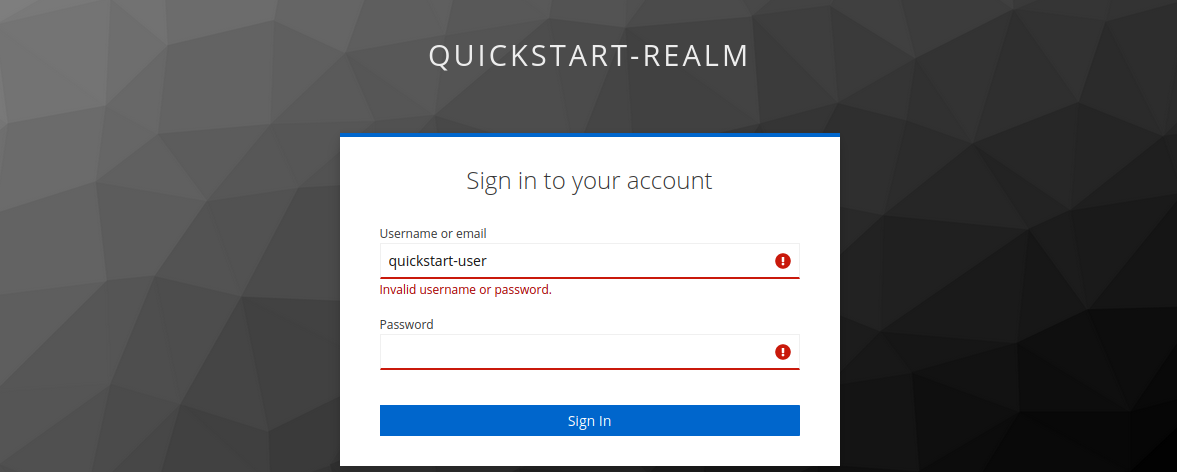 |
| |
| ## Implement Client Credentials Grant |
| |
| In client credentials grant, clients obtain access tokens without any users involved. It is typically used in machine-to-machine (M2M) communications. |
| |
| To implement client credentials grant, create a Route with `openid-connect` Plugin to use the JWKS endpoint of the identity provider to verify the token. The endpoint would be obtained from the discovery document. |
| |
| ```shell |
| curl -i "http://127.0.0.1:9180/apisix/admin/routes" -X PUT -d ' |
| { |
| "id": "auth-with-oidc", |
| "uri":"/anything/*", |
| "plugins": { |
| "openid-connect": { |
| "use_jwks": true, |
| "client_id": "'"$OIDC_CLIENT_ID"'", |
| "client_secret": "'"$OIDC_CLIENT_SECRET"'", |
| "discovery": "'"$OIDC_DISCOVERY"'", |
| "scope": "openid profile", |
| "redirect_uri": "http://localhost:9080/anything/callback" |
| } |
| }, |
| "upstream":{ |
| "type":"roundrobin", |
| "nodes":{ |
| "httpbin.org:80":1 |
| } |
| } |
| }' |
| ``` |
| |
| Alternatively, if you would like to use the introspection endpoint to verify the token, create the Route as such: |
| |
| ```shell |
| curl -i "http://127.0.0.1:9180/apisix/admin/routes" -X PUT -d ' |
| { |
| "id": "auth-with-oidc", |
| "uri":"/anything/*", |
| "plugins": { |
| "openid-connect": { |
| "bearer_only": true, |
| "client_id": "'"$OIDC_CLIENT_ID"'", |
| "client_secret": "'"$OIDC_CLIENT_SECRET"'", |
| "discovery": "'"$OIDC_DISCOVERY"'", |
| "scope": "openid profile", |
| "redirect_uri": "http://localhost:9080/anything/callback" |
| } |
| }, |
| "upstream":{ |
| "type":"roundrobin", |
| "nodes":{ |
| "httpbin.org:80":1 |
| } |
| } |
| }' |
| ``` |
| |
| The introspection endpoint will be obtained from the discovery document. |
| |
| ### Verify With Valid Access Token |
| |
| Obtain an access token for the Keycloak server at the [token endpoint](https://www.keycloak.org/docs/latest/securing_apps/#token-endpoint): |
| |
| ```shell |
| curl -i "http://$KEYCLOAK_IP:8080/realms/quickstart-realm/protocol/openid-connect/token" -X POST \ |
| -d 'grant_type=client_credentials' \ |
| -d 'client_id='$OIDC_CLIENT_ID'' \ |
| -d 'client_secret='$OIDC_CLIENT_SECRET'' |
| ``` |
| |
| The expected response is similar to the following: |
| |
| ```text |
| {"access_token":"eyJhbGciOiJSUzI1NiIsInR5cCIgOiAiSldUIiwia2lkIiA6ICJoT3ludlBPY2d6Y3VWWnYtTU42bXZKMUczb0dOX2d6MFo3WFl6S2FSa1NBIn0.eyJleHAiOjE3MDM4MjU1NjQsImlhdCI6MTcwMzgyNTI2NCwianRpIjoiMWQ4NWE4N2UtZDFhMC00NThmLThiMTItNGZiYWM2ODA5YmYwIiwiaXNzIjoiaHR0cDovLzE5Mi4xNjguMS44Mzo4MDgwL3JlYWxtcy9xdWlja3N0YXJ0LXJlYWxtIiwiYXVkIjoiYWNjb3VudCIsInN1YiI6IjE1OGUzOWFlLTk0YjAtNDI3Zi04ZGU3LTU3MTRhYWYwOGYzOSIsInR5cCI6IkJlYXJlciIsImF6cCI6ImFwaXNpeC1xdWlja3N0YXJ0LWNsaWVudCIsImFjciI6IjEiLCJyZWFsbV9hY2Nlc3MiOnsicm9sZXMiOlsiZGVmYXVsdC1yb2xlcy1xdWlja3N0YXJ0LXJlYWxtIiwib2ZmbGluZV9hY2Nlc3MiLCJ1bWFfYXV0aG9yaXphdGlvbiJdfSwicmVzb3VyY2VfYWNjZXNzIjp7ImFjY291bnQiOnsicm9sZXMiOlsibWFuYWdlLWFjY291bnQiLCJtYW5hZ2UtYWNjb3VudC1saW5rcyIsInZpZXctcHJvZmlsZSJdfX0sInNjb3BlIjoiZW1haWwgcHJvZmlsZSIsImVtYWlsX3ZlcmlmaWVkIjpmYWxzZSwiY2xpZW50SG9zdCI6IjE3Mi4xNy4wLjEiLCJjbGllbnRJZCI6ImFwaXNpeC1xdWlja3N0YXJ0LWNsaWVudCIsInByZWZlcnJlZF91c2VybmFtZSI6InNlcnZpY2UtYWNjb3VudC1hcGlzaXgtcXVpY2tzdGFydC1jbGllbnQiLCJjbGllbnRBZGRyZXNzIjoiMTcyLjE3LjAuMSJ9.TltzSXqrJuVID7aGrb35jn-oc07U_-jugSn-3jKz4A44LwtAsME_8b3qkmR4boMOIht_5pF6bnnp70MFAlg6JKu4_yIQDxF_GAHjnZXEO8OCKhtIKwXm2w-hnnJVIhIdGkIVkbPP0HfILuar_m0hpa53VpPBGYR-OS4pyh0KTUs8MB22xAEqyz9zjCm6SX9vXCqgeVkSpRW2E8NaGEbAdY25uY-ZC4dI_pON87Ey5e8GdD6HQLXQlGIOdCDi3N7k0HDoD9TZRv2bMRPfy4zVYm1ZlClIuF79A-ZBwr0c-XYuq7t6EY0gPGEXB-s0SaKlrIU5S9JBeVXRzYvqAih41g","expires_in":300,"refresh_expires_in":0,"token_type":"Bearer","not-before-policy":0,"scope":"email profile"} |
| ``` |
| |
| Save the access token to an environment variable: |
| |
| ```shell |
| # replace with your access token |
| export ACCESS_TOKEN="eyJhbGciOiJSUzI1NiIsInR5cCIgOiAiSldUIiwia2lkIiA6ICJoT3ludlBPY2d6Y3VWWnYtTU42bXZKMUczb0dOX2d6MFo3WFl6S2FSa1NBIn0.eyJleHAiOjE3MDM4MjU1NjQsImlhdCI6MTcwMzgyNTI2NCwianRpIjoiMWQ4NWE4N2UtZDFhMC00NThmLThiMTItNGZiYWM2ODA5YmYwIiwiaXNzIjoiaHR0cDovLzE5Mi4xNjguMS44Mzo4MDgwL3JlYWxtcy9xdWlja3N0YXJ0LXJlYWxtIiwiYXVkIjoiYWNjb3VudCIsInN1YiI6IjE1OGUzOWFlLTk0YjAtNDI3Zi04ZGU3LTU3MTRhYWYwOGYzOSIsInR5cCI6IkJlYXJlciIsImF6cCI6ImFwaXNpeC1xdWlja3N0YXJ0LWNsaWVudCIsImFjciI6IjEiLCJyZWFsbV9hY2Nlc3MiOnsicm9sZXMiOlsiZGVmYXVsdC1yb2xlcy1xdWlja3N0YXJ0LXJlYWxtIiwib2ZmbGluZV9hY2Nlc3MiLCJ1bWFfYXV0aG9yaXphdGlvbiJdfSwicmVzb3VyY2VfYWNjZXNzIjp7ImFjY291bnQiOnsicm9sZXMiOlsibWFuYWdlLWFjY291bnQiLCJtYW5hZ2UtYWNjb3VudC1saW5rcyIsInZpZXctcHJvZmlsZSJdfX0sInNjb3BlIjoiZW1haWwgcHJvZmlsZSIsImVtYWlsX3ZlcmlmaWVkIjpmYWxzZSwiY2xpZW50SG9zdCI6IjE3Mi4xNy4wLjEiLCJjbGllbnRJZCI6ImFwaXNpeC1xdWlja3N0YXJ0LWNsaWVudCIsInByZWZlcnJlZF91c2VybmFtZSI6InNlcnZpY2UtYWNjb3VudC1hcGlzaXgtcXVpY2tzdGFydC1jbGllbnQiLCJjbGllbnRBZGRyZXNzIjoiMTcyLjE3LjAuMSJ9.TltzSXqrJuVID7aGrb35jn-oc07U_-jugSn-3jKz4A44LwtAsME_8b3qkmR4boMOIht_5pF6bnnp70MFAlg6JKu4_yIQDxF_GAHjnZXEO8OCKhtIKwXm2w-hnnJVIhIdGkIVkbPP0HfILuar_m0hpa53VpPBGYR-OS4pyh0KTUs8MB22xAEqyz9zjCm6SX9vXCqgeVkSpRW2E8NaGEbAdY25uY-ZC4dI_pON87Ey5e8GdD6HQLXQlGIOdCDi3N7k0HDoD9TZRv2bMRPfy4zVYm1ZlClIuF79A-ZBwr0c-XYuq7t6EY0gPGEXB-s0SaKlrIU5S9JBeVXRzYvqAih41g" |
| ``` |
| |
| Send a request to the route with the valid access token: |
| |
| ```shell |
| curl -i "http://127.0.0.1:9080/anything/test" -H "Authorization: Bearer $ACCESS_TOKEN" |
| ``` |
| |
| An `HTTP/1.1 200 OK` response verifies that the request to the upstream resource was authorized. |
| |
| ### Verify With Invalid Access Token |
| |
| Send a request to the Route with invalid access token: |
| |
| ```shell |
| curl -i "http://127.0.0.1:9080/anything/test" -H "Authorization: Bearer invalid-access-token" |
| ``` |
| |
| An `HTTP/1.1 401 Unauthorized` response verifies that the OIDC Plugin rejects requests with invalid access token. |
| |
| ### Verify without Access Token |
| |
| Send a request to the Route without access token: |
| |
| ```shell |
| curl -i "http://127.0.0.1:9080/anything/test" |
| ``` |
| |
| An `HTTP/1.1 401 Unauthorized` response verifies that the OIDC Plugin rejects requests without access token. |
| |
| ## Implement Password Grant |
| |
| Password grant is a legacy approach to exchange user credentials for an access token. |
| |
| To implement password grant, create a Route with `openid-connect` Plugin to use the JWKS endpoint of the identity provider to verify the token. The endpoint would be obtained from the discovery document. |
| |
| ```shell |
| curl -i "http://127.0.0.1:9180/apisix/admin/routes" -X PUT -d ' |
| { |
| "id": "auth-with-oidc", |
| "uri":"/anything/*", |
| "plugins": { |
| "openid-connect": { |
| "use_jwks": true, |
| "client_id": "'"$OIDC_CLIENT_ID"'", |
| "client_secret": "'"$OIDC_CLIENT_SECRET"'", |
| "discovery": "'"$OIDC_DISCOVERY"'", |
| "scope": "openid profile", |
| "redirect_uri": "http://localhost:9080/anything/callback" |
| } |
| }, |
| "upstream":{ |
| "type":"roundrobin", |
| "nodes":{ |
| "httpbin.org:80":1 |
| } |
| } |
| }' |
| ``` |
| |
| ### Verify With Valid Access Token |
| |
| Obtain an access token for the Keycloak server at the [token endpoint](https://www.keycloak.org/docs/latest/securing_apps/#token-endpoint): |
| |
| ```shell |
| OIDC_USER=quickstart-user |
| OIDC_PASSWORD=quickstart-user-pass |
| curl -i "http://$KEYCLOAK_IP:8080/realms/quickstart-realm/protocol/openid-connect/token" -X POST \ |
| -d 'grant_type=password' \ |
| -d 'client_id='$OIDC_CLIENT_ID'' \ |
| -d 'client_secret='$OIDC_CLIENT_SECRET'' \ |
| -d 'username='$OIDC_USER'' \ |
| -d 'password='$OIDC_PASSWORD'' |
| ``` |
| |
| The expected response is similar to the following: |
| |
| ```text |
| {"access_token":"eyJhbGciOiJSUzI1NiIsInR5cCIgOiAiSldUIiwia2lkIiA6ICJ6U3FFaXN6VlpuYi1sRWMzZkp0UHNpU1ZZcGs4RGN3dXI1Mkx5V05aQTR3In0.eyJleHAiOjE2ODAxNjA5NjgsImlhdCI6MTY4MDE2MDY2OCwianRpIjoiMzQ5MTc4YjQtYmExZC00ZWZjLWFlYTUtZGY2MzJiMDJhNWY5IiwiaXNzIjoiaHR0cDovLzE5Mi4xNjguNDIuMTQ1OjgwODAvcmVhbG1zL3F1aWNrc3RhcnQtcmVhbG0iLCJhdWQiOiJhY2NvdW50Iiwic3ViIjoiMTg4MTVjM2EtNmQwNy00YTY2LWJjZjItYWQ5NjdmMmIwMTFmIiwidHlwIjoiQmVhcmVyIiwiYXpwIjoiYXBpc2l4LXF1aWNrc3RhcnQtY2xpZW50Iiwic2Vzc2lvbl9zdGF0ZSI6ImIxNmIyNjJlLTEwNTYtNDUxNS1hNDU1LWYyNWUwNzdjY2I3NiIsImFjciI6IjEiLCJyZWFsbV9hY2Nlc3MiOnsicm9sZXMiOlsiZGVmYXVsdC1yb2xlcy1xdWlja3N0YXJ0LXJlYWxtIiwib2ZmbGluZV9hY2Nlc3MiLCJ1bWFfYXV0aG9yaXphdGlvbiJdfSwicmVzb3VyY2VfYWNjZXNzIjp7ImFjY291bnQiOnsicm9sZXMiOlsibWFuYWdlLWFjY291bnQiLCJtYW5hZ2UtYWNjb3VudC1saW5rcyIsInZpZXctcHJvZmlsZSJdfX0sInNjb3BlIjoicHJvZmlsZSBlbWFpbCIsInNpZCI6ImIxNmIyNjJlLTEwNTYtNDUxNS1hNDU1LWYyNWUwNzdjY2I3NiIsImVtYWlsX3ZlcmlmaWVkIjpmYWxzZSwicHJlZmVycmVkX3VzZXJuYW1lIjoicXVpY2tzdGFydC11c2VyIn0.uD_7zfZv5182aLXu9-YBzBDK0nr2mE4FWb_4saTog2JTqFTPZZa99Gm8AIDJx2ZUcZ_ElkATqNUZ4OpWmL2Se5NecMw3slJReewjD6xgpZ3-WvQuTGpoHdW5wN9-Rjy8ungilrnAsnDA3tzctsxm2w6i9KISxvZrzn5Rbk-GN6fxH01VC5eekkPUQJcJgwuJiEiu70SjGnm21xDN4VGkNRC6jrURoclv3j6AeOqDDIV95kA_MTfBswDFMCr2PQlj5U0RTndZqgSoxwFklpjGV09Azp_jnU7L32_Sq-8coZd0nj5mSdbkJLJ8ZDQDV_PP3HjCP7EHdy4P6TyZ7oGvjw","expires_in":300,"refresh_expires_in":1800,"refresh_token":"eyJhbGciOiJIUzI1NiIsInR5cCIgOiAiSldUIiwia2lkIiA6ICI0YjFiNTQ3Yi0zZmZjLTQ5YzQtYjE2Ni03YjdhNzIxMjk1ODcifQ.eyJleHAiOjE2ODAxNjI0NjgsImlhdCI6MTY4MDE2MDY2OCwianRpIjoiYzRjNjNlMTEtZTdlZS00ZmEzLWJlNGYtNDMyZWQ4ZmY5OTQwIiwiaXNzIjoiaHR0cDovLzE5Mi4xNjguNDIuMTQ1OjgwODAvcmVhbG1zL3F1aWNrc3RhcnQtcmVhbG0iLCJhdWQiOiJodHRwOi8vMTkyLjE2OC40Mi4xNDU6ODA4MC9yZWFsbXMvcXVpY2tzdGFydC1yZWFsbSIsInN1YiI6IjE4ODE1YzNhLTZkMDctNGE2Ni1iY2YyLWFkOTY3ZjJiMDExZiIsInR5cCI6IlJlZnJlc2giLCJhenAiOiJhcGlzaXgtcXVpY2tzdGFydC1jbGllbnQiLCJzZXNzaW9uX3N0YXRlIjoiYjE2YjI2MmUtMTA1Ni00NTE1LWE0NTUtZjI1ZTA3N2NjYjc2Iiwic2NvcGUiOiJwcm9maWxlIGVtYWlsIiwic2lkIjoiYjE2YjI2MmUtMTA1Ni00NTE1LWE0NTUtZjI1ZTA3N2NjYjc2In0.8xYP4bhDg1U9B5cTaEVD7B4oxNp8wwAYEynUne_Jm78","token_type":"Bearer","not-before-policy":0,"session_state":"b16b262e-1056-4515-a455-f25e077ccb76","scope":"profile email"} |
| ``` |
| |
| Save the access token and refresh token to environment variables. The refresh token will be used in the [refresh token step](#refresh-token). |
| |
| ```shell |
| # replace with your access token |
| export ACCESS_TOKEN="eyJhbGciOiJSUzI1NiIsInR5cCIgOiAiSldUIiwia2lkIiA6ICJ6U3FFaXN6VlpuYi1sRWMzZkp0UHNpU1ZZcGs4RGN3dXI1Mkx5V05aQTR3In0.eyJleHAiOjE2ODAxNjA5NjgsImlhdCI6MTY4MDE2MDY2OCwianRpIjoiMzQ5MTc4YjQtYmExZC00ZWZjLWFlYTUtZGY2MzJiMDJhNWY5IiwiaXNzIjoiaHR0cDovLzE5Mi4xNjguNDIuMTQ1OjgwODAvcmVhbG1zL3F1aWNrc3RhcnQtcmVhbG0iLCJhdWQiOiJhY2NvdW50Iiwic3ViIjoiMTg4MTVjM2EtNmQwNy00YTY2LWJjZjItYWQ5NjdmMmIwMTFmIiwidHlwIjoiQmVhcmVyIiwiYXpwIjoiYXBpc2l4LXF1aWNrc3RhcnQtY2xpZW50Iiwic2Vzc2lvbl9zdGF0ZSI6ImIxNmIyNjJlLTEwNTYtNDUxNS1hNDU1LWYyNWUwNzdjY2I3NiIsImFjciI6IjEiLCJyZWFsbV9hY2Nlc3MiOnsicm9sZXMiOlsiZGVmYXVsdC1yb2xlcy1xdWlja3N0YXJ0LXJlYWxtIiwib2ZmbGluZV9hY2Nlc3MiLCJ1bWFfYXV0aG9yaXphdGlvbiJdfSwicmVzb3VyY2VfYWNjZXNzIjp7ImFjY291bnQiOnsicm9sZXMiOlsibWFuYWdlLWFjY291bnQiLCJtYW5hZ2UtYWNjb3VudC1saW5rcyIsInZpZXctcHJvZmlsZSJdfX0sInNjb3BlIjoicHJvZmlsZSBlbWFpbCIsInNpZCI6ImIxNmIyNjJlLTEwNTYtNDUxNS1hNDU1LWYyNWUwNzdjY2I3NiIsImVtYWlsX3ZlcmlmaWVkIjpmYWxzZSwicHJlZmVycmVkX3VzZXJuYW1lIjoicXVpY2tzdGFydC11c2VyIn0.uD_7zfZv5182aLXu9-YBzBDK0nr2mE4FWb_4saTog2JTqFTPZZa99Gm8AIDJx2ZUcZ_ElkATqNUZ4OpWmL2Se5NecMw3slJReewjD6xgpZ3-WvQuTGpoHdW5wN9-Rjy8ungilrnAsnDA3tzctsxm2w6i9KISxvZrzn5Rbk-GN6fxH01VC5eekkPUQJcJgwuJiEiu70SjGnm21xDN4VGkNRC6jrURoclv3j6AeOqDDIV95kA_MTfBswDFMCr2PQlj5U0RTndZqgSoxwFklpjGV09Azp_jnU7L32_Sq-8coZd0nj5mSdbkJLJ8ZDQDV_PP3HjCP7EHdy4P6TyZ7oGvjw" |
| export REFRESH_TOKEN="eyJhbGciOiJIUzI1NiIsInR5cCIgOiAiSldUIiwia2lkIiA6ICI0YjFiNTQ3Yi0zZmZjLTQ5YzQtYjE2Ni03YjdhNzIxMjk1ODcifQ.eyJleHAiOjE2ODAxNjI0NjgsImlhdCI6MTY4MDE2MDY2OCwianRpIjoiYzRjNjNlMTEtZTdlZS00ZmEzLWJlNGYtNDMyZWQ4ZmY5OTQwIiwiaXNzIjoiaHR0cDovLzE5Mi4xNjguNDIuMTQ1OjgwODAvcmVhbG1zL3F1aWNrc3RhcnQtcmVhbG0iLCJhdWQiOiJodHRwOi8vMTkyLjE2OC40Mi4xNDU6ODA4MC9yZWFsbXMvcXVpY2tzdGFydC1yZWFsbSIsInN1YiI6IjE4ODE1YzNhLTZkMDctNGE2Ni1iY2YyLWFkOTY3ZjJiMDExZiIsInR5cCI6IlJlZnJlc2giLCJhenAiOiJhcGlzaXgtcXVpY2tzdGFydC1jbGllbnQiLCJzZXNzaW9uX3N0YXRlIjoiYjE2YjI2MmUtMTA1Ni00NTE1LWE0NTUtZjI1ZTA3N2NjYjc2Iiwic2NvcGUiOiJwcm9maWxlIGVtYWlsIiwic2lkIjoiYjE2YjI2MmUtMTA1Ni00NTE1LWE0NTUtZjI1ZTA3N2NjYjc2In0.8xYP4bhDg1U9B5cTaEVD7B4oxNp8wwAYEynUne_Jm78" |
| ``` |
| |
| Send a request to the route with the valid access token: |
| |
| ```shell |
| curl -i "http://127.0.0.1:9080/anything/test" -H "Authorization: Bearer $ACCESS_TOKEN" |
| ``` |
| |
| An `HTTP/1.1 200 OK` response verifies that the request to the upstream resource was authorized. |
| |
| ### Verify With Invalid Access Token |
| |
| Send a request to the Route with invalid access token: |
| |
| ```shell |
| curl -i "http://127.0.0.1:9080/anything/test" -H "Authorization: Bearer invalid-access-token" |
| ``` |
| |
| An `HTTP/1.1 401 Unauthorized` response verifies that the OIDC Plugin rejects requests with invalid access token. |
| |
| ### Verify without Access Token |
| |
| Send a request to the Route without access token: |
| |
| ```shell |
| curl -i "http://127.0.0.1:9080/anything/test" |
| ``` |
| |
| An `HTTP/1.1 401 Unauthorized` response verifies that the OIDC Plugin rejects requests without access token. |
| |
| ### Refresh Token |
| |
| To refresh the access token, send a request to the Keycloak token endpoint as such: |
| |
| ```shell |
| curl -i "http://$KEYCLOAK_IP:8080/realms/quickstart-realm/protocol/openid-connect/token" -X POST \ |
| -d 'grant_type=refresh_token' \ |
| -d 'client_id='$OIDC_CLIENT_ID'' \ |
| -d 'client_secret='$OIDC_CLIENT_SECRET'' \ |
| -d 'refresh_token='$REFRESH_TOKEN'' |
| ``` |
| |
| You should see a response similar to the following, with the new access token and refresh token, which you can use for subsequent requests and token refreshes: |
| |
| ```text |
| {"access_token":"eyJhbGciOiJSUzI1NiIsInR5cCIgOiAiSldUIiwia2lkIiA6ICJTdnVwLXlPMHhDdTJBVi1za2pCZ0h6SHZNaG1mcDVDQWc0NHpYb2QxVTlNIn0.eyJleHAiOjE3MzAyNzQ3NDUsImlhdCI6MTczMDI3NDQ0NSwianRpIjoiMjk2Mjk5MWUtM2ExOC00YWFiLWE0NzAtODgxNWEzNjZjZmM4IiwiaXNzIjoiaHR0cDovLzE5Mi4xNjguMTUyLjU6ODA4MC9yZWFsbXMvcXVpY2tzdGFydC1yZWFsbSIsImF1ZCI6ImFjY291bnQiLCJzdWIiOiI2ZWI0ZTg0Yy00NmJmLTRkYzUtOTNkMC01YWM5YzE5MWU0OTciLCJ0eXAiOiJCZWFyZXIiLCJhenAiOiJhcGlzaXgtcXVpY2tzdGFydC1jbGllbnQiLCJzZXNzaW9uX3N0YXRlIjoiNTU2ZTQyYjktMjE2Yi00NTEyLWE5ZjAtNzE3ZTAyYTQ4MjZhIiwiYWNyIjoiMSIsInJlYWxtX2FjY2VzcyI6eyJyb2xlcyI6WyJkZWZhdWx0LXJvbGVzLXF1aWNrc3RhcnQtcmVhbG0iLCJvZmZsaW5lX2FjY2VzcyIsInVtYV9hdXRob3JpemF0aW9uIl19LCJyZXNvdXJjZV9hY2Nlc3MiOnsiYWNjb3VudCI6eyJyb2xlcyI6WyJtYW5hZ2UtYWNjb3VudCIsIm1hbmFnZS1hY2NvdW50LWxpbmtzIiwidmlldy1wcm9maWxlIl19fSwic2NvcGUiOiJlbWFpbCBwcm9maWxlIiwic2lkIjoiNTU2ZTQyYjktMjE2Yi00NTEyLWE5ZjAtNzE3ZTAyYTQ4MjZhIiwiZW1haWxfdmVyaWZpZWQiOmZhbHNlLCJwcmVmZXJyZWRfdXNlcm5hbWUiOiJxdWlja3N0YXJ0LXVzZXIifQ.KLqn1LQdazoPBqLLR856C35XpqbMO9I7WFt3KrDxZF1N8vwv4AvZYWI_2rsbdjCakh9JmPgyYRgEGufYLiDBsqy9CrMVejAIJPYsJIonIXBCp5Ysu92ODJuqtTKuuJ6K7dam7fisBFfCBbVvGspnZ3p0caedpOaF_kSd-F8ARHKVsmkuX3_ucDrP3UctjEXHezefTY4YHjNMB9wuMDPXX2vXt2BsOasnznsIHHHX-ZH8JY6eEfWPtfx0qAED6lVZICT6Rqj_j5-Cf9ogzFtLyy_XvtG9BbHME2B8AXYpxdzqxOxmVVbZdrB8elfmFjs1R3vUn2r3xA9hO_znZo_IoQ","expires_in":300,"refresh_expires_in":1800,"refresh_token":"eyJhbGciOiJIUzI1NiIsInR5cCIgOiAiSldUIiwia2lkIiA6ICIwYWYwZTAwYy0xMThjLTRkNDktYmIwMS1iMDIwNDE3MmFjMzIifQ.eyJleHAiOjE3MzAyNzYyNDUsImlhdCI6MTczMDI3NDQ0NSwianRpIjoiZGQyZTJmYTktN2Y3Zi00MjM5LWEwODAtNWQyZDFiZTdjNzk4IiwiaXNzIjoiaHR0cDovLzE5Mi4xNjguMTUyLjU6ODA4MC9yZWFsbXMvcXVpY2tzdGFydC1yZWFsbSIsImF1ZCI6Imh0dHA6Ly8xOTIuMTY4LjE1Mi41OjgwODAvcmVhbG1zL3F1aWNrc3RhcnQtcmVhbG0iLCJzdWIiOiI2ZWI0ZTg0Yy00NmJmLTRkYzUtOTNkMC01YWM5YzE5MWU0OTciLCJ0eXAiOiJSZWZyZXNoIiwiYXpwIjoiYXBpc2l4LXF1aWNrc3RhcnQtY2xpZW50Iiwic2Vzc2lvbl9zdGF0ZSI6IjU1NmU0MmI5LTIxNmItNDUxMi1hOWYwLTcxN2UwMmE0ODI2YSIsInNjb3BlIjoiZW1haWwgcHJvZmlsZSIsInNpZCI6IjU1NmU0MmI5LTIxNmItNDUxMi1hOWYwLTcxN2UwMmE0ODI2YSJ9.Uad4BVuojHfyxqedFT5BHliWjIqVDbjM-Xeme0G2AAg","token_type":"Bearer","not-before-policy":0,"session_state":"556e42b9-216b-4512-a9f0-717e02a4826a","scope":"email profile"} |
| ``` |