This is a list of tasks/activities that are useful or necessary to know while working on the Kogito operator. This document is written in an order that is recommended to be worked through chronologically as a new Kogito operator developer.
To run the operator, you will need to have a Kubernetes cluster to work with. We recommend using CRC or minikube to run a local cluster to develop the operator with.
CRC (CodeReady Containers) allows you to have a locally running OpenShift container on your machine. This article gives you a good overview of the product as well where to download it and ensure that it works. You will need to create a Red Hat account to download CRC. It should be noted that CRC can be a very demanding application and require a lot of resources to run smoothly. The official documentation states their hardware requirements as such:
From our developers' experience, we would recommend having more memory if possible (16+ GB) so that you have extra memory to run your other development applications (browser, IDE, builds, etc.).
To get the command to login as an admin, you can use crc console --credentials.
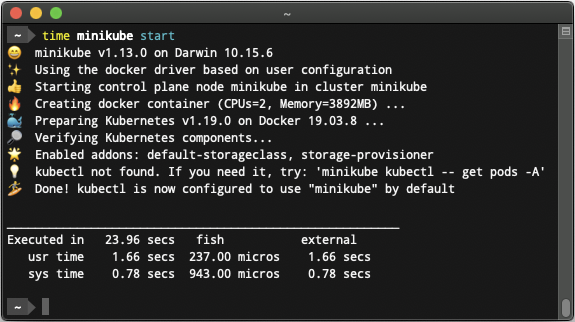
minikube provides an alternative to CRC if you do not have a device capable of running CRC. The “Getting Started” guide for minikube suggests the following system requirements:
minikube can be deployed as a VM or container. We suggest deploying it as a container for a faster startup time (<1m for container vs. >2m for VM). To do so, Docker must be installed. Once you have done so, minikube can be deployed as a container with minikube start --driver=docker.
To deploy using a VM, KVM2 is the recommended virtualization software for minikube. Once installed, minikube can be deployed as a VM with minikube start --driver=kvm2.
To set your default minikube driver, you can use minikube config set driver [docker|kvm2] such that for future launches, minikube start will suffice and use your preferred driver.
You will also need to install kubectl.
The operator requires some dependencies in order to run. The following dependencies are copied from the operator's README. Please ensure that they are up-to-date and still match. Following are the specific installation commands/links for Fedora:
Go, Golint, Python 3.x, CEKit:
sudo dnf install go python3 python3-pip cekit
go install golang.org/x/lint/golint@latest
On other Linux distributions, it is advised to install CEKit using venv.
OPERATOR_SDK_DL_URL to v1.21.0:export OPERATOR_SDK_DL_URL=https://github.com/operator-framework/operator-sdk/releases/tag/v1.21.0
To test that your changes to the operator works, you will usually want to deploy a Kogito application to Kubernetes. To do so, you will need to compile a Kogito example, and there are some dependencies to do so. The following dependencies are copied from the process-quarkus-example's README. Please ensure that they are up-to-date and still match. Following are the specific installation commands/links for Fedora:
sudo dnf install mavenJAVA_HOME/GRAALVM_HOME environment variablegu install native-image sudo dnf install gcc glibc-devel zlib-devel libstdc++-static
To test that your changes to the operator work, you will want to be able to run your modified operator locally. To do this, you will need to apply some CRD‘s/YAML’s.
First, start your local Kubernetes cluster and create a new namespace.
CRC:
crc start
crc console --credentials # run the admin login command
oc new-project kogito # create and switch to "kogito" namespace
minikube:
minikube start --driver=docker
kubectl create namespace kogito
# set all future kubectl commands in the minikube cluster to apply to the "kogito" namespace
kubectl config set-context --current --namespace=kogito
After this, you can run these commands from the base directory of your cloned operator repository:
make install
DEBUG=true make run
In future runs, only DEBUG=true make run needs to be run. But if no changes were made to the api/ folder, DEBUG=true go run main.go can be run for a faster startup time.
To test that your changes to the operator works, you will usually want to deploy a Kogito application to Kubernetes. To do so, you will need to first compile a Kogito example.
You can compile Quarkus Kogito applications into either a JAR file or a native executable. The native executable packages all the Java classes and its dependencies into the executable and allows for a quicker startup and lower memory usage in exchange for a longer build time. You can read more about native images in GraalVM's docs. Spring Boot Kogito applications can only be compiled into a JAR.
Instructions to build specific examples can be found in the README for each example. Generally speaking, JAR's are compiled with mvn clean package -DskipTests=true and native executables are compiled with mvn clean package -Pnative -DskipTests=true (GraalVM must be installed with native image compilation). To build with additional profile options (e.g. persistence or events), you can separate the profiles with commas: mvn clean package -Pnative,persistence,events -DskipTests=true.
Note: The Kogito operator must be running in the current namespace in order for the examples to be deployed onto Kubernetes. See the section Running Operator Locally for more information on how to do this.
Note: Deploying via CLI only works if you are running CRC.
You can build and install the Kogito CLI by running make install-cli in the base directory of your cloned operator repository. This will compile the CLI binary to $GOPATH/bin or $HOME/go/bin if the GOPATH environment variable is not set. To ensure that you can run the binary, add $GOPATH/bin/$HOME/go/bin to your PATH environment variable.
To deploy, ensure that you have CRC installed/started (crc start) and are logged in (get your login command with crc console --credentials). You can create and switch to a new namespace with oc new-project [namespace name].
With the Kogito CLI, there are many ways to deploy an application. You can see all the various deployment options using kogito deploy-service -h:
deploy-service will create a new Kogito service in the Project context.
	Providing a directory containing a pom.xml file in root will upload the whole directory for s2i build on the cluster.
	Providing a dmn/drl/bpmn/bpmn2 file or a directory containing one or more of those files as [SOURCE] will create a s2i build on the cluster.
	Providing a target directory (from mvn package) as [SOURCE] will directly upload the application binaries.

Usage:
  kogito deploy-service NAME [SOURCE] [flags]
You can categorize deployments into S2I (source-to-image) or binary. Each will be covered each now.
This is the type of deployment you will most likely be using most often if you are deploying from the CLI for development purposes. Binary deployments allow you to reuse the binary (JAR or native executable) you have already compiled locally.
To deploy a binary build, you must first be in the example folder where you compiled the binary. In the example folder, there should be a target/ folder that contains your JAR or native executable. To deploy the binary, you can simply run kogito deploy-service [app name] target.
It is unlikely that you will be using S2I builds frequently for operator development as it takes longer to build on CRC, and it will have to build each time you want to deploy. Nonetheless, it is still good to know how to deploy this way.
Deploying Directory
This corresponds to Providing a directory containing a pom.xml file in root will upload the whole directory for s2i build on the cluster.
Examples:
# deploying local folder
kogito deploy-service process-quarkus-example kogito-examples/process-quarkus-example
# deploying example from web
kogito deploy-service process-quarkus-example https://github.com/kiegroup/kogito-examples --context-dir process-quarkus-example
Deploying Single File
This corresponds to Providing a dmn/drl/bpmn/bpmn2 file or a directory containing one or more of those files as [SOURCE] will create a s2i build on the cluster.
Examples:
# deploying local BPMN2 files
kogito deploy-service process-quarkus-example kogito-examples/process-quarkus-example/src/main/resources/org/kie/kogito/examples
# deploying BPMN2 file from web
kogito deploy-service process-quarkus-example https://github.com/kiegroup/kogito-examples/process-quarkus-example/src/main/resources/org/kie/kogito/examples/orderItems.bpmn2
While deploying via CLI is somewhat convenient, deploying via image/YAML is the recommended method of deployment and the only available method if you are using minikube.
The first step to deploying this way is building the image with Docker. The instructions to do this can be found in the examples/ folder of the operator in the quarkus-jvm.Dockerfile and springboot.Dockerfile depending on the runtime of the application you're trying to build. You will need to setup a Quay account (or any other image registry) and login to it on Docker using docker login quay.io.
Once your built image is pushed to Quay, you can now deploy the application onto Kubernetes.
By default, new images pushed to Quay are setup as a prviate repository. You must go onto Quay and change the settings for the image to be public.
The YAML to deploy the application varies depending on the specific requirements of it. In all cases, you deploy the YAML using the command oc apply -f [YAML file name] for CRC or kubectl apply -f [YAML file name] for minikube.
In the simplest case, no KogitoInfra or KogitoSupportingService are required. For example, process-quarkus-example without persistence/events enabled. The YAML for this case can be found in examples/process-quarkus-example-runtime.yaml in the operator:
apiVersion: app.kiegroup.org/v1beta1
kind: KogitoRuntime
metadata:
  name: process-quarkus-example
spec:
  replicas: 1
  image: quay.io/[Quay username]/process-quarkus-example
KogitoInfraAn example of deploying with a KogitoInfra would deploying the process-quarkus-example with persistence enabled. The YAML for this case can be found in examples/process-quarkus-example-persistence-nobuild.yaml in the operator:
# Infinispan operator should be pre-installed in namespace
# And have installed an Infinispan server named "kogito-infinispan" in the same namespace of the Kogito resources
# Follow these instructions to setup the Infinispan server:
# https://infinispan.org/docs/infinispan-operator/main/operator.html
apiVersion: app.kiegroup.org/v1beta1
kind: KogitoInfra
metadata:
  name: kogito-infinispan-infra
spec:
  resource:
    apiVersion: infinispan.org/v1
    kind: Infinispan
    name: kogito-infinispan
---
apiVersion: app.kiegroup.org/v1beta1
kind: KogitoRuntime
metadata:
  name: example-quarkus
spec:
  # see the quarkus-jvm.Dockerfile in this directory to know how to build your image locally
  image: quay.io/[Quay username]/process-quarkus-example:latest
  infra:
    - kogito-infinispan-infra
Ensure that the Infinispan operator is installed in the namespace as the comments in the YAML mention, and the image is built with the -Ppersistence flag. The comments also mention that an Infinispan server is required and link to these instructions to do so. An example YAML you could do this with is:
apiVersion: infinispan.org/v1
kind: Infinispan
metadata:
  name: kogito-infinispan
spec:
  replicas: 1
Once your application has been deployed to Kubernetes, you will often want to check whether it is working properly by sending a request to it via an endpoint. To do so, it must be exposed.
In CRC, a route will automatically be created for the service so that the application is automatically exposed. You can find the URL for all your applications using oc get routes where the URL's will be listed under the HOST/PORT column.
For minikube, one way to expose the service is with a NodePort. You can do so by using the following commands:
# get the name of the deployment
kubectl get deployment
# expose deployment
kubectl expose deployment [deployment name] --type=NodePort --name=[deployment name]-np
# open URL in default browser
minikube service [deployment name]-np -n kogito
Note that the Kogito application may not have an HTML page to open at the URL, but the command will still output the URL which you can then use to test endpoints.
$LOCAL_KOGITO_SERVICE_URLCertain parts of the operator will need to query a Kogito application‘s URL, and so the operator needs to retrieve this URL somehow. For end users that are running the Kogito operator inside the cluster, the operator can take advantage of Kubernetes’ DNS and use URL's that are internal to the cluster.
However for developers running the Kogito operator locally, the operator will not be able to access the internal URL's. Thus when running the operator locally, the LOCAL_KOGITO_SERVICE_URL environment variable must be set after exposing the Kogito application. To do this, you should stop the locally-running operator, run the following command and then restart the operator:
export LOCAL_KOGITO_SERVICE_URL=[exposed Kogito application URL]
The operator repository is composed of many folders. This section will cover the general purpose of each:
api/ - Definition for custom Kogito resources/types.bundle/ - Required by OLM. Contains the metadata, manifests, and current CRD version.cmd/ - Code for Kogito CLI.config/ - Files for Kustomize.controllers/ - Code for operator's controllers (a controller watches a specific resource type).core/ - Bulk of operator's code.docs/ - Docs for Kogito developers.examples/ - Example YAML files for deployment onto Kubernetes.hack/ - Various shell scripts for make.internal/ - Internal Go routines not meant to be exposed or imported by other apps.meta/ - Contains scheme and type registrations used by Kubernetes client.modules/ - Modules used to build the operator image using CEKit.profiling/ - Files used to profile the operator.test/ - Code for BDD tests.version/ - Code for operator version.Once you have made changes to the operator, you will want to test if they work. One way to ensure that the operator is running the changes you made is to add a custom log/debug message. I will now walk you through adding one and parsing the logs for it.
The operator uses a Logger object to output log messages. Various Kogito objects will each have their own Logger property/object. To output a log message in the file that you are working on, search for the word Log to see if there is another function that uses it that you can copy.
In this section, we will just add a simple log message to the KogitoRuntime reconcile loop. In the Reconcile() function of controllers/kogitoruntime_controller.go, simply add log.Debug("test debug log") anywhere in the function after the log object is defined.
We will now run the operator to see if we can see our custom log message. See the sections Running Operator Locally, Building Examples and Deploying Examples to Kubernetes for running the operator and deploying a Kogito application.
If all was successful, you should see something like the following in your operator log:
[time] DEBUG kogitoruntime_controllers.DEBUG test debug log {"name": "[app name]", "namespace": "[namespace]"}
If you have a terminal with scrollback and a find function, you can search for your log message that way. Else, you can also run your operator with DEBUG=true make run 2>&1 | tee operator.log. tee outputs the operator log to both your terminal and operator.log where you can then parse through the logs in operator.log.
At times, you will want to step through the code to figure out a bug or ensure that something is working. To do this, you will need a Go debugger. It is recommended that you use Delve. Ensure that your GOPATH environment variable is set (see the section about installing the Kogito CLI).
You can find instructions for setting up Delve for the following IDE's:
You can also debug from the command line using dlv debug main.go.
The Kogito project uses Jira to track and manage its various bugs/issues/feature requests. You can find unresolved operator-specific tickets here. You will need to create a Red Hat account (you should have one from downloading CRC) to access all the features of the Jira board.
You can also bring up concerns/talk to Kogito developers about tasks on the Kogito Zulip community chat.
Once you have completed a Jira ticket and are ready to submit it, make sure to run make before-pr to ensure your code is ready to submit. You should also add an entry to the release notes with your Jira description. Be sure to consult the README and PR checklist for other PR requirements.